Dev:Ref/Release Notes/2.44
These are unsorted release notes collected from the www.blender.org pages. Added to have a more complete collection of Release Notes within the Blender Wiki space.
If the www.blender.org page changes then this page will need to be updated.
Blender 2.44
Blender 2.44 was intended to be an upgrade release, mainly for plenty of bug fixes, but the developers took the effort adding at least a few interesting new features.
This version now is fully 64 bits compatible, new modifers were added, a couple of composite nodes were added, and a revamp of the old mesh primitives was done. But most relevant to mention is Blender 2.44's new long-awaited but unexpected feature: subsurface scattering (SSS) support!
May 12th, 2007
Sculpt and Multires
The previous release was the first Blender version to offer 3d sculpt and multi-res. Based on welcome feedback and reporting, a lot of bug fixes and improvements were added.
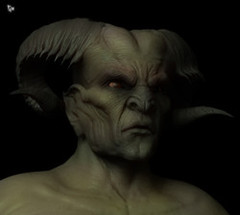
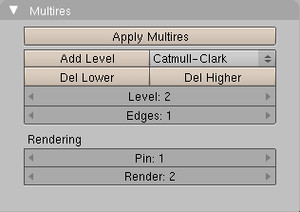
There have been some useful additions to the sculpt and multires mesh tools. Subdivide method for Multires meshes
You can now add levels of multires as simple subdivides instead of Catmull-Clark subdivides. This is especially useful if you want the lower level to keep its position when adding new levels of multires.
Note however, that changes to multires at higher levels are still propogated to lower levels using the Catmull-Clark algorithm. New brush in the Sculpt tools
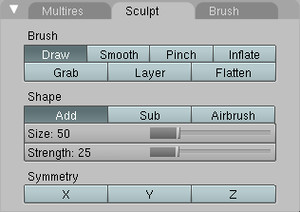
There is a new brush type 'Flatten'. This brush pushes vertices along the normal defined by the average normal of each vertex within the brush area. The vertices are pushed towards the plane defined by vertices towards the edge of the brush. Essentially, this means that the direction of flattening is dependent on the surface beneath the brush.
A scaling factor has been added to sculpt brushes - this will make working on models that are extremely large or small scale much easier.
Python Scripts and API
There have been a large number of script additions and script updates, as well as API improvements since the last release.

There have been a large number of script additions and script updates, as well as API improvements since the last release.
New scripts (partial list)
Some of the additions are:
Autodesk FBX (Export Menu) exports mesh objects and their texface textures, multiple uv layers, vertex color layers as well as materials, lights, and cameras. (animation related features are not yet supported).
Cal3D (Export Menu)
This script has been added back in since it is now maintained.
- Material support
- Multiple materials per mesh
- Multiple UV coords per mesh
- Write new XML cal3d files only (older binary files can no longer be written)
- Posebones IK's etc are optionally baked and exported.
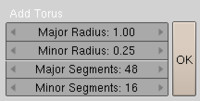
Torus (Add>Mesh Menu) Adds a Torus with radius and segment options.
Solid Wireframe (Mesh>Scripts Menu) This script uses the mesh edges to make a wireframe copy of the model.
Unfolder (Mesh>Scripts) Excellent mesh unfolder script by Matthew Chadwick. See http://celeriac.net/unfolder/
Drop Onto Ground (Object>Scripts Menu) Drops objects onto terrain, either a group or the active object. using either the Z axis or view axis.
Find By Data Use (Object>Scripts Menu) Used for finding an object by the data its linked to.
Quake 3 (.map) (Export Menu) Quake map exporter that supports cubes as 'brushes', complex meshes face per 'brush' and nurbs surfaces as a quake 'patch' and lamps.
Seams From Islands (UVs>Scripts Menu) Adds seams at the boundries of existing UV islands. This is useful when modifying the UV's of existing models.
Lightmap UVPack (UVs>Scripts Menu Menu) - A script for packing uv coordinates witout waisting texture space, it also has the option of creating a new image and UVLayer per selected model. This is useful when baking lightmaps.
Selection to DupliGroug (Object>Scripts Menu) - creates a dupliGroup from a set of selected objects. Then, when you move/rotate/resize on of the objects of the Group, the whole group is moved/rotates/resized along. Updated Scripts
A number of scripts were updated and improved this release cycle,
Unwrap (smart Projections) (UVCalculation Menu)
- Added option 'Init from View', so you can use the view axis for the first projection vector.
- Box packing function was rewritten in C.
xfig export (.fig) (Export Menu)
- Use popup interface wither then using a window.
- Use all meshes rather then just the active mesh.
- Use edges rather then faces to write lines.
- Use objects transformation and derived data such as particles and dupli objects.
Unweld (Mesh>Scripts Menu)
- Dont allow on multires mesh
- Warn that it will destroy multi UVs
- Fixed some errors.
Motion Capture (.bvh) (Import Menu) Bone offset was incorrectly calculated relative to the parent bone.
3D Studio (.3ds) (Export Menu) fixed errors related to 3ds files not openning in other applications because of the 12 character limit of names and filenames in 3ds files. Also was optimized.
Lightwave (.lwo) (Import Menu)
- Improved compatibility
- Changed model orientation to match Blenders on import
SVG (Import>Paths Menu)
- Added units managements
- Correction of the rotate matrix
- Correction of the skew matrix
- Correction of an error in the scale transform management
- Correction (bad) on handle management with V and H commands.
- Now the new object curve is added in the current layer.
- When a svg file contains several curves they can be imported in separate object.
- Management of paths name when paths are imported as separate curves.
- A menu was added to select between separate or joined curves
- Management of svg colors as materials.
- Corrected a scale problem that only appears when one uses beveldepth in separate curve option, name is also given to the curve data.
- Use as list of svg's color names (147) and modified the color's method to work with.
- Correction of a zero division error in the calc_arc function.
AC3D (Export Menu) Updated ac3d exporter to use first material found in the mesh for loose edges (lines) color.
AC3D (Import Menu)
- Updated ac3d importer to be even more forgiving to bad data.
- Added option to turn transparency on in the 3D View for models using materials with alpha < 1.0.
- Added optional support for ac3d's subdiv tag, works by adding a subsurf modifier to the imported model(s) that have this tag, so they appear as intended.
Cleanup Meshes (Mesh>Scripts Menu) added an option to remove all white vcol layers. this is useful when loading old blend files where every UV mapped mesh has vcolor's even if they are all white (because of how texface used to be stored before vcol layers)
Object and Mesh Script Templates (access from the text window: File, Script Templates)
Moved Mesh>Bridge/Loft/Skin, into the FKey menu for quicker access. Now you can select 2 edge loops, press FKey, and skin them. API Changes
Misc API related changes
- Python access has been removed from the OOPS data.
- Python slots were added to the Add>Mesh, Add>Armature, FKEY face menu and a new Submenu called 'Script Templates' added to the text file menu, so that custom scripts can be added at those locations.
- Nested folders now work for scripts.
- Blender version is now a float since we have a sub version.
- Consistency between modules has been improved with more getsetters available and common access methods being implemented.
- All libdata has been made hashable
- All libdata now has the following attributes 'name', 'users', 'fakeUser', 'properties', 'tag', and 'lib', where lib is the filename of the library these models are stored in, or None for local models.
Per module changes
Object
- ob.action can now be set (was previously read only)
- Added a constant dictionary "Blender.Object.IpoKeyTypes" to pass to ob.insertIpoKey(keytype), previously these constants were not well documented.
Mesh
- All new data (faces, edges, verts) is selected.
- Added a keyword argument to mesh.transform() - "selected_only"
Camera
- Camera.c - added a veriable .angle to camera, same as .lens but adjusts the camera angle in degrees (like the D button)
Mathutils
- Added PointInTriangle2D
Registry
- SetKey() had a limit of 60 that would keep counting up every time you used SetKey() until it would always be 60 and nothing would save.
Library
- Appending after linking will no longer make all existing datablocks local.
Draw
- Draw.Label can be used to draw user theme fonts
- UIBlock is a new way of adding a popup user interface that you can add your own buttons to.
- Buttons can have their own callback functions.
PyDrivers
Adding name "self" to the pydriver's dictionary, so that objects can be easily referenced in their own expressions. For example, the expression: self.LocY for the LocY channel of an object would force this object's location in Y to be equal to its location in Y.
New Modifiers
Two new modifiers are available now; "Smooth" and "Cast".
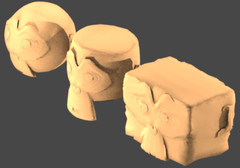
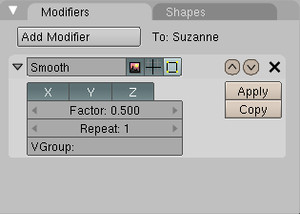
Smooth: this modifier smooths the mesh object by softening the angles between adjacent faces, propably shrinking the size of the original object during the process. Based on the Smooth function (Mesh Tools panel, Editing [F9] while in Edit mode).
- X, Y, Z: specifies the axis along which the modifier is applied
- Factor: define the amount of smoothing, from 0.0 to 1.0. Lower (including negative) or higher values can be used, but can deform the mesh object.
- Repeat: specifies the number of smoothing iterations
- VGroup: Vertex Group name to define which vertices are affected
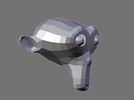
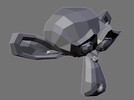
Cast Modifier at Work
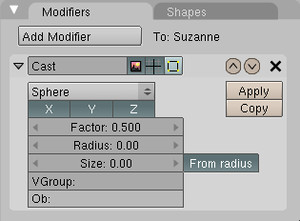
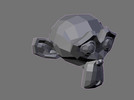
Cast: this modifier alters the global shape of the mesh object so that it tends toward one of these three fundamental shapes: cuboid, cylinder or sphere. Based on the To Sphere function (Mesh Tools panel, Editing [F9] while in Edit mode) but extended to new shapes.
- Sphere, Cylinder, Cuboid: projection type to apply
- X, Y, Z: specifies the axis along which the modifier is applied
- Factor: defines the amount of deformation, usually from 0.0 to 1.0. Lower (including negative) or higher values can be used.
- Radius: Only deforms vertices within this distance from the center of the effect (leave as 0 for infinite)
- Size: size of projection shape (leave as 0 for auto)
- From radius: use radius as size of projection shape (0 = auto)
- VGroup: Vertex Group name to define which vertices are affected
- Ob: control object. If available, its location determines the center of the effect
The Cast (to Sphere) Modifier at work
More modifier extras
Mirror modifier
- Upgraded the Mirror modifier to support mirroring of UV coordinates in the faces created by the modifier.
Array modifier
- Upgraded the Array modifier to allow the user to specify start and end cap objects. :This makes arrays more flexible and more useful for creating subsurf cages. The cap objects are added at the start and end of the array, and will be auto-merged with the rest of the array if the 'Merge' button is on.
Wave modifier:
- You can now apply the effect along the normals, and restrict the effect to any existing VGroup. Furthermore, you can control the Wave effect to some extent using a texture.
64 bits migration notes
Blender had been ported to 64 bits Dec Alpha in 1998 already, but since 2002 its 64 bits compliancy has been gathering dust mostly. Time for a cleanup.
Blender now is 64 bits safe again. That safety is on two different levels; Blender Files + Libraries
Blender's famous "struct DNA", which ensures backwards and even upwards compatibility for files, had to be tested and fixed for full (mixed!) 32 and 64 bits compliancy. Files saved in 32 bits should be readable in 64 bits, and vice versa. Also for appending data and for dynamic linked data (libraries) you should be able to use mixed 32 and 64 files.
Luckily the errors in previously saved 64 bits files were minimal, so those who already were using Blender 64 bits can still read data with this version. Note that it is possible these files will crash with 32 bits, so don't spread this! Addressing and pointer magic
All cases in the code where pointers (memory addresses) were converted to integers had to be checked to use 64 bits integers too. Testing notes
- We had no access to a system with 8 or 16 GB memory for stress testing. It is well possible several issues still are there... please report this to our bug tracker.
- No Windows 64 bits version is available yet. We seek a developer to help with it, especially because we chose the (unix) LP64 standard...
- Only the release of OSX 10.5 will allow us to publish a 64 bits OSX Blender.
Subsurface Scattering
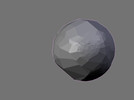
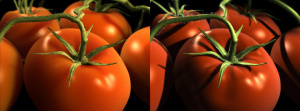
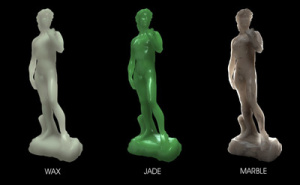
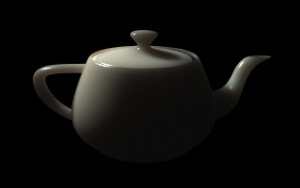
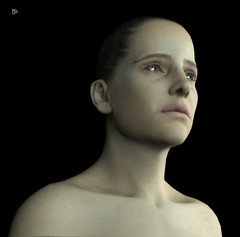
Subsurface scattering is a new material option to render materials like skin, marble or milk. For these materials light scatters under the surface and leaves at another position. This leads to a softer appearance, as light is blurred out over the surface.
Introduction
Subsurface scattering is a new material option to render materials like skin, marble or milk. For these materials light rays are not always reflected at the surface, but can also scatter under the surface and leave at another position. This leads to a softer appearance, as light is blurred out over the surface.
Blender uses a method to simulate this effect for diffuse illumination, in a two step process by rendering a lightmap of the frontside and the backside of the object in advance. The implementation is based on:
Henrik Wann Jensen and Juan Buhler:
"A Rapid Hierarchical Rendering Technique for Translucent Materials"
http://graphics.ucsd.edu/~henrik/papers/fast_bssrdf/
Proceedings of SIGGRAPH 2002
Settings
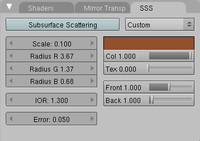
The new SSS panel in the material buttons contains the subsurface scattering settings, with a number of presets to choose from. The following settings are available:
- Scale: the scale of the object, used as a global scaling factor for the Radius R, G and B. For the presets scale 1.0 means 1 blender unit equals 1 millimeter, scale 0.001 means 1 blender unit equals 1 meter.
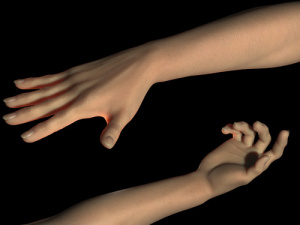
- Radius R, G and B: the blurring radius, or the average distance light scatters under the surface. Different color channels scatter with a different radius in reality. For example in skin red scatters further, as can be seen when holding a hand in front of a lamp (check picture from Cire in the Introduction, for a pratical example).
- IOR: index of refraction. For most materials 1.3 is a good choice.
- Error: parameter to control how precisely the algorithm samples the surrounding points. Leaving it at 0.05 should give images without artifacts. It can be set higher to speed up rendering, potentially with errors. Setting it at 1.0 is a good way to quickly get an preview of the look.
- R, G, B: the diffuse reflectance of the surface. This both modulates the color and influences the scattering behavior.
- Col, Color influence: controls how much the R, G, B option modulates the color. Note that even with this option set to 0.0, the R, G, B option still influences the scattering behavior.
- Tex, Texture blurring: controls how much of the texture is blurred along with the shading.
- Front weight: weighting factor for front scattering.
- Back weight: weighting factor for back scattering.
A number of material pre-sets are already available. For example, you can find various settings for skins (Skin 1, Skin 2, Chicken), a few liquids (Skim milk, Whole milk), a few vegatables (Potato, Apple), one mineral (Marble) and even some creams (Ketchup, Cream).
You can also easily elaborate your own personal SSS settings, starting with one of the presets and then shifting to Custom.
Known Limitations
- SSS materials as seen in reflections or refractions may not look correct if the object with the SSS material is placed outside the camera view.
- Only samples from the front and the back of objects are taken (as seen from the camera), not inbetween. This means some back scattering may be missing if objects overlap, but also helps to keep memory usage down, and more importantly, avoids unwanted influence from internal geometry.
- Irregular shadow buffers do not cast shadows correctly on the back of SSS materials.
- Normals must point in the correct direction, they will not be automatically corrected to point towards the camera, because SSS must be able to identify which faces point backwards to compute backscattering.
- Panorama and wide lens angle rendering are reported to give poor results.
Implementation
Not much code had to be changed to integrate SSS into the render pipeline.
- For each material with SSS, a preprocessing pass is done similar to environment mapping.
- This pass is fully threaded, and works similar to rendering a regular layer.
- For each tile, two zbuffers are created, one with the frontmost faces and one with the backmost faces.
- The points on these faces are then shaded, but with only diffuse shading, including AO and radiosity.
- These points are all collected into a list, with their color, 3d coordinate and area.
- Using the list of points, an octree is built for quick lookup during rendering.
- When doing regular rendering, instead of using the diffuse shading, a color computed by taking a weighted average of points in the octree is used.
New Composite Nodes
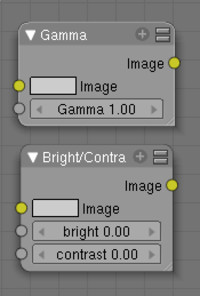
Two new Composite nodes had been added, that can be accessed by the Add > Color menu, expanding further the possibilities of the Composite node editor.
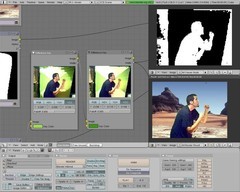
Two new Composite nodes had been added, that can be accessed by the Add > Color menu, expanding further the possibilities of the Composite node editor.
- Gamma: this node allows for correcting the Gamma level of the input image.
- Bright/Contrast: this node allows for adjusting the brightness and/or the contrast levels of the input image.
Character Animation
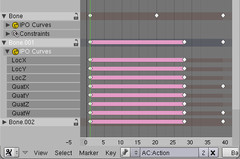
The Action and NLA editors have now better control over visible channels. A new constraint was added, and a "preview range" option was added.
http://wiki.blender.org/index.php/User:Aligorith
Physics Engine
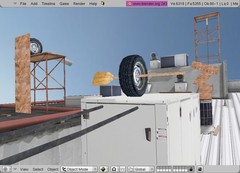
The Bullet physics engine has had some changes which should give better reproducibility and precision/quality for physics simulations.
Bullet Physics and GameEngine
The physics engine has had some changes which should give better reproducibility and precision/quality for physics simulations. Note that the improved reproducibility is only on the same platform - using a different platform can still behave slightly differently.
Improved precision can be activated via python scripting via PhysicsConstraints.setNumTimeSubSteps(x), with higher values of x increasing the accuracy of the simulation. This will be especially useful for those baking simulations to keyframes.
A new feature 'instant replace mesh' was added to the game engine by Jason Richards (Scabootssca) it allows you to substitute a new mesh for a previous mesh on the same frame.
Other improvements have been some bug fixes including cube maps; font textures; a ray sensor fix by Carsten, and a fix for the track to actuator by mal_Cando.
Also for the 2.43 there was a contest for the best 'Rube goldberg' physics demonstration using the bullet physics library. There were some excellent entrys, you can see the results, download the videos, and download the demonstration blends here.
http://www.continuousphysics.com/mediawiki-1.5.8/index.php?title=PhysicsContest2007
Mesh primitives update
The mesh primitives have been revisited, improving their usability and pushing them a little beyond their previous state.
New controls
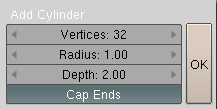
All the control parameters defining the primitive are now gathered in a single floating panel; for example, you can specify UVSphere's number of Segments and Rings from a single panel.
Some primitives now show new parameters:
- Radius. The starting size of the Circle, Cylinder, Cone, UVSphere and IcoSphere primitives can now be set.
- Depth. The starting length of the Cylinder and Cone primitives can also be set.
A new option is to decide, when adding the Cylinder primitive, if you need to cap its ends (Cap Ends option). The same decision is possible with the Cone primitive (Cap End option). Note that an uncaped Cylinder is a tube; therefore, the old redundant Tube mesh primitive is no longer directly available.
With the same logic, you can also decide if you want to fill the Circle with faces (Fill option). The result is then a Disk primitive.
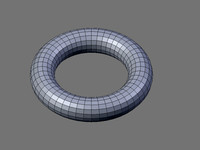
New primitive added: Torus
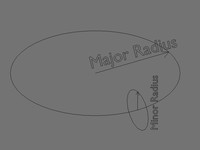
A new mesh primitive is also available: Torus. It is possible to set both the Major Radius and the Minor Radius of the torus, and to specify how many segments are used to define both radii (Major Segments and Minor Segments).
More features and fixes
Plenty of smaller features made it into this release.
3D Window
- Animated view option (User preset) allows interpolation of view changes, set the "Smooth View" milliseconds above zero to enable.
- Fly Mode: Holding Shift decreases mouse wheel and panning influence to a 10th. Fly mode now respects the objects location axis locking, so you can fly over land and look down without flying into it.
- Snapping: Editmode snapping now works to snap to vertices in another selected object as well.
- Hide and Unhide works in Object Mode; H to hide selected objects, Alt+H to unhide hidden and Shift+H to hide unselected. This was only accessible in the outliner for version 2.43.
- Hook menu (Object Mode) to recenter or center cursor for all hooks used by a mesh, This is the same as accessing from the modifier panel but useful when making adjustments with many hooks.
- SubSurf can be enable/disable in linked Library data. The subsurf setting will not be saved but changing the setting is useful for previews.
- Transform properties panel now shows Parent bone (Object to Bone)
User Interface
- Running Blender in debug mode now prints the subversion of .blend files.
- "File" menu: Option "Load Factory Settings" added. This shows the original .B.blend as compiled in Blender. It doesn't save over things.
- The recently saved files list now has a user preset to define how many entries it has.
- Switch screen hotkey, CTRL+Left/Rightarrow now cycles.
- Menus now scroll with mouse wheel. Activate menu items only with Enter key.
- Blender in X11 (Linux, Solaris and Irix) will start with window decorations by default.
Various editors
- In Outliner, shift+click on item with [Li] icon, gives name of Library file
- Sound Window now has option "lock view to other 2d windows" too.
- Create/delete vertex groups now is possible in Object mode too (using the buttons in edit buttons).
- Sequencer, Add new strips: Selecting multiple movie/audio files in filewindow now adds each of them.
- UV/Image Editor: "Add New Image": you now can set alpha and color, "Pack Charts" in the UVs menu to pack selected groups of UV coordinates into a non overlapping layout.
- Composite: Blur Nodes now react to ESC properly.
- Curve editmode: Ctrl Alt H: Hide Point(s), Alt H: Show All Points
- Mesh editmode: UV and Vertex Color mesh-layers now have an display layer and a layer to be rendered. So viewing different mesh-layers does not change what is rendered.
