「Doc:2.6/Manual/Modifiers/Modify/Vertex Weight」の版間の差分
(minor edits) |
細 (1版 をインポートしました) |
(相違点なし)
| |
2018年6月29日 (金) 04:46時点における最新版
目次
WeightVGroup Modifiers
Mode: Any mode
Panel: Modifiers (Modifiers properties)
Description
The WeightVGroup modifiers work on a vertex group of the affected object, by modifying its weights and/or which vertices belong to this group.
Those modifiers do implicit clamping of weight values in the standard [0.0, 1.0] range. So all values below 0.0/above 1.0 will be lost!
There are currently three WeightVGroup modifiers:
Common Settings
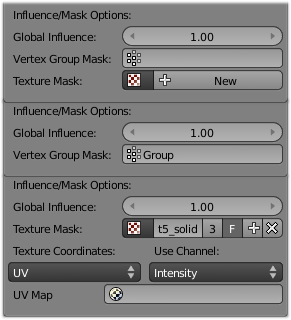
The three WeightVGroup modifiers share a few settings, controlling their influence on the affected vertex group.
- Global Influence
- The overall influence of the modifier (0.0 will leave the vertex group’s weights untouched, 1.0 is standard influence).
- Note that influence only affects weights, adding/removing of vertices to/from vertex group is not prevented by setting this value to 0.0!

- Vertex Group Mask
- An additional vertex group, which weights will be pre-multiplied with the global influence value, for each vertex. If a vertex is not in the masking vertex group, its masking weight (and hence its influence) will be null.
- Texture
- An additional texture, which values will be pre-multiplied with the global influence value, for each vertex. You can choose which channel of the texture to use as values.
- This is a standard texture ID control. When set, it reveals other settings:
- Texture Coordinates
- How the texture is mapped to the mesh… You have four choices:
- Local: use local vertices coordinates.
- Global: use the vertices coordinates in the global space.
- Object: use the vertices coordinates in another object’s space.
- UV: use an UV layer’s coordinates.
- Use Channel
- Which channel to use as weight factor source (intensity, RGB, HSV, alpha – the options are quite self-explanatory, I guess…).
- Object
- The object to be used as reference for Object mapping…
- UV Layer
- The UV layer to be used for UV mapping…
Viewing Modified Weights
You will now view the modified weights in WeightPaint mode. This also implies that you’ll have to disable the Vertex Weight modifiers if you want to see the original weights of the vertex group you are editing (provided it is affected by some modifier, obviously).
Vertex Weight Edit Modifier
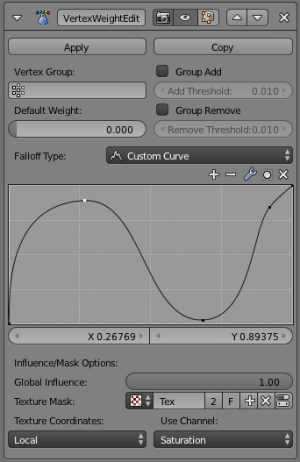
This modifier is intended to edit the weights of one vertex group.
The general process is the following, for each vertex:
- [Optional] It does the mapping, either through one of the predefined functions, or a custom mapping curve.
- It applies the influence factor, and optionally the vertex group or texture mask (null values mean original weight, 1.0 ones mean fully mapped weight).
- It applies back the weight to the vertex, and/or it might optionally remove the vertex from the group if its weight is below a given threshold, or add it if it’s above a given threshold.
Options
- Vertex Group
- The vertex group to affect.
- Default Weight
- The default weight to assign to all vertices not in the given vertex group.
- Falloff Type
- Type of mapping:
- Linear – No mapping.
- Custom Curve – Enables the the curve mapping. This shows up a curve control.
- Sharp, Smooth, Root and Sphere are classical mapping functions, from spikiest to roundest.
- Random – Fully randomizes the weights!
- Median Step – Creates binary weights (0.0 or 1.0), with 0.5 as cutting value.
- Group Add
- Adds vertices with a final weight over Add Threshold to the vertex group.
- Group Remove
- Removes vertices with a final weight below Rem Threshold from the vertex group.
Vertex Weight Mix Modifier
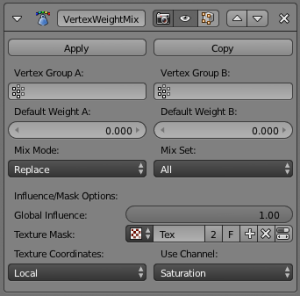
This modifier mixes a second vertex group (or a simple value) into the affected vertex group, using different operations.
It also has an option to choose which vertices to work on (all, only those of the first or second vertex group, etc.).
This implies that it might add vertices to the affected vertex group (it will never remove vertices, though); see below for details.
Options
- Vertex Group A
- The vertex group to affect.
- Default Weight A
- The default weight to assign to all vertices not in the given vertex group.
- Vertex Group B
- The second vertex group to mix into the affected one. Leave it empty if you only want to mix in a simple value.
- Default Weight B
- The default weight to assign to all vertices not in the given second vertex group.
- Mix Mode
- How the vertex group weights are affected by the other vertex group’s weights. You have seven choices:
- Replace weights just replaces affected weights by the second weights.
- Add to weights adds both values.
- Subtract from weights subtracts the second weights from the affected weights.
- Multiply weights multiplies both weights.
- Divide weights divides the affected weights by the second weights.
- Difference computes the difference between affected weights and second weights (it’s just the absolute value of the subtract operation).
- Average computes the average value of both weights.
- Mix Set
- Which vertices to work on. You have five options:
- All vertices affects all vertices, disregarding the vertex groups content. This option might add vertices to the affected vertex group.
- Vertices from group A affects only vertices belonging to the affected vertex group.
- Vertices from group B affects only vertices belonging to the second vertex group. This option might add vertices to the affected vertex group.
- Vertices from one group affects only vertices belonging to at least one of the vertex groups. This option might add vertices to the affected vertex group.
- Vertices from both groups affects only vertices belonging to both vertex groups.
Vertex Weight Proximity Modifier
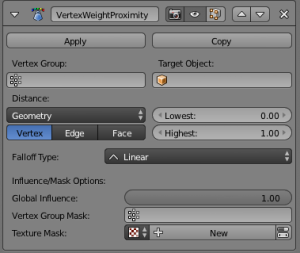
This modifier sets the weights of the given vertex group, based on the distance between the object (or its vertices), and another target object (or its geometry).
Options
- Vertex Group
- The vertex group to affect.
- Target Object
- The object from which to compute distances.
- Proximity mode
-
- Object Distance will use the distance between the modified mesh object and the target object as weight for all vertices in the affected vertex group.
- Geometry Distance will use the distance between each vertex and the target object, or its geometry.
The Geometry Distance mode has three additional options, to use the target object’s geometry instead of its center location (if you enable more than one of them, the shortest computed distance will be used). If the target object has no geometry (e.g. an empty or camera one), it will silently fall back to the default Object Distance behavior.
- Vertex
- This will set each vertex’s weight from its distance to the nearest vertex of the target object.
- Edge
- This will set each vertex’s weight from its distance to the nearest edge of the target object.
- Face
- This will set each vertex’s weight from its distance to the nearest face of the target object.
- Lowest Dist
- Distance mapping to 0.0 weight. It can be above Highest Dist for reversed mapping effects.
- Highest Dist
- Distance mapping to 1.0 weight. It can be below Lowest Dist for reversed mapping effects.
- Falloff Type
- Some predefined mapping functions, see the Vertex Weight Edit part above.
Examples
Using Distance from a Target Object
As a first example, let’s dynamically control a Wave modifier with a modified vertex group.
Add a Grid mesh, with many vertices (e.g. a 100×100 vertices), and 10 BU side-length. Switch to Edit mode (⇆ Tab), and in the Object Data properties, Vertex Groups panel, add a vertex group. Assign to it all your mesh’s vertices (with e.g. a 1.0 weight). Go back to Object mode.
Then, go to the Modifiers properties, and add a Vertex Weight Proximity modifier. Set the mode to Object Distance. Select your vertex group, and the target object you want (here I used the lamp).
You will likely have to adjust the linear mapping of the weights produced by the Vertex Weight Proximity modifier. To do so, edit Lowest Dist and Highest Dist so that the first corresponds to the distance between your target object and the vertices you want to have lowest weight, and similarly with the second and highest weight…
Now add a Wave modifier, set it to your liking, and use the same vertex group to control it.
Animate your target object, making it move over the grid. As you can see, the waves are only visible around the reference object! Note that you can insert a Vertex Weight Edit modifier before the Wave one, and use its Custom Curve mapping to get larger/narrower “wave influence’s slopes”.
The Blender file, TEST_1 scene.
Using Distance from a Target Object’s Geometry
We’re going to illustrate this with a Displace modifier.
Add a 10×10 BU 100×100 vertices grid, and in Edit mode, add to it a vertex group containing all of its vertices, as above. You can even further sub-divide it with a first Subsurf modifier.
Now add a curve circle, and place it 0.25 BU above the grid. Scale it up a bit (e.g. 4.0).
Back to the grid object, add to it a Vertex Weight Proximity modifier, in Geometry Distance mode. Enable Edge (if you use Vertex only, and your curve has a low U definition, you would get wavy patterns, see (Wavy patterns)).
| Wavy patterns. | |
|---|---|
Set the Lowest Dist to 0.2, and the Highest Dist to 2.0, to map back the computed distances into the regular weight range.
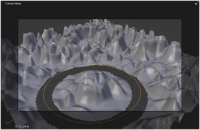
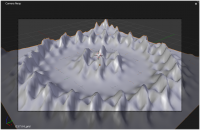
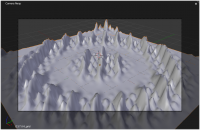
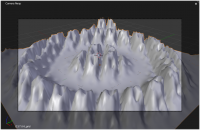
Add a third Displace modifier and affect it the texture you like. Now, we want the vertices of the grid nearest to the curve circle to remain undisplaced. As they will get weights near zero, this means that you have to set the Midlevel of the displace to 0.0. Make it use our affected vertex group, and that’s it! Your nice mountains just shrink to a flat plane near the curve circle.
As in the previous example, you can insert a Vertex Weight Edit modifier before the Displace one, and play with the Custom Curve mapping to get a larger/narrower “valley”…
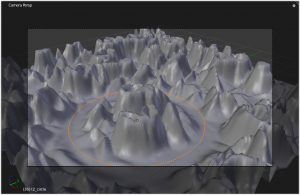
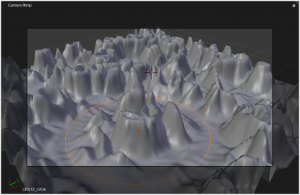
| Curve Map variations. | ||
|---|---|---|
You can also add a fifth Mask modifier, and enable Vertex Weight Edit’s Group Remove option, with a Rem Threshold of 0.1, to see the bottom of your valley disappear.
The Blender file, TEST_2 scene.
Using a Texture and the Mapping Curve
Here we are going to create a sort of strange alien wave (yes, another example with the Wave modifier… but it’s a highly visual one; it’s easy to see the vertex group effects on it…).
So as above, add a 100×100 grid. This time, add a vertex group, but without assigning any vertex to it – we’ll do this dynamically.
Add a first Vertex Weight Mix modifier, set the Vertex Group A field with a Default Weight A of 0.0, and set Default Weight B to 1.0. Leave the Mix Mode to Replace weights, and select All vertices as Mix Set. This way, all vertices are affected. As none are in the affected vertex group, they all have a default weight of 0.0, which is replaced by the second default weight (1.0). And all those vertices are also added to the affected vertex group.
Now, select or create a masking texture – here I chose a default Magic one. The values of this texture will control how much of the “second weight” (1.0) replaces the “first weight” (0.0)… In other words, they are taken as weight values!
You can then select which texture coordinates and channel to use. Leave the mapping to the default Local option, and play with the various channels…
| Texture channel variations. | ||
|---|---|---|
Don’t forget to add a Wave modifier, and select your vertex group in it!
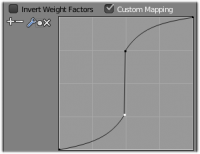
You can use the weights created this way directly, but if you want to play with the curve mapping, you must add the famous Vertex Weight Edit modifier, and enable its Custom Curve mapping.
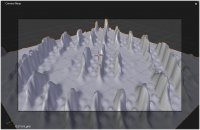
By default, it’s a one-to-one linear mapping – in other words, it does nothing! Change it to something like in (A customized mapping curve), which maps [0.0, 0.5] to [0.0, 0.25] and [0.5, 1.0] to [0.75, 1.0], thus producing nearly only weights below 0.25, and above 0.75: this creates great “walls” in the waves…
| Custom mapping curve. | ||
|---|---|---|
The Blender file, TEST_4 scene.
See Also
- The Development page.
