Doc:2.6/Manual/Render/Cycles/Materials/Volume
目次
Volume
Volume rendering can be used to render effects like fire, smoke, mist, absorption in glass, and many other effects that can't be represented by surface meshes alone.
To set up a volume, you create a mesh that defines the bounds within which the volume exists. In the material you typically remove the surface nodes and instead connect volume nodes to define the shading inside the volume. For effects such as absorption in glass you can use both a surface and volume shader. The world can also use a volume shader to create effects such as mist.
Volume Shaders
We support three volume shader nodes, that model particular effects as light passes through the volume and interacts with it.
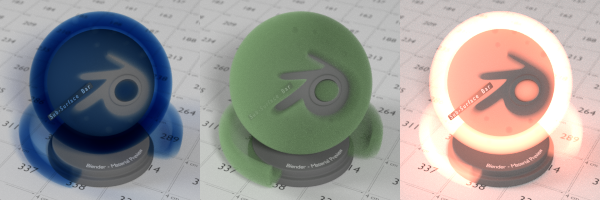
- Volume Absorption will absorb part of the light as it passes through the volume. This can be used to shade for example black smoke or colored glass objects, or mixed with the volume scatter node. This node is somewhat similar to the transparent BSDF node, it blocks part of the light and lets other light pass straight through.
- Volume Scatter lets light scatter in other directions as it hits particles in the volume. The anisotropy defines in which direction the light is more likely to scatter. A value of 0 will let light scatter evenly in all directions (somewhat similar to the diffuse BSDF node), negative values let light scatter mostly backwards, and positive values let light scatter mostly forward. This can be used to shade white smoke or clouds for example.
- Emission will emit light from the volume. This can be used to shade fire for example.
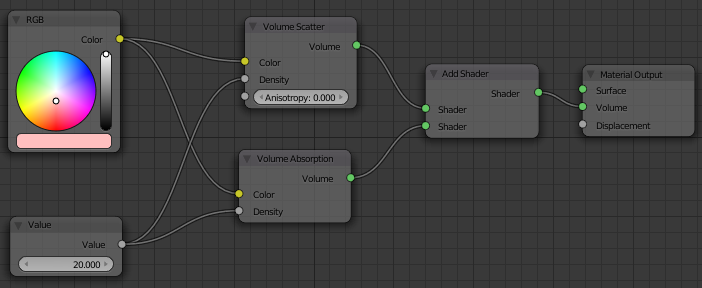
The following is a basic starting point for a volume shader:
Density
All volume shaders have a density input. The density defines how much of the light will interact with the volume, getting absorbed or scattered, and how much will pass straight through. For effects such as smoke you would specify a density field to indicate where in the volume there is smoke and how much (density bigger than 0), and where there is no smoke (density equals 0). When shading a smoke domain you can retrieve this field using an attribute node, typing density in the node, and connecting the Fac output of the attribute node to the density input of the shader. Volumes in real life consist of particles, a higher density means there are more particles per unit volume. More particles means there is a higher chance for light to collide with a particle and get absorbed or scattered, rather than passing straight through.
Volume Material
Interaction with the Surface Shader
A material may have both a surface and a volume shader, or only one of either. Using both may be useful for materials such as glass, water or ice, where you want some of the light to be absorbed as it passes through the surface, combined with e.g. a glass or glossy shader at the surface.
When the surface shader does not reflect or absorb light, it enters into the volume. If no volume shader is specified, it will pass straight through to the other side of the mesh. If it is defined, a volume shader describes the light interaction as it passes through the volume of the mesh. Light may be scattered, absorbed, or emitted at any point in the volume.
Mesh Topology
Meshes used for volume render should be closed and manifold. That means that there should be no holes in the mesh. Each edge must be connected to exactly 2 faces such that there are no holes or T-shaped faces where 3 or more faces are connected to an edge.
Normals must point outside for correct results. The normals are used to determine if a ray enters or exits a volume, and if they point in a wrong direction, or there is a hole in the mesh, then the renderer is unable to decide what is the inside or outside of the volume.
These rules are the same as for rendering glass refraction correctly.
Volume World
A volume shader can also be applied to the entirely world, filling the entire space.
Currently this is most useful for night time or other dark scenes, as the world surface shader or sun lamps will have no effect if a volume shader is used. This is because the world background is assumed to be infinitely far away, which is accurate enough for the sun for example. However for modelling effects such as fog or atmospheric scattering, it is not a good assumption that the volume fills the entire space, as most of the distance between the sun and the earth is empty space. For such effects it is be better to create a volume object surrounding the scene. The size of this object will determine how much light is scattered or absorbed.
Scattering Bounces
Real world effects such as scattering in clouds or subsurface scattering require many scattering bounces. However unbiased rendering of such effects is slow and noisy. In typical movie production scenes only 0 or 1 bounces might be used to keep render times under control. The effect you get when rendering with 0 volume bounces is what is known as "single scattering", the effect from more bounces is "multiple scattering".
For rendering materials like skin or milk, the subsurface scattering shader is an approximation of such multiple scattering effects that is significantly more efficient but not as accurate.
For materials such as clouds or smoke that do not have a well defined surface, volume rendering is required. These look best with many scattering bounces, but in practice one might have to limit the number of bounces to keep render times acceptable.
Limitations
Currently we do not support:
General:
- Camera inside a volume mesh (Support added in Blender newer than 2.72).
- Correct ray visibility for volume meshes
On GPU:
- Smoke/Fire rendering
- Equi Angular / MIS Volume Sampling
- Volume Multi Light sampling


