Extensions:2.6/Py/Scripts/Import-Export/HiRISE DTM from PDS IMG
| UI location | File > Import > HiRISE terrain model | ||
|---|---|---|---|
| Version | 0.2.2 | Author(s) | Nicholas Wolf |
| Blender | 2.78 | License | GPLv2 |
| File name | io_convert_image_to_mesh_img/__init__.py,io_convert_image_to_mesh_img/import_img.py |
|---|
目次
Tutorial
Description
This plugin allows you to import a Mars Surface from the HiRISE project directly into Blender.
Details
This script imports a standard HiRISE DTM (*.IMG), reads the embedded PDS label and decodes the raster elevations to create a mesh in the current view. The lowest value of the DTM is set to Z=0 in blender coordinates and the upper left corner of the image is placed at X=0,Y=0 in the Blender world.
Different Resolutions
Since HiRISE DTMs are quite large for most machines that Blender runs on today, the script has the ability to sample/average portions of the image into single pixels which effectively reduces the resolution but also reduces the amount of time/memory that Blender needs to work with the DTM. Re-importing a higher resolution later on will place the DTM in exactly the same place that the original DTM was imported to (size/scale matching as well) so that creating animations/previews can be done with much less effort.
This is really useful for prototyping your scene. Import a low-res version, get all of your animation/modeling done and rendered and then import a higher resolution mesh for the final render.
A few words on scale
When importing for the first time, leave the scale=0.01 so that the mesh is not huge. Setting scale=1 will map the DTM coordinates 1:1 with Blender units. The result is a very large mesh that can't be viewed easily in the default view.
Usage
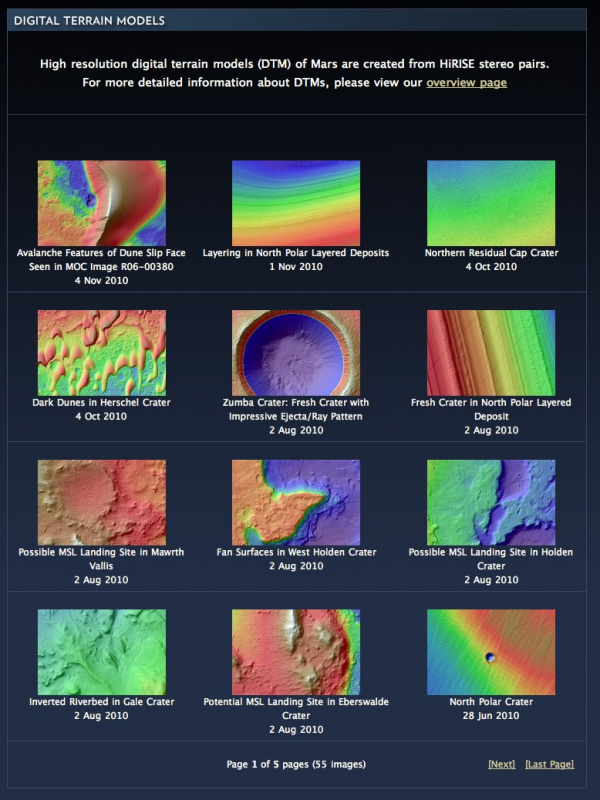
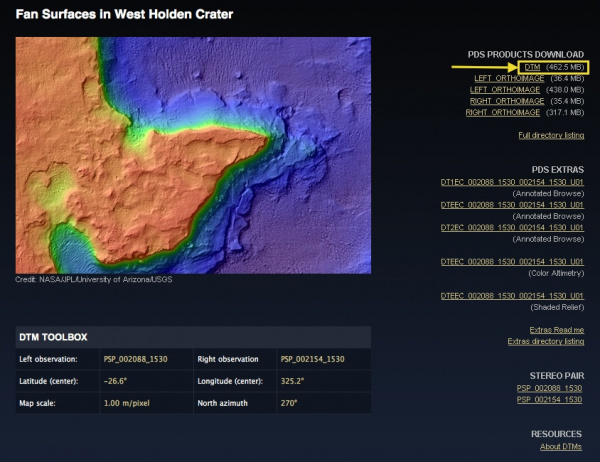
1) choose a published HiRISE DTM from http://www.uahirise.org/dtm
2) download the linked "DTM" image Warning: these files can be quite large
3) Inside of Blender navigate:
File -> Import -> HiRISE DTM from PDS IMG (*.IMG)
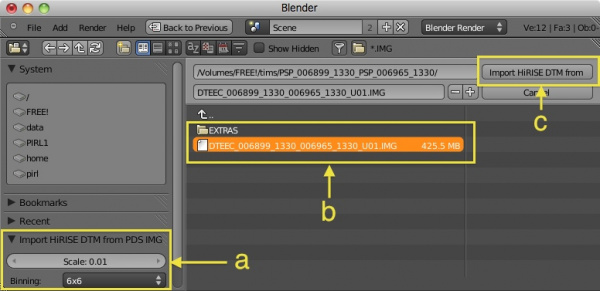
4) Select the DTM and desired settings
a) Select your bin/scale settings.
| None | This will import the DTM without downsampling. Warning: this can take a lot of memory |
| 2x2 | Create one value for each 2x2 region of the DTM by averaging them |
| 6x6 | Create one value for each 6x6 region of the DTM by averaging them |
| 6x6 Fast | Create one value for each 6x6 region of the DTM by sampling a single value |
| 12x12 | Create one value for each 12x12 region of the DTM by averaging them |
| 12x12 Fast | Create one value for each 12x12 region of the DTM by sampling a single value |
b) Select the DTM you downloaded
c) Select the "Import HiRISE DTM" button to start the import
5) Now just wait. NB: These DTMs are big and take a whole lot of floating point manipulation to import.
6) Enjoy/manipulate/render the surface of mars as you would any other mesh in Blender.
Installation
1) Download the files into a folder named "io_mesh_img".
2) Open User Preferences (File -> User Preferences)
3) Select the "Add-Ons" tab
4) Click the "Install Add-On" button at the bottom of the window
5) Navigate to the io_mesh_img folder and click the "Install Add-On" button
6) Type in "HiRISE" into the search field and enable the plugin:
Import/Export: HiRISE DTM from PDS IMG
The latest plugin
Warning: this may be broken from time to time or include features that are new/untested.
History
https://projects.blender.org/tracker/index.php?func=detail&aid=24897


