Extensions:2.6/Py/Scripts/Import-Export/Import Movement From Audio File
| UI location | Inside Object Tab | ||
|---|---|---|---|
| Usage | Just Select a Object, go to tab - Import Movement From Audio File - Click in - Import Audio File - and then - Import Key Frames. | ||
| Version | 0.70 | Author(s) | Vlassius |
| Blender | 2.64.9 | License | GPL |
| Category | Import-Export | Distribution | SVN - Contrib |
| File name | io_import_sound_to_anim.py |
|---|---|
| Current version download | 0.70 |
| Python modules | wave, time, os, copy, sys, shutil |
| External Python Modules or dependencies | none |
| Data | *.wav |
| Links | http://wiki.blender.org/index.php/User:Vlassius |
|---|---|
| Release Log | into the script file |
Import the movement of a .wav file to a animation - Engine
Hi,
Maybe this can help you to sync movement with sound. This script takes a .wav file and transforms it into movement (key frames) using the amplitude of the audio.
Examples of use:
- Make balls jumping with the sound.
- You have some minutes of audio to make a robo "talk". If you have the audio file (just with voice), you can get a very good sync to the mouth (using bones).
- Make a sound system:
- Make a hand move and fake a piano player:
- Make a business training, helping to learn difficult concepts:
It was used a lot of times and got a very good (and funny) results mainly to Business Training even to a mouth, where is just necessary a basic sync and not a letter-by-letter sync.
The result is very quick and simple comparing with other methods.
Get Started Manual
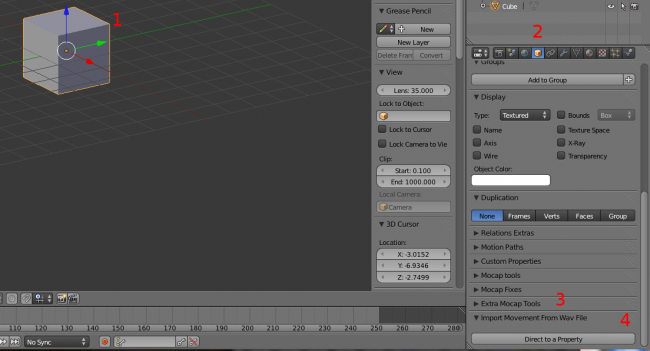
1- Select a object, you can use the default cube (Mesh, Bone, Empty or Camera) 2- Go to the Object Tab 3- Go to "Import movement From a .WAV File" 4- Go to "Direct to a property"
Let everything "as is" for now.
Click the button "Process Wav" and open a file. Must be a 8 bits or 16 bits wave file mono or multichannel. You can use a program like Audacity to save a mp3 file in this format.
You can use the beat detect option or use just one voice or one instrument at a time. Its important to know that the script takes the sound of the file, but, it cannot separate sounds, for example voice and guitar. One can see the terminal window about the process until it ends. In a 100KB file, it will take some seconds. In a 100MB .wav file, it will take some minutes.
After this, a button and more options will appear.
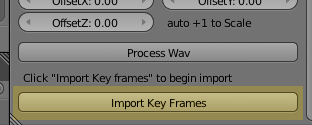
Let everything "as is" and click "Import Key Frame"
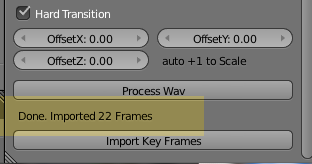
At the end of the process, you will have a text between the two buttons indicating the number of frames imported.
Your "Time Bar" will have the Key Frames.
Try to use a file with some seconds to see its the performance. It can take several minutes to process and import a large file. I've processed a 80MB file (7 minutes of audio) into a MESH to change its location in just 3 minutes but, the same file in a bone to deform a mesh took 15 minutes. The major time is spend in import the values to Blender.
Time to have fun, press Control A to start the animation and see your object moving.
Basic Options:
General Information
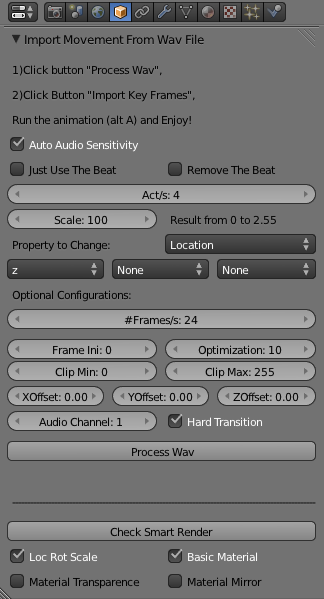
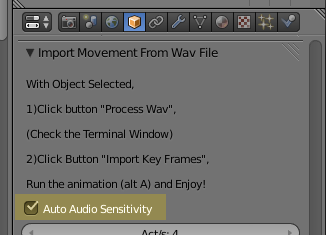
Auto Audio Sensitivity - The script will try to calculate the best scale to the audio.
If you turn off "Auto Audio Sensitivity" you can adjust Audio Sensitivity from 1 to 6. See this in detail at last section.
Acts/s: Max. frames per second to put the key frames, if 1(one), it will be one key frame inserted per second; if 10 will be ten key frames inserted by second of video. For example, to a mouth you probably want 4 (quick movements) and, to a arm or hand, probably you will use 1 because the arm/hand movements are generally soft and slow. Min:1 Max:Number of Key Frames/s - Default:4. You can even see the wave curves in the terminal window, if you set Frames/s to 120 and Acts/s = 120.
Scale: Scale the values of samples you get. If 1: gets 0 ~255. If 100. gets 0~2.55. If 1000, gets 0~0.255. To a mouth bone, maybe you will use a Scale of 2000 and, 100 to test a default cube. There is a text next to the button to remember you the result values.
- If your animation has a ball to fly 25 units of Blender, set this to 10
- If your animation has a ball to fly 12.5 units of Blender, set this to 20
- If your animation has a ball to fly 0.12 units of Blender, set this to 2000
Frames/s: Adjust from your scene, necessary to correctly sync the frames. Its automatically imported from the current scene Frames/s value. If you change the Frame/s in your current scene after use this script, it will be necessary to adjust here too. Bad values will make loose of sync. Advanced- Can be useful to change it if you use multiple of the original values.
Apply the movement:
- Change Location:
- Property: Location - and choose one or more location axis.
- Change Scale:
- Property: Scale - and choose one or more scale axis.
- Change Rotation:
- Property: Rotation - and choose one or more rotation axis.
Initial frames to put the key frames.
Optimization: It will round the samples values. If bigger, more quickly the import but less precision. If 0, hi precision values and more slow to process. Default 10. Min:0 to Max:255.
Clip Min: Cut the lower value to the sample. Samples goes from 0 but if set here 100, any value less than 100, will be set to 100.
Clip Max: Max. value for the samples. Default: 255. If this number is lower than 255, any sample value higher than this value will be set to it.
Offset to X, Y and Z. This value will be added to the axis with the result value of sound file.
Hard Transition: If you want movements like a month (quick movement just when speaking) check this. If you want a soft transition to the movements, like a arm moving, leave in blank. Default: checked.
Examples
Ball
I want a ball that stay still until a beat and goes to the maximum value, than goes back. The basic setup to this is: Everything default but:
- Disable "Hard Transition" (or maybe not, see what you get in both cases)
- If your sound has more than a beat, you can try to use the Just Use the Beat option.
- Adjust the Scale option to fit in your scene.
Advanced:
- You can set the "Clip Max" to 100 for example to have sure that no values in between would bottler you.
Hand in Piano
I have a scene that shows the hand and a piano but does not show the fingers, can I sync the play with the movement of the hand?
- Sure, just take your audio with just the piano sound, apply to the hands.
- Adjust the "Scale", probably something like 500 or 1000 to make little movements.
- You can use with or without "Hard Transition". If Checked the movements will be appear stronger, with quick movements. If not checked, the movements will be softer.
Finger Playing Piano
I want to a finger touch a key when a sound plays. Its very simple but, maybe you need some ground here.
- You need to remember that the script will not isolate the sound that you like. You need a isolated sound (the sound that you want to move the finger) and apply to the finger.
- You will apply the script to the bone (finger and key of keyboard).
- (Advanced) You can use the "Clip Max" to cut the max. movement.
- Change the "Property" to "Rotation" and choose the proper axis.
- Once you get the right setup for one finger, you can use the same setup to the others fingers.
- You can apply the values of all fingers to the hand thus, the hand will move too when the finger moves.
- As a additional step, you can use a program to filter the audio and make the setup a lot easier. Just use a high frequency filter and use the resultant audio to import using the scripts. This filter will make the piano sound like a "tick". You can use Audacity to easily do it. That was what i done in the example video to have better results.
About the example of a piano player in this page: The script was used 13 times: 10 fingers, 2 hands and the keyboard No adjust was done after import the movements. All movements was imported and processed in just 2 hours. There are more than 9000 keys (movements) inserted into the animation. The setup took no more than one hour. Its very hard to do it manually and really impossible to do it all in one day without the script.
Tutorial - Bubble Man
In this example you will have all steps and files to make this animation.
Files
How To Do It
Make a character, in this case, Bubble Man. (half hour)
- Prepare to receive the movement, in this case i use a Meta Ball to the head and this script does not work with it. Problem? Not at all.
- To apply the movement to the Meta Ball you can place a cube at zero "z" (and out of camera view) then make parent the cube and the Meta Ball so you can apply the movements to the cube and the Meta Ball will follow.
- The cube is at zero "z" because the script apply absolute values, not relative to the position of the object, I mean, if the head is at 2.00 "z", after apply the script it will be from 0 to max value, where max value is the sample value times scale used (and can be negative, once you can apply to -z) and using a external parented object, is possible to make the setup easier.
- Now we have the target object (cube) to receive the movements.
Get a sound to use. In this case it was used a piano keyboard to generate the sound. ( half hour) You have two ways now, one very easy using the Beat Detection and one very accurate using manual setup.
Prepare the sound file:
- A simple sound was recorded in the keyboard and saved as MIDI file.
- Using a program called Rosegarden, I made a other MIDI file (using the first MIDI) just with one instrument. (MIDI file is a data file that has instrument, notes...You can isolate one or more instrument).
- Again in the piano keyboard, the MIDI files was exported to .wav files. One MIDI exported the entire music to the animation, the second MIDI was just the choose instrument to generate movement.
- To filter the .wav that will be imported, it was used the program Audacity and applied a "High Band Filter" at 10Khz.
- The final sound is very clean to make an accurate result.
Result:
Apply the Movement to the target. (five minutes)
- Open Blender (if possible, open in a terminal window), Select the cube (parented with the head).
- Go to script panel,
- Location to -z
- Scale 130
- Click: "Process Wave". Take a look in the terminal window.
- Click: "Import Key frames". Take a look in the terminal window.
- Adjust the "End Frame" if necessary (scene tab).
- Ready to render!!!
Total time (without render): less than 1.5 hours
Its done!
Advanced: Adjust Sensitivity
Remember: You can use the "Auto Audio Sensitivity to do this work to you, so this is a advanced configuration. The sound file may contain a very loud (high amplitude) sound, or a very low (low amplitude) sound or any in between. To adjust this, you will need to adjust the sensitivity to get most sample amplitudes fits inside the samples (0 to 255).
- If you use a very low amplitude sound with a very low sensitivity, you you get the samples very with low amplitude like 0 to 50 instead of 0 to 255. If the samples is very low like this example, you will loose movement because the scale is squeezed from 0 to 50.
- If you have a very loud sound and you set the sensitivity to max (6), you will get the samples squeezed again to the high part of scale, for example 200 to 255. In this case, you will loose movement too.
- The right way to do it in most times is to put the sound samples fit inside 0 to 255 values.
The best way to do it is using a tool that meter the result, and see if it is distributed inside the 0 to 255 values. It seems very technical matter but, the script comes with a graph meter to help you to do it very easily.
All you need to do is start Blender in a terminal window of your OS. http://wiki.blender.org/index.php/Doc:2.6/Manual/Interface/Window_system/Console_window
Use your Blender normally with the terminal window open or minimized. When the time to use the script comes, before open the audio file, open the terminal window thus you can see what happens.
OK, lets see how to do it in a very simple way:
- Just checking, you started Blender using a terminal window. Choose your object to receive the Key Frames, select it, go to "Object" tab, at the end of the tab open the "Import Movement From the Wav File", click the button "Direct to a Property".
- As we want to test just the sensitivity, please, leave all settings "as is".
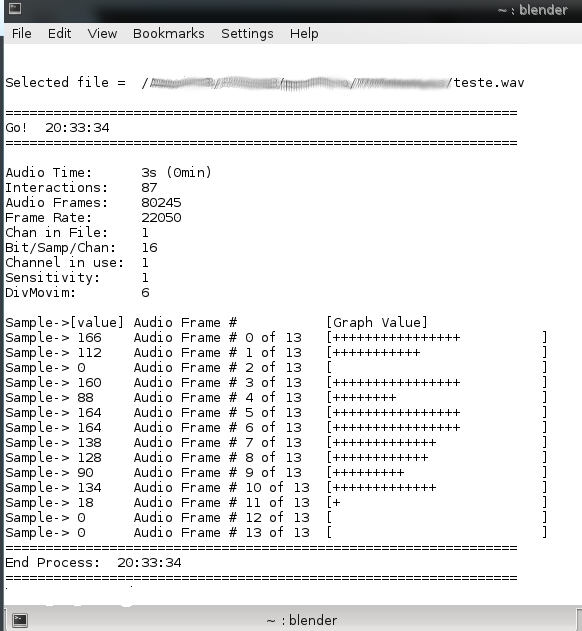
- Click the button "Process Wav", open your 16 bits sound .wav file and look at the terminal window. The next picture is a example of what you will see.
- Look at the "Graph Value". In this example, you can see that the levels (marked with *) go from 0 to something like 60% of the bar. This mean that the level is almost good, but can be better. Just to clarify, 60% of the bar means a level of 60% of 255, that is about 150, the samples are going from 0 to 150 and we want it 0 to 255.
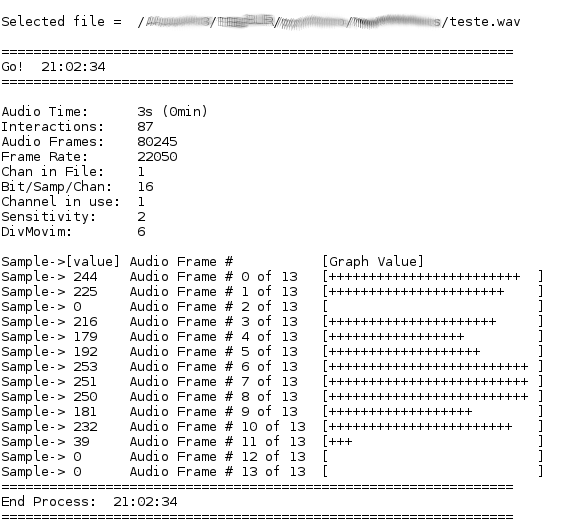
- OK, so now we will increase the sensibility to the levels go up. I just changed the "Audio Sens" to 2. Lets see what happened.
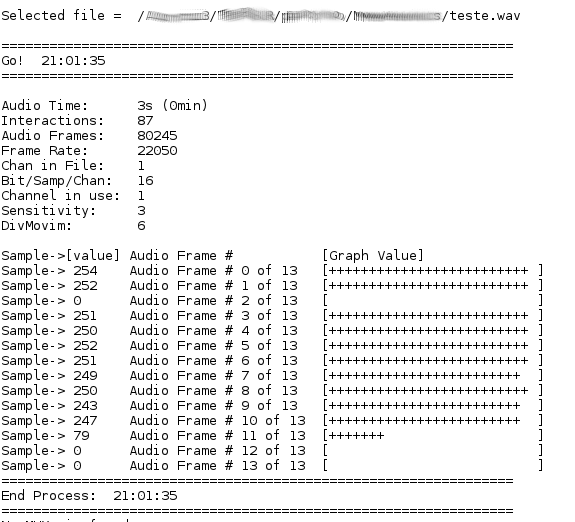
- Very good. The level of samples goes from 0 to almost 255 (almost 100% of the bar graph). But what happens if i set the "Audio Sens" to 3? Lets see it.
- Now, the samples goes from 0 to 255 but, you can see that almost all samples are in 100% (255). This will make your movement goes from 0 to 255 without values between.
In most cases, this is a problem but, you may want just use exact like this like a ball that goes up on a beat and goes down when there is no sound.
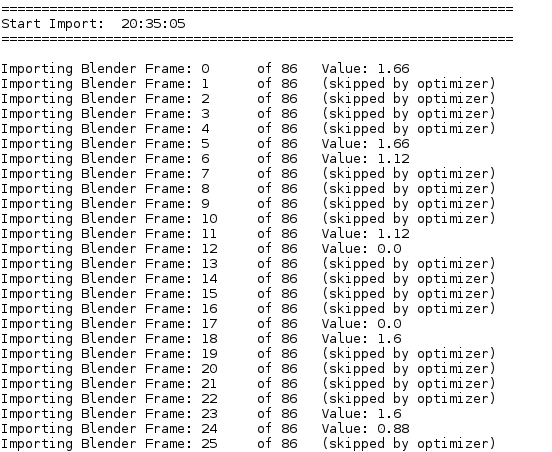
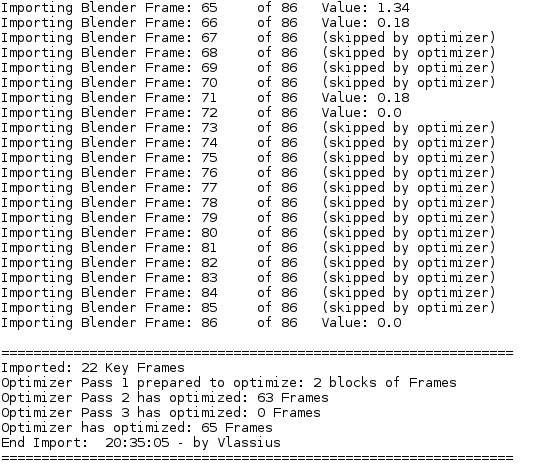
- OK then, you can choose the sensitivity to meet your needs. Now just to complete the example, the next two images are examples to the import process when you click the next button to import to Blender.
Final Message
Use your imagination, have fun!!!!!!!!!!!!!!!
.
