利用者:Riidom/SelectingBasics
Selection Basics
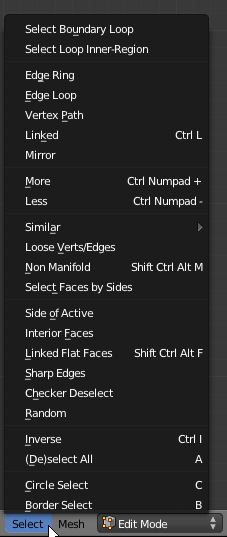
This is how the select menu looks like, when editing a mesh object, regardless of the selection mode (vert/edge/face) you are in.
In this page the basic, often used menu entries will be explained, while the more special ones will be covered on the next page, Advanced Selection.
Select Boundary Loop
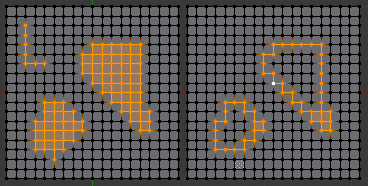
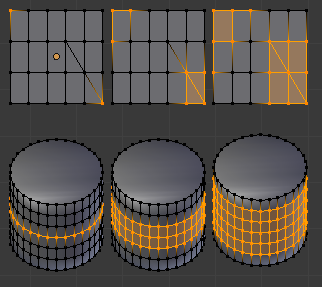
A grid before and after using Select » Select Boundary Loop. Notice that the selection does not get expanded, and what happens to one-vertex-wide selections.
Select Loop Inner Region
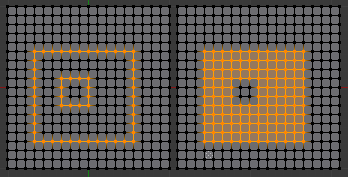
Again, left side before, right side after doing Select » Select Loop Inner-Region. This tool is meant to be used from vertex or edge select mode, using it on whole quads will lead to unpredictable selection results. From the image you can see that it deals with holes as well, if you cut the plane with just one single selected loop in two, it will pick the smaller half. Also, it does not really require loops (the selected squares in the left half of image are no loops) to work.
Edge Ring & Edge Loop
These functions are explained at Selecting Edges already.
Vertex Path
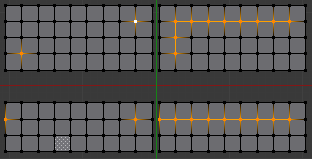
This operation requires the user to have two vertices selected, and it will select the shortest way between them. If there are different possibilities, it is not reliable, which one is chosen. In the upper example, it goes straight with only one corner, but creating any other, yet similar looking situation, could also create a path that looks closer to a diagonal line.
Linked
Mode: Edit Mode (Mesh)
Hotkey:
- L select linked part
- ⇧ ShiftL deselect linked part
Menu: Select » Linked
If there is a mesh object that consists out of several, unconnected pieces, it is possible to let Blender select only one of these parts, by pressing L while hovering over a vertex that belongs to the targeted piece. Deselecting works similar with ⇧ ShiftL. Note, that, in difference to the usual style regarding selection with and without ⇧ Shift, in this case, L always adds to the selection, while ⇧ ShiftL always deselects. This takes into account already selected parts as well.
Seams and the Face Select Mode
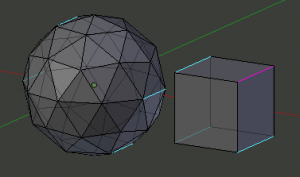
| Here we see the same mesh in face and in vertex select mode, with
1. an edge-creased quad (on top),
|
||
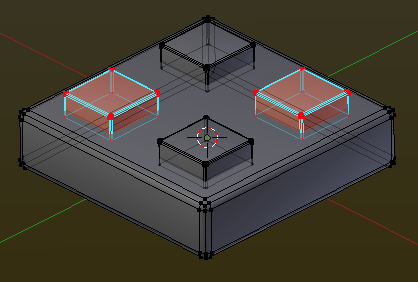
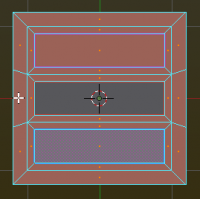
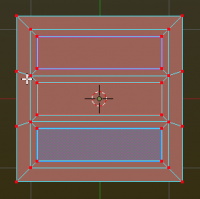
| While in Face select mode, the Linked Selection respects seams and treats them as "borders". It does not so with sharp and creased edges. Being in Vertex Select Mode (or Edge), this does not work and seams will be ignored as well. So depending on the effect you desire, make sure to be in the proper select mode before using Linked Select. | ||
-> difference L and StrgL ???
Mirror
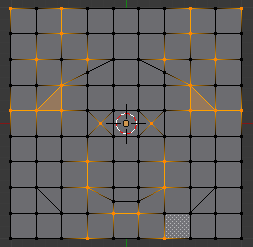
Select » Mirror mirrors the current selection along the X-Axis. It works only in Vertex Select Mode and requires a symmetrical mesh, preferably one coming from an applied Mirror-modifier or treated with Mesh » Symmetrize. Also, the object center must be on the mirror axis. It does not require a loop along the mirror axis, see example image.
There is one option available in the F6-menu (or bottom of T-Toolbar), "Extend". If unchecked, the original selection will be deselected (swapping the sides), and any vertices being selected on the middle mirror-loop (if existing), will get deselected. If checked, the original selection stays, the mirrored selection gets added and any selected middle vertices will stay selected as well.
More & Less
Mode: Edit Mode (Mesh)
Hotkey:
- Ctrl+ NumPad grow current selection
- Ctrl- NumPad shrink current selection
Menu:
- Select » More
- Select » Less
Select » More and Select » Less work pretty straight-forward. Vertices connected to a current selected vertex will get selected on Select-More. When doing Select-Less, only these vertices will stay selected, which had all their neighbours selected before.
Similar
Mode: Edit Mode (Mesh)
Hotkey: ⇧ ShiftG
Menu: Select » Similar » ...
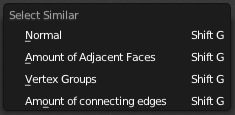
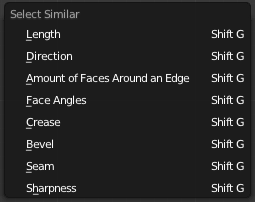
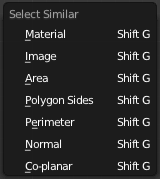
Select » Similar » ... or ⇧ ShiftG is a very powerful selection menu. The available possibilities are dependant from the current Select Mode. If several of them are activated, it will only take the last activated one into account. Like the name suggests, Select Similar requires a "base selection", to have the rest of the mesh compared against under the given user specifications described below. If the base selection consists out of several elements, that have different crucial attributes, the resulting selection will add all the results together (Example: Select Similar » Vertex » Amount of connecting edges - The Mesh has only vertices that connect to either 5 or 6 edges. Select one of the 5-pole vertices and one of the 6-pole vertices, do the Amount of connecting edges operation, and the whole mesh will be selected).
Vertex Select Mode
Normal: Selects Vertices that have the same or a similar Vertex Normal. Vertex Normals display can be activated in Properties Bar N » Mesh Display » Numerics » Normals » Vertex Icon. As additional option there is a Threshold Value, ranging from 0 (selecting only Vertices with exactly same Vertex Normal) to 1 (selecting everything). Compare (Equal, Less or Greater) has no function in Select Similar » Vertex » Normal.
Amount of Adjacent Faces: Selects vertices based upon the number of faces that share that vertex. Here, the Threshold is disfunctional, but Compare has an effect on the selection.
Vertex Groups: This works slightly different than Properties Window » "Mesh Data" Tab » "Vertex Groups" Panel » "Select" Button. If the base vertex (the one selected before doing Select Similar » Vertex » Vertex Groups) is member of several vertex groups, all vertices of all these vertex groups will be selected, while in the Mesh Data Panel there can be selected only one vertex group per click. The options Compare and Threshold have no functionality in this case.
Amount of connecting edges: Technically very similar to Amount of Adjacent Faces (see above), just that it also works, when your mesh is a wireframe without faces, just vertices connected by edges.
Edge Select Mode
Length: Selects edges based upon the length of the prior selected edge(s). Compare has an effect here as well as Threshold. Threshold is not a percentage value, but works absolute (having a 20cm-edge as base selection, a threshold of 0.04 (counting in meters here!) would select all edges with a length of 16-24cm).
Direction: Selects edges based upon the direction they point at. Compare has no effect, while Threshold at 0 only selects precise matching vectors, at 1 it selects everything.
Amount of faces around an edge: Pretty self-explanatory, Select » Non-Manifold is heavily based on this. Compare affects the result, Threshold does not.
Face Angles: Face Angles are the angle between two edges that meet in a vertex that forms a corner of a face. On a simple square quad there are four of them, each 90 degrees. With Properties Bar N » Mesh Display » Numerics » Face Angles it is possible to display values on the 3D View. Note that you have to select whole faces to get any numbers to display, while the selection feature described here only needs an edge selected to work. Compare is not taken into account for Face Angles selection, Threshold is. A Threshold value of 0.00 produces unexpectable results, probably due to precision errors, a minimum value of 0.010 is recommended.
Crease: A crease value can be put on each edge, ranging from 0 to 1. This feature grabs edges by that value, and both Compare and Threshold come to use here. There are no edges without crease for the algorithm, it assumes a value of 0 then.
Bevel: This works very similar to the Select Similar » Edge » Crease selection feature described above. The per-edge bevel weight (taken into account by the Bevel Modifier), ranges from 0 to 1 as well, and so the selection features work pretty much as for Crease.
Seam: Seam works in the simplest way possible. If a seam was selected before, it will select all seams, if an edge that is not a seam is selected, it will select all edges except the seams. Compare and Threshold are out of use in this case.
Sharpness: Marking edges as sharp works similar to declare them as seams, described above: Either they are sharp, or they are not. So, the selection by sharpness is as simple as selecting by seams.
Face Select Mode
Material: Selects faces based on the materials of the already selected faces. If the selection covers several materials, all faces who are assigned to all these previous selected materials will be selected. Compare and Threshold are without functionality here.
Image: Selects all faces that use the same UV-texture as those already selected. Again, Compare and Threshold are without functionality here.
