利用者:N t/SummerOfCode2005/Fluid Animation/Tutorial 1
Fluid Simulation - Tutorial 1 (Very Basic Introduction)
This is inteded as a really low level introduction to Blender and the El'Beem fluid simulation "module". So it should be doable even for Blender newbies :) ... This is how it should look in the end: DivX.
Important
The Blender GUI changed a bit after these tutorials were made. So if you are using a newer build please check the tutorial changes page before going on.
|
Getting Started
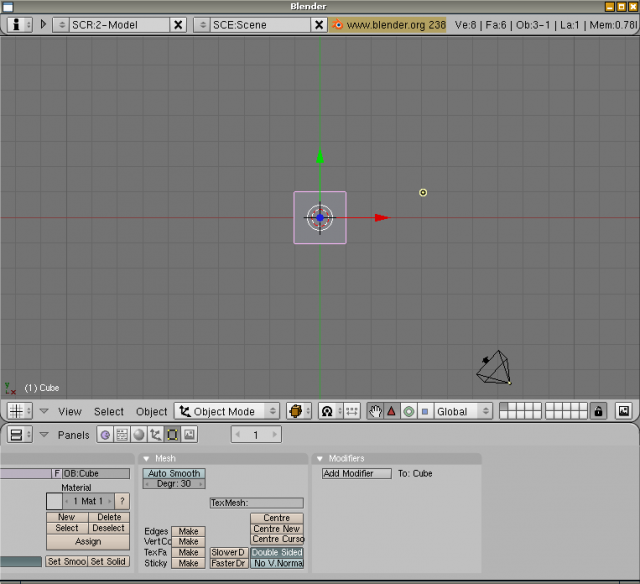
Step 1) Start Blender - you should see a windows that looks like this one... On the top is a menu with basic things like loading/saving files, the middle contains the 3D view of the scene and on the bottom is the buttons window.
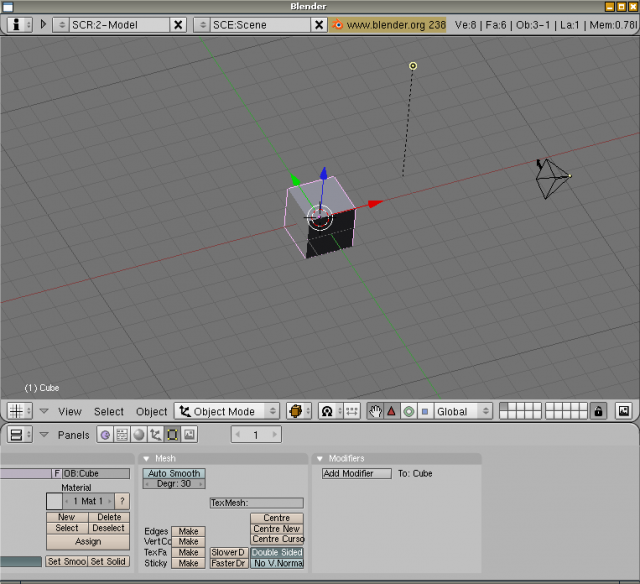
Step 2) Use the middle mouse button (MMB ![]() ) to rotate the scene and get a better view: the standard scene consists of a light (the yellow dot), a camera (the thing to the right) and a cube that is selected (it has pink edges and a manipulator is displayed with the 3 arrows). Dont click into the 3D view with the left mouse button (LMB
) to rotate the scene and get a better view: the standard scene consists of a light (the yellow dot), a camera (the thing to the right) and a cube that is selected (it has pink edges and a manipulator is displayed with the 3 arrows). Dont click into the 3D view with the left mouse button (LMB ![]() ) for now, as this will not select, but usually start performing some object manipulation function. If something strange is happening, try pressing Esc , and CtrlZ works in most cases as well to undo an unwanted change.
) for now, as this will not select, but usually start performing some object manipulation function. If something strange is happening, try pressing Esc , and CtrlZ works in most cases as well to undo an unwanted change.
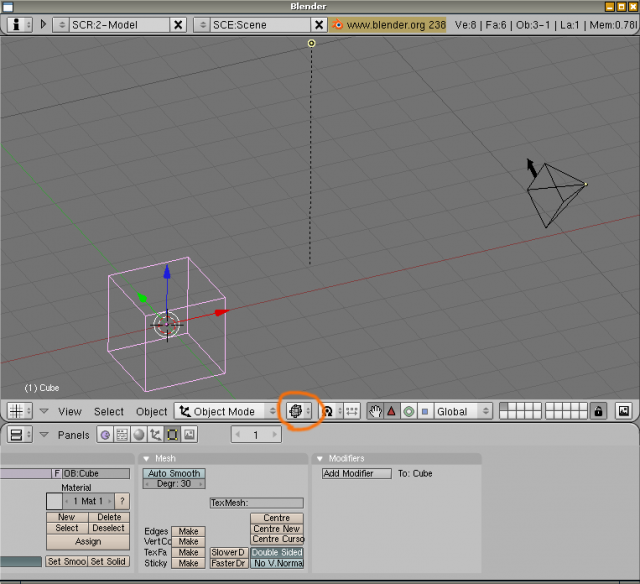
Step 3) Press the marked button and switch to a wireframe view. Use ⇧ ShiftMMB ![]() to move the view and center somewhere between the 3 objects. Use the mouse wheel or CtrlMMB
to move the view and center somewhere between the 3 objects. Use the mouse wheel or CtrlMMB ![]() to zoom into the scene, until you get a view similar to the one displayed. Make sure the cross with red-white stripes is still centered on the cube (if you didn't click somewhere into the 3D view with the left button it should be). This is where new object will be created.
to zoom into the scene, until you get a view similar to the one displayed. Make sure the cross with red-white stripes is still centered on the cube (if you didn't click somewhere into the 3D view with the left button it should be). This is where new object will be created.
Creating a Spherical Drop
Step 4) Press Space and from the menu select Add → Mesh → Icosphere as shown. You will get a small window saying Subdivision right under the cursor - don't move the mouse too far, otherwise the window will disappear not creating anything. So just click OK, then it should look like this...
http://graphics.ethz.ch/~thuereyn/download/blender/tut1ss05.png
Step 5) Here's the new sphere mesh. Blender automatically enters Edit-mode (it also says so at the bottom of the 3D view), so just press the ⇆ Tab to get to the "normal" object mode.
http://graphics.ethz.ch/~thuereyn/download/blender/tut1ss06.png
Step 6) Press the S key to enable the object scaling. Move the mouse inwards a bit until the sphere fits nicely into the box. You can press Esc or the right mouse button (RMB ![]() ) anytime to abort.
) anytime to abort.
http://graphics.ethz.ch/~thuereyn/download/blender/tut1ss07.png
Step 7) Now switch to the Object view (the marked button to the left), and select the fluid simulation tab (the one to the far right). Then click on Enable there, and select Fluid. This means (as you might have guessed) that for the simulation later on, the sphere will be completely filled with fluid.
Simulate
http://graphics.ethz.ch/~thuereyn/download/blender/tut1ss08.png
Step 8) Select the cube again, by clicking near one of its edges with RMB ![]() . It will be displayed in pink once its selected, and the buttons below will change accordingly.
. It will be displayed in pink once its selected, and the buttons below will change accordingly.
http://graphics.ethz.ch/~thuereyn/download/blender/tut1ss09.png
Step 9) The fluid simulation tab will still be displayed. Also enable fluid simulation for the cube, and select Domain. This will make several other settings show up, but you can leave all of them at the default settings for now. The domain is the region where the fluid simulation is performed - all fluid objects outside of it are ignored, and the fluid can not flow out of the domain. Currently, the bounding box of the domain object is used, no matter what it's shape really is.
http://graphics.ethz.ch/~thuereyn/download/blender/tut1ss10.png
Step 10) Before performing the simulation you might want to reduce the total number of frames in the animation. Click on the left button marked to switch to the Scene button view. Then hold one of the ⇧ Shift keys and click on the End button in the Anim tab. A red cursor will show up. Delete the 250 and enter something like 50.
http://graphics.ethz.ch/~thuereyn/download/blender/tut1ss11.png
Step 11) The cube should still be selected, so go back to Object view, and click the big BAKE button to start the simulation. Blender will freeze, but the mouse cursor will start counting to 50. This may take a few minutes, though, depending on the speed of your computer. Once simulation is done, Blender should immediatly hide the domain object, and display the first frame of the simulation. As the drop was used to place fluid in the simulation this will result in a pink drop, as shown here.
http://graphics.ethz.ch/~thuereyn/download/blender/tut1ss12.png
Step 12) Now you can play the animation by pressing AltA while the mouse is over the 3D view. The mouse cursor will start counting the frames again, and you should see the drop fall down and splash at the floor. Press Escape to stop the animation.
http://graphics.ethz.ch/~thuereyn/download/blender/tut1ss13.png
Step 13) This will put you back to frame 1. Press ↑ two times to go to frame 21 (this will be shown at the marked button).
http://graphics.ethz.ch/~thuereyn/download/blender/tut1ss14.png
Step 14) Before rendering we have to get rid of the original sphere mesh, but instead of deleting it, it's safer to just hide it in another layer. Select the sphere with the RMB ![]() , and press the M key. A window like this one will open. Click on the second rectangle from the left side in the upper row, and press OK. Only objects in layers that are enabled in 3D view are shown - you can toggle these on and off by holding a ⇧ Shift key and pressing the buttons on the bottom right side of the 3D view.
, and press the M key. A window like this one will open. Click on the second rectangle from the left side in the upper row, and press OK. Only objects in layers that are enabled in 3D view are shown - you can toggle these on and off by holding a ⇧ Shift key and pressing the buttons on the bottom right side of the 3D view.
Render
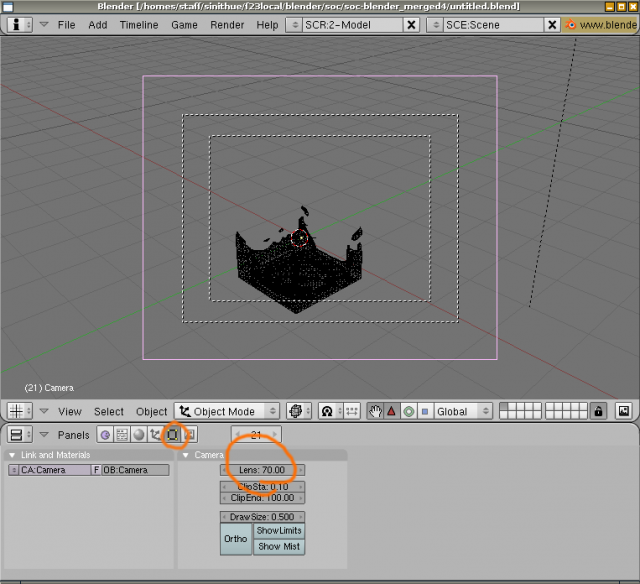
Step 15) Now move the mouse over the 3D view, and select the camera with the RMB ![]() . Press 0 NumPad. This will switch to the camera (1 NumPad,3 NumPad and 7 NumPad select front,side and top views btw). Then select the Editing buttons view, and change the Lens field to ca. 70 by ⇧ Shift-clicking it again. You should have a similar view to the one above now.
. Press 0 NumPad. This will switch to the camera (1 NumPad,3 NumPad and 7 NumPad select front,side and top views btw). Then select the Editing buttons view, and change the Lens field to ca. 70 by ⇧ Shift-clicking it again. You should have a similar view to the one above now.
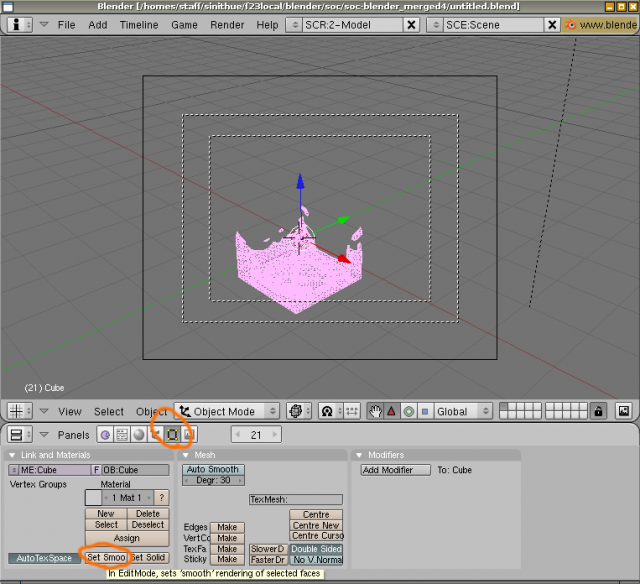
Step 16) As a last step, select the fluid surface (=the domain object) again, and select Set Smooth at the bottom. This will make the fluid surface shaded smoothly, instead of a faceted appearance.
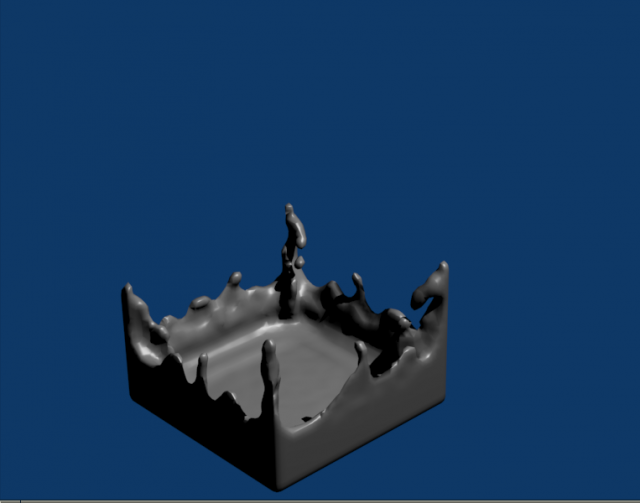
Step 17) Finally press the F12 (or go to the Scene buttons and click on RENDER), to calculate a picture of the current frame. A new window should pop up, and show a picture like this one. Whoa - a grey blob on a blue background!
The next tutorial will demonstrate how to setup a more interesting scene, and make the surface look more like a real fluid...
Back to the Fluid Simulation chapter...
