Doc:2.6/Manual/Lighting
Introduction
Lighting is a very important topic in rendering, standing equal to modeling, materials and textures. The most accurately modeled and textured scene will yield poor results without a proper lighting scheme, while a simple model can become very realistic if skillfully lit.
Viewing Restrictions
The color of an object and the lighting of your scene is affected by:
- Your ability to see different colors (partial color blindness is common).
- The medium in which you are viewing the image (e.g. an LCD panel versus printed glossy paper).
- The quality of the image (e.g. a JPEG at 0.4 compression versus 1.0).
- The environment in which you are viewing the image (e.g. a CRT monitor with glare versus in a dark room, or in a sunshiny blue room).
- Your brain’s perception of the color and intensity relative to those objects around it and the world background color, which can be changed using color manipulation techniques using Blender Composite Nodes.
Global Influences
In Blender, the elements under your control which affect lighting are:
- The color of the world ambient light.
- The use of Ambient Occlusion as a way to cast that ambient light onto the object.
- The degree to which the ambient light colors the material of the object.
- The use of Indirect lighting, where the color of one object radiates onto another.
- The render engine used (Blender Internal versus Yafray).
- The lamps in your scene.
The physics of light bouncing around in the real world is simulated by Ambient Occlusion (a world setting), buffer shadows (which approximate shadows being cast by objects), ray tracing (which traces the path of photons from a light source). Also, within Blender you can use Indirect lighting. Ray tracing, ambient occlusion, and indirect lighting are computer-intensive processes. Blender can perform much faster rendering with its internal scan line renderer, which is a very good scan line renderer indeed. This kind of rendering engine is much faster since it does not try to simulate the real behavior of light, assuming many simplifying hypotheses.
Lighting Settings
Only after the above global influences have been considered, do you start adding light from lamps in your scene. The main things under your control are the:
- Type of light used (Sun, Spot, Lamp, Hemi, etc.).
- Color of the light.
- Position of the light and its direction.
- Settings for the light, including energy and falloff.
Then you are back to how that material’s shader reacts to the light.
This chapter attempts to address the above, including how lights can work together in rigs to light your scene. In this chapter we will analyze the different type of lights in Blender and their behavior; we will discuss their strong and weak points. We also describe many lighting rigs, including the ever-popular three-point light method.
Lighting in the Workflow
In this user manual we have placed Lighting before Materials; you should set up your lighting before assigning materials to your meshes. Since the material shaders react to light, without proper lighting, the material shaders will not look right, and you will end up fighting the shader, when it is really the bad lighting that is causing you grief. All of the example images in this section do not use any material setting at all on the ball, cube or background.
Overriding Materials to Reset Lighting
If you have started down the road of assigning materials, and are now fiddling with the lighting, we suggest that you create a default, generic gray material--no Vertex Color, no Face Texture, no Shadeless, just plain old middle gray with RGB of (0.8, 0.8, 0.8). Name this “Gray”.
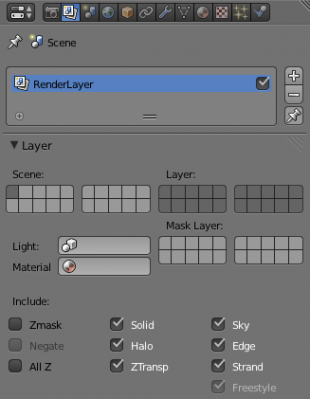
Next go to the Render context. In the Render Layers panel, select your new “Gray” material in the Material field. This will override any materials you may have set, and render everything with this color. Using this material, you can now go about adjusting the lighting. Just empty this field to get back to your original materials.
