テンプレート:Release Notes/2.43/Outliner
目次
Outliner
Complete information on this topic can be found on the Manual/The_Outliner page.
Description
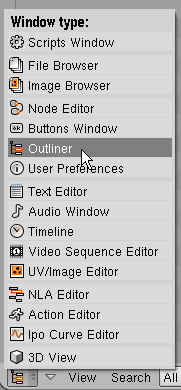
The Outliner is a Window Type, accessed by the window type menu found at the far left of the header.
In the Outliner, you can:
- View the data in the scene
- Select and deselect Objects in the scene
- Hide or show an object in the scene
- Enable or disable selection (to make an object "unselectable" in the 3D Window)
- Enable or disable the rendering of an object
- Select data like materials and textures directly (they show up automatically in the Buttons Window!)
- Delete objects from the scene
- Unlink data (equivalent to pressing the "X" button next to the name of a datablock)
- Easily select which RenderLayer to render
- Easily select which render pass to render (for example, you can choose to render just the Specular layer).
Options and Usage
Selecting and activating
- Activate the datablock with LMB
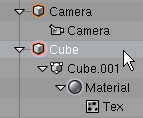
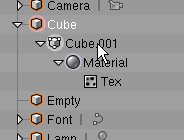
 on the icon or the name of the datablock. Activating the datablock will automatically switch to the relevant mode or Buttons context. For example, activating the mesh data of the cube will select the cube and enter Edit Mode (see right). Another example is that activating the material datablock for the cube will show the material in the Material context of the Buttons window.
- Show the context menu for a datablock with RMB
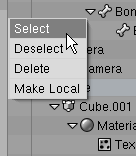
 on the icon or name. Depending on the type of datablock, you will have the following options (Note: some datablock types will not have a context menu at all):
- Select
- Deselect
- Delete
- Unlink
- Make Local
- Delete selected datablocks with X.
- Expand one level with + NumPad.
- Collapse one level with - NumPad.
- Collapse/Expand all levels with A
Toggling object-level restrictions
The following options are only available for objects:
- Toggle visibility by clicking the 'eye' icon for the object on the right-hand side of the Outliner. Useful for complex scenes when you don't want to assign the object to another layer. This will only work on visible layers - an object on an invisible layer will still be invisible regardless of what the Outliner says.
- Toggle selectability by clicking the 'arrow' icon. This is useful for if you have placed something in the scene and don't want to accidentally select it when working on something else.
- Toggle rendering by clicking the 'camera' icon. This will still keep the object in the 3D view and in the scene itself; it just won't show up in the render.
Searching
You can search the file for datablocks, either by using the Search menu in the header of the Outliner, or by using one of the following hotkeys:
- ⇧ ShiftF - Find again
- CtrlAltF - Find complete (case sensitive)
- AltF - Find complete
- CtrlF - Find (case sensitive)
- F - Find
Matching datablocks will be automatically selected.
Other notes
- Outliner now shows hierarchy for Libraries, indicating which Library files invoked loading another.
- SHIFT+F1 "Append" browser has a Library menu, allowing to directly browse into all open library files. This will prevent accidents like re-opening a same .blend via another path
- Button popups to enter strings now starts activated.
- outliner either shows for Armature the Bones, or Posechannels or Editbones, depending the mode. Was needed to make searches meaningful.
- Xkey or DEL can now be used for deleting objects in outliner. There are reasons to be a bit reluctant with extensions like this, mostly related to the fact that the outliner operations are still not completely unfinishe. We need to spend time on thinking over how it should evolve, and based on that the proper hotkeys and menus can be added as well.


