「Doc:2.6/Manual/Materials/Multiple Materials」の版間の差分
細 (1版 をインポートしました) |
|
(相違点なし)
| |
2018年6月29日 (金) 04:39時点における最新版
Multiple Materials
Normally, different colors or patterns on an object are achieved by adding textures to your materials. However, in some applications you can obtain multiple colors on an object by assigning different materials to the individual faces of the object.
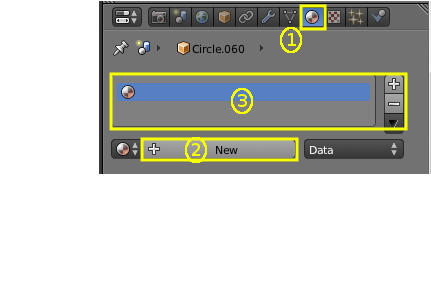
To apply several materials to different faces of the same object, you use the Material Slots options (3) in the Materials header panel.
The workflow for applying a second material to some faces of an object covered by a base material is as follows:
- In Object mode, apply the base material to the whole object (as shown in Assigning a material)
- Create/select the second material (the whole object will change to this new material).
- In the Active Material box (2), re-select the base material.
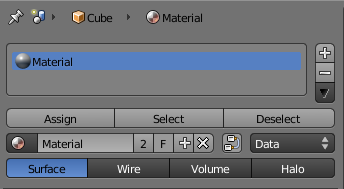
- Go to Edit Mode - Face Select (a new box appears above the Active Material box with Assign/Select/Deselect).
- Select the face/faces to be colored with the second material.
- In the Object Material Slots box (3), click the + to create a new slot, and while this is still active, click on the second material in the Available Materials list.
- Click the Assign button, and the second material will appear on the selected object faces.
- You can also make this new material a copy of an existing material by adding the data block:
Select object, get the material, (R Click) – Copy data to clipboard. When you have renamed the material, click “Data – Data” to link to the existing material. Proceed to assign faces as required. NB: If you change the material on the original object, the new object color changes too.

