「Doc:2.6/Manual/Interface」の版間の差分
(minor) |
細 (1版 をインポートしました) |
(相違点なし)
| |
2018年6月29日 (金) 03:44時点における最新版
Page status (reviewing guidelines)
Page reviewed and in good shape |
目次
Starting Blender for the first time
If you are familiar with Blender 2.4x or other 3D software such as Maya, 3ds Max or XSI, you will immediately notice that Blender is quite different from what you are used to seeing. However you will soon see similarities with your previous software, like a 3D Viewport, an Outliner and a Timeline. If this is the first time you have used any 3D software, you may be a little lost. Fortunately there's really only one rule when you want to learn 3D with Blender: don't be afraid to explore and experiment!
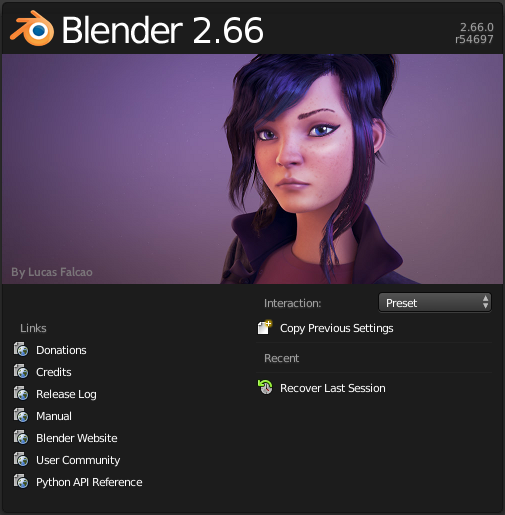
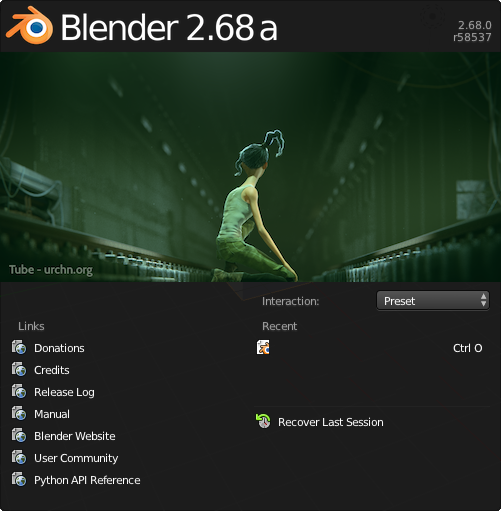
After starting Blender, take a look at the splash screen where you will see the Blender version in the top right-hand corner.
| The left side shows you some useful links like the release log of the version you are using (what's new in this version), the wiki manual (what you're reading now) and the official Blender website. These links are also accessible from the Help menu. | The right side lists recent blender files (.blend) you have saved. If you're running Blender for the first time, this part will be empty. This list is also available in File » Open Recent. The interaction menu lets you choose a keymap preset (by default, Blender or Maya) are available. |
To start using Blender, you have three options:
- Click on one of the recent files (if you have any)
- Click anywhere else on the screen (except the dark area of the splash screen) or
- Press Esc to start a new project
Save your work regularly
Blender does not warn you of any unsaved data when you exit the program, so remember to save often! If you do close Blender without saving your last actions, all is not lost. Just open Blender again and click on Recover Last Session in the Splash Screen. You also have this option in the main menu via File » Recover Last Session.
Temporary .blend file
Every time Blender exits, it saves the current data in a temporary .blend file. When you recover your last session, Blender will load the data from that file.
|
Interface concepts
Blender is developed as cross-platform software which means that its primary target is to work seamlessly in all major operating systems, including Linux, Mac OS X and Windows.(1)
Since the Blender interface is based on OpenGL, you will find that it is consistent between the major operating systems.
(1) Other operating systems are supported by third party developers through source compilation.
The 3 Rules
The Blender user interface is based on 3 main principles:
- Non Overlapping: The UI permits you to view all relevant options and tools at a glance without pushing or dragging windows around(2).
- Non Blocking: Tools and interface options do not block the user from any other parts of Blender. Blender doesn't pop up requesters that require the user to fill in data before things execute.
- Non Modal: User input should remain as consistent and predictable as possible without changing commonly used methods (mouse, keyboard) on the fly.
(2)However, Blender 2.5 permits multiple windows for multi-screen setup. It is an exception to the Non overlapping rule.
Powerful interface
Blender's interface is drawn entirely in OpenGL which allows you to customize your interface to suit your needs. Windows and other interface elements can be panned, zoomed and their content moved around. Once your screen is organized exactly to your taste for each specialized task it can then be named and saved.
Blender also makes heavy use of keyboard shortcuts to speed up your work. The keymaps can be edited to make memorizing them easier.
Overview
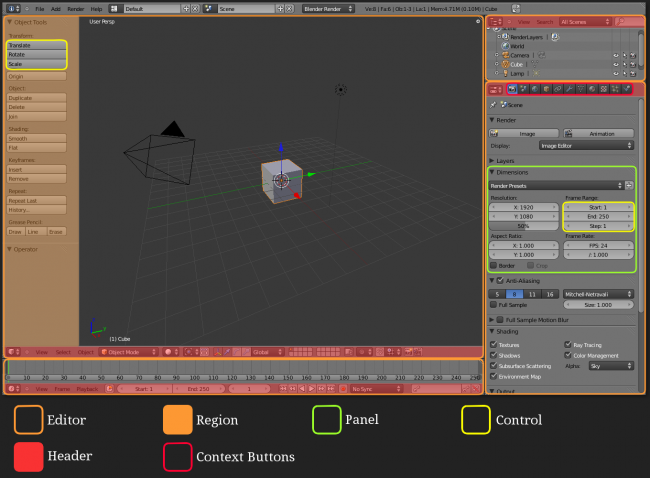
Let's have a look at the default interface. It is composed of Editors, Headers, Context buttons, Regions, Panels and Controls.
- In Blender, we call an Editor the parts of the software which have a specific function (3D view, Properties Editor, Video Sequence Editor, Nodes Editor...). Each editor has its own Header at the top or bottom.
- Context buttons give access to options. They are like tabs and are often placed on an editor header (like Properties Editor).
- For each editor, options are grouped in Panels to logically organize the interface (Shadow panel, Color panel, Dimensions panel...).
- Regions are included in some editors. In that case, panels and controls are grouped there. For workspace optimization, it is possible to temporarily hide regions with the hotkeys T and N for the Toolbar and Properties Region respectively.
- Panels contain Controls. These can let you modify a function, an option, or a value. In Blender, there are several types of controls:
- Buttons: Permit access to a tool (Translate, Rotate, Insert Keyframe). These tools usually have a keyboard shortcut to speed up your work. To display the shortcut, just hover your mouse over a button to see the tooltip.
- Checkboxes: Permit enabling or disabling of an option. This control can only contain a boolean value (True/False, 1/0).
- Sliders: Allows you to enter floating values. These can be limited (e.g. from 0.0 to 100.0) or not (e.g. from -∞ to +∞). Notice that two types of sliders exist in Blender.
- Menus: Permits a value to be chosen from a list. The difference between this and a Checkbox is that values are named and there can be more than two values on these menus.
Read more about buttons and controls »


