「Extensions:2.6/Py/Scripts/3D interaction/Sun Position」の版間の差分
細 (1版 をインポートしました) |
|
(相違点なし)
| |
2018年6月29日 (金) 05:44時点における最新版
| UI location | Group: World panel | ||
|---|---|---|---|
| Version | 3.0.1 | Author(s) | Xaire |
| Blender | 2.65 r#53207 | License | GPL |
| Category | 3D View | ||
| File name | |
|---|---|
| Current version download | https://developer.blender.org/F20492 |
| Python modules | sun_position |
| Links | http://blenderartists.org/forum/showthread.php?245406-New-addon-Very-realistic-sun-studies-for-architects. |
|---|
目次
Introduction
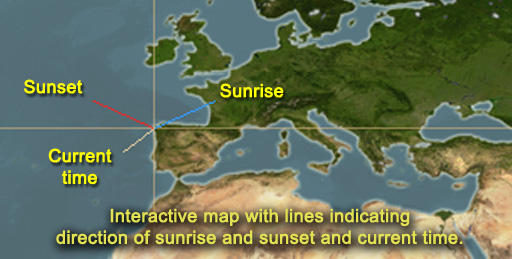
The sun position widget can be used for creating sun animations as well as for just studying the sun position for given locations and times as a singular object or multiple objects on the ecliptic or as an analemma.
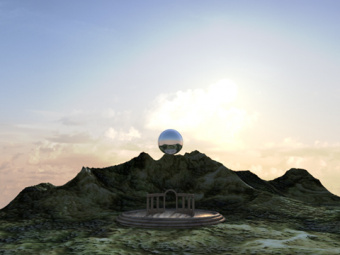
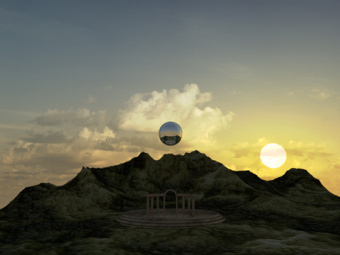
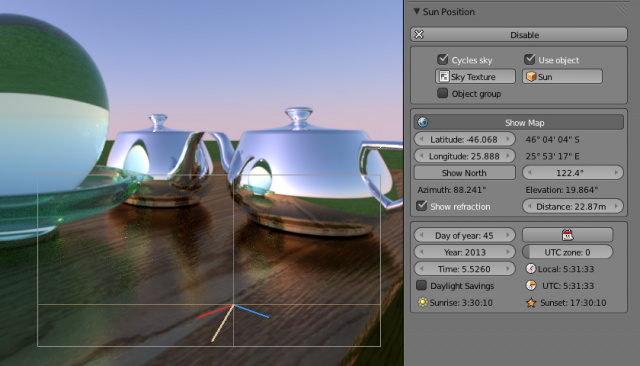
- Sun animation • Created using Cycles.
Installation
- These scripts are in modular form stored in its own directory named sun_position. Prior to installation, make sure to uninstall any previous version of Sun Position and remove it from the Blender ...\scripts\addons folder.
- You can install the Sun panel in one of two ways:
- Either unzip the sun_position.zip file and place the sun_position folder in the Blender ...\scripts\addons folder.
- Or, open Blender and click on File » User Preferences » Addons. Next click on Install Addon located at the bottom of the Preferences panel, locate the zip file and select it and click on Install Addon.
- Check 3D View: Sun Position and close the window or press Save as Default.
- The Sun panel will be available in the World panel.
Instructions
| Enable and preference buttons. |
- In the Properties window header, click on the World context button and press Enable button in the Sun Position panel. For more information on any panel field, just hover the mouse over it.
Preferences
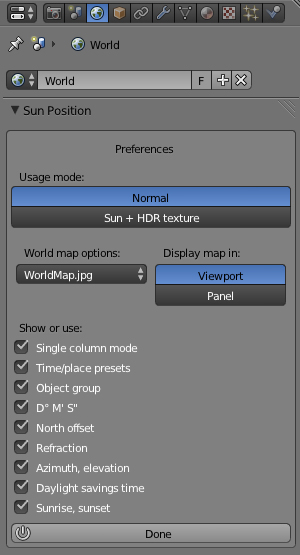
An inline preference panel allows you to tailor the Sun panel to your needs. There are two modes available:
- Normal: This sets up a the panel for using world coordinates.
- Sun+HDR texture: Sets up the panel for simply binding the sun to an environment texture (i.e. HDR, EXR, etc). Once bounded, both can be rotated at the same time on the Z axis.
Those who just want to do simple rendering without caring about azimuth, north offset, etc., can select a minimal configuration while those wanting to do ecliptic studies or observe sun movement more in-depth can choose other options. If you would like your preferences to appear in your default Blender scene, do the following:
- Set the preferences you want.
- Next, disable the Sun panel by clicking on Disable.
- Now save the file as the default by pressing CtrlU or click on the File menu and select Save User Settings.
| Selecting an option determines whether the item is displayed in the Sun panel. |
Note on Map images
If you have a low-end graphics card, you may find that the higher resolution maps may not load or may respond slowly. In that case, try one of the supplied lower resolution maps. All the images are jpg. Also, two of the highest resolution maps have been removed as of version 2.05 to make for a smaller sized addon. Hopefully no one will find this inconvenient.
|
Normal Mode
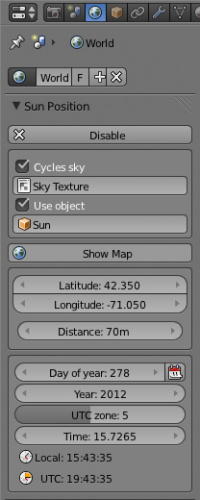
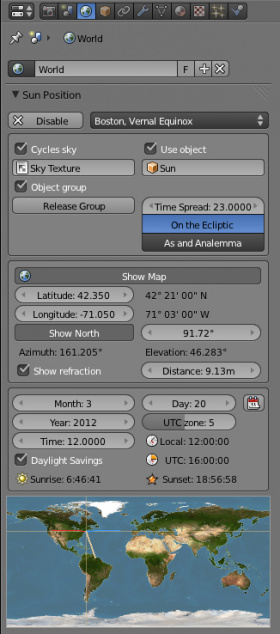
| Single column mode with a minimal number of options selected. | Two column mode showing all possible options selected. |
| Note: If north offset, refraction or daylight savings time have been set in the Sun panel, sun objects will be placed based on those settings even if these options are later hidden by your preference selection. | When comparing azimuth and solar elevation with NOAA's solar calculator located at http://www.esrl.noaa.gov/gmd/grad/solcalc/, the "Show Refraction" box should be selected from within the Sun panel, for the most accurate reading. Refraction is most notable at dawn and dusk. |
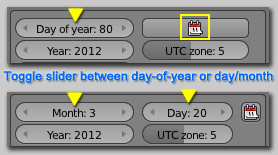
| Toggle to the Day-of-Year slider or Month-Day. Day-of-Year allows for smooth action of objects spanning the year without needing to stop after each month. |
Note on Time Zone
The UTC zone slider specifies the time difference from Zero longitude in hours. The widget automatically determines whether the value is positive or negative based on longitude. If you notice the sun object jump as you cross zero longitude using the map or slider, this is because of the time zone value flipping and moving the sun relative to the number of hours specified. If you are using the map or sliders just as a way to smoothly move the sun, then keep the UTC zone slider at zero.
|
Sun+HDR Texture Mode
|
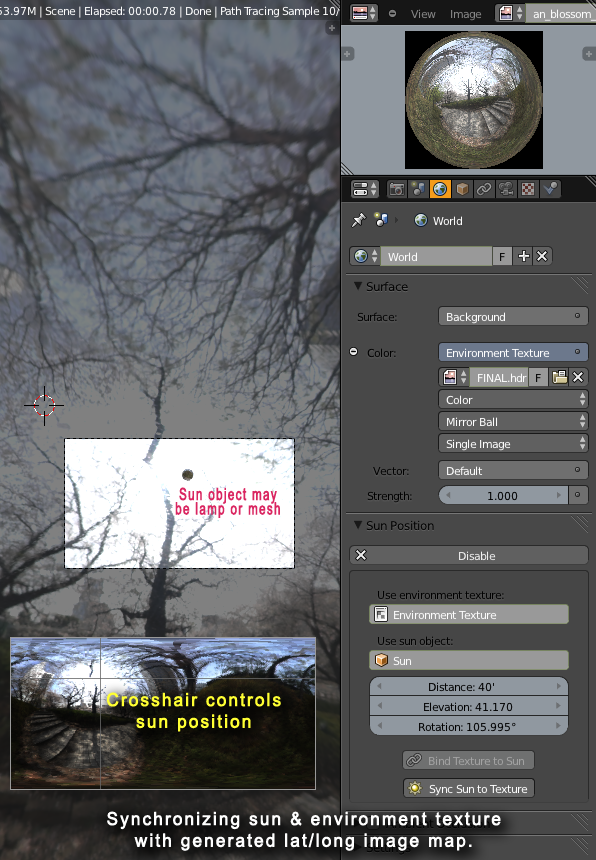
| Image showing panel when binding sun to an environment texture. This mode only works when rendering in Cycles. |
To use this mode in Cycles, go to the sun widget's inline preference panel and:
- Select Sun + HDR texture then press Done and then enable the Sun panel.
In the Surface section of the World panel make sure that nodes are enabled, then:
- Under Color, select Environment Texture
- Click on Open and select the image you want to use.
- Set the projection type to Equilateral or Mirror Ball.
In the Sun panel:
- Select the Environment Texture and Sun object to be used.
- Click on Sync Sun to Texture. An image of the environment texture will appear in the viewport. A few seconds may be needed for Mirror Ball projections to be converted.
- Use LMB
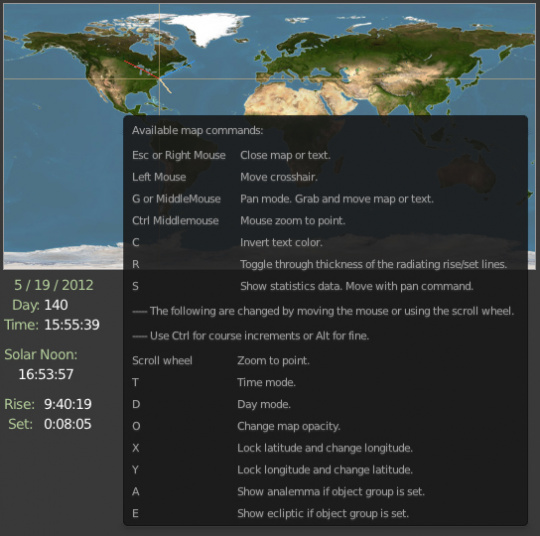
 to place the crosshair over the sun location within the image. You can zoom and move the image as with the World map in Normal mode. Press F1 or H for help.
 - Click RMB
 when finished.
The sun and texture are now bound together. Changing the values in the Rotation slider will rotate both sun and texture along the Z axis. If you press Release binding, the Rotation slider will only move the sun. You may want to do this for tweaking the position of the sun without using the lat/long image. The Elevation slider will move the sun higher or lower. When satisfied, press Bind Texture to Sun to rebind them.
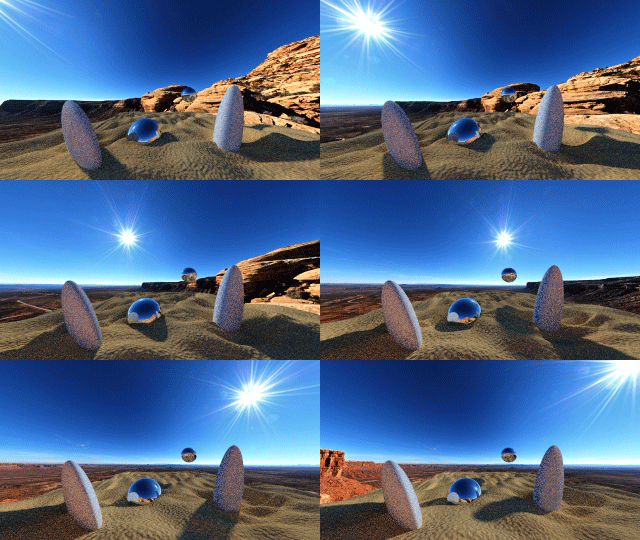
| Example of using the Sun+HDR mode where a sun lamp is bound to an environment texture. Both are rotated together using a rotation slider. |
Map Help
|
| The help screen for the map is accessed by pressing F1 or H while the mouse is hovering over the map. |
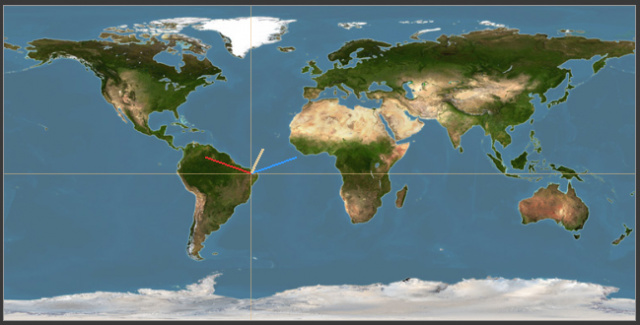
| One of the map image options is Textureless. In addition to freeing up GPU space, this selection allows you to tweak the sun position within Cycles or the native renderer without blocking your view or caring about geographic location. This clear mode of working is also available when using a map texture by pressing 'O', then moving the mouse and or scroll wheel to reduce the opacity. However, one difference between using Textureless or a map image is how North Offset is effected. The offset has no effect on the sun direction indicator when an image is used but will effect it in Textureless mode. Why so? Well, on the map, north is north whereas in textureless mode, who can tell? |
Sun positioning methods:
- I. Using a sky texture in Cycles
- II. Using a named object
- III. Using selected objects
- IV. Mixing options
I. Using a sky texture in Cycles
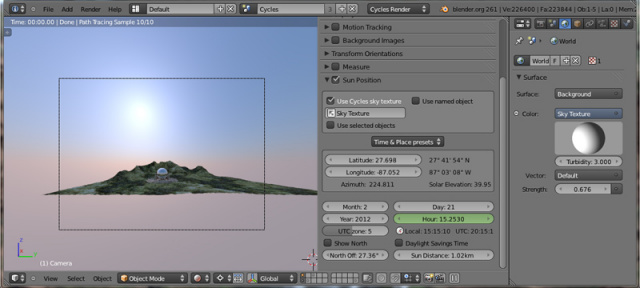
- In the Info header, set Cycles as the render engine. (The image below shows the entire setup)
- In the Properties header, click on the button for the World panel.
- In the World panel, enable nodes if not already enabled.
- Once enabled, choose "Sky Texture" from the color menu or attach a sky texture node in the node editor for the world shader.
- In the Sun panel, enable "Cycles sky" and select the name of the texture from the drop down menu. The default name is "Sky Texture." The menu only appears if the World panel nodes are enabled.
- At this point, looking through Blender’s camera in the 3D viewport, choose "Rendered" from the Viewport Shading menu. Location and time sliders can now be changed to view changes in real-time in Cycles. The sky texture's sun will be set in the proper position for the given time and location. For well defined shadows, add a sun lamp to the scene and set its size to about .02 (found within the Lamp properties panel.) The higher the value, the softer the shadow. Be sure to check both "Cycles sky" and "Use object" (giving the name of the sun lamp) so that both remain in sync.
- To create an animation:
- In the Timeline panel, set the starting frame.
- In the Sun panel, move the time slider to position the sun for the start of the animation and insert a keyframe by hovering the mouse over the time field and pressing I. The field color should change indicating that the keyframe was set.
- In the Timeline panel, set the ending frame.
- In theSun panel, move the time slider to position the sun for the ending frame. Hover the mouse over the time field and press I.
- With Cycles set and currently rendering in the 3D viewport, you should now be able to move the Timeline bar and watch the sun movement from beginning to end. This is the sequence which will occur when you render the final animation.
|
| TheSun panel using just the sky texture in Cycles. The World panel is on the right showing color set as Sky Texture. |
II. Using a named object
|
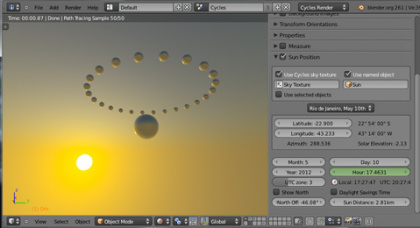
| Image showing combination of sky texture and mesh emitter |
- Enable the option "Use object." It will try to default to "Sun" even if it doesn't exist. For a different object, click on the entry field and choose from the menu or enter the name you would like to use as the sun (lamp or mesh).
- When the Sun panel's values are changed, the object will be positioned accordingly at the specified distance. If you don't see it, bring it closer with the Distance slider or make sure that the value of the End field of the scene's clipping distance (located in the View panel ) is greater than the sun distance.
- If you want correct shadows, the named object should be a sun lamp. The sun direction will automatically be set and will point to the convergence of the XYZ axes. You could create special effects by using multiple sun lamps of different colors set apart using the Time Spread slider for the ecliptic.
- For a Cycles animation, you could also do a blend of the sky texture and a sphere chosen as a sun object that has an emitting material as in the image above.
III. Using an object group
|
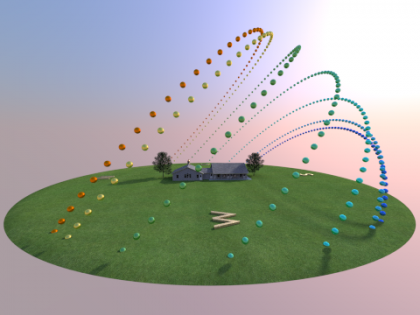
| Ecliptic range from the winter to summer solstice. |
- Positioning multiple objects is meant as a help for architects or anyone interested in observing the ecliptic and analemma for given times and locations. The analemma will let you see in one fell swoop the range of solar elevations at a particular time of day throughout the year.
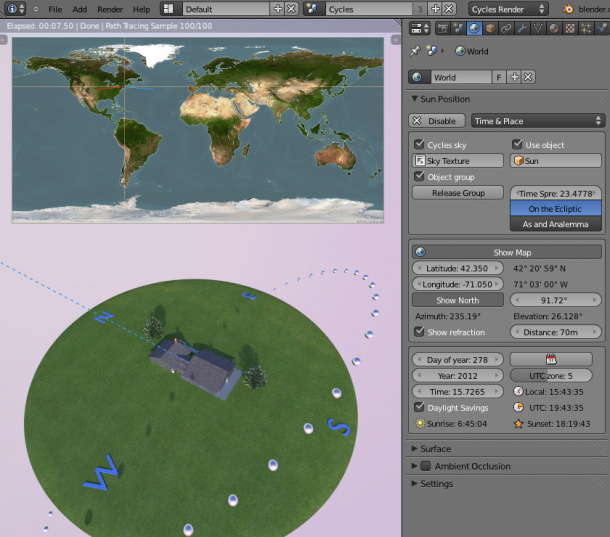
- Enable the option "Object group" in order to place the currently selected lamps or meshes on the ecliptic or as an analemma.
- Next, press Set Object Group. All of the objects that where currently selected will be remembered as the object group and are de-highlighted. These groups are only remembered for the current Blender session. To create a new group or add to the group, press Release Group, make your selections and press Set Object Group.
- For the ecliptic, objects are distributed within the time frame specified by the Time Spread slider.
- Objects are evenly distributed on the analemma. If you use theDay-of-Year slider while viewing the analemma, you can watch the direction the sun moves based on the day.
IV. Mixing options
Any mixture of options I, II and III can be used.
|
| Object group on the ecliptic with map in the viewport. |
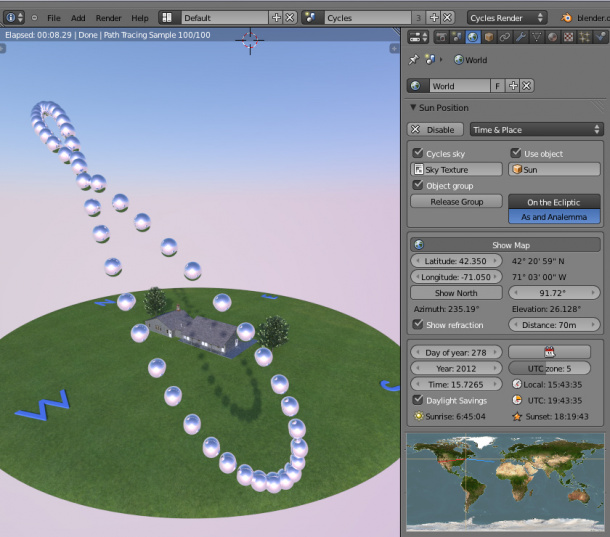
|
| Object group as an analemma with map floating free in the panel. |
Additional Info
- We gratefully acknowledge both NASA and the NOAA for their work and the liberal usage policy of their products.
- The world map images have been composited from two NASA images.
- The sun positioning algorithms are based on the National Oceanic and Atmospheric Administration's (NOAA) Solar Position Calculator which rely on calculations of Jean Meeus' book "Astronomical Algorithms."
- Azimuth and solar elevation are provided in degrees and can be used in conjunction with time and place coordinates to verify the accuracy of this widget with web based solar calculators such as the one provided by the National Oceanic and Atmospheric Administration at http://www.esrl.noaa.gov/gmd/grad/solcalc/. For the greatest accuracy in matching these values, make sure the Show Refraction option is set. Of course the accuracy of results provided in the Sun panel can be no greater than that which NOAA has stated for their solar calculator.
- The default direction for North is Blender's Y+ axis. A North offset value is provided so that North can be set in relationship to your model. When used, it will be in degrees or radians based on the Units setting in Blender's Scene panel. The Show North option will keep a compass needle pointing north in the 3D viewport.
- The decimal values for latitude and longitude can be plugged into Google Earth's "Fly to" field to look up the location. Values are entered as (latitude,longitude). For example,[ 47.398, -2.687 ] will take you to ( 47° 23' 55" N ) by ( 2° 41' 13" W ).
- Back to Extensions:2.6/Py/Scripts
