「利用者:Axelmening」の版間の差分
(→11. UV Tools (not finished yet)) |
細 (1版 をインポートしました) |
(相違点なし)
| |
2018年6月29日 (金) 06:08時点における最新版
sorry for my English, I use translator
My profile on blenderartists.org
目次
- 1 1. Fast switching between vertices, edges and polygons in edit mode
- 2 2.Multiple Loop Subdivide
- 3 3. UV. Pack Islands. Smarter algorithm for more compact packing
- 4 4. Quick Navigation & Transformation
- 5 5. Cycles. Material to override exclusion
- 6 6. Bevel modifier
- 7 7. Miror modifier
- 8 8. Viewport Statistics
- 9 9. Outliner, Object Layer Manager and more
- 10 10. Import/Export Settings. File Format (not finished yet)
- 11 11. UV Tools (not finished yet)
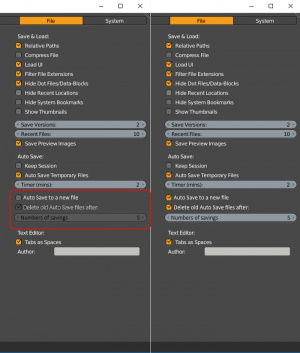
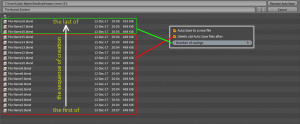
- 12 12. Auto Save to a new file
1. Fast switching between vertices, edges and polygons in edit mode
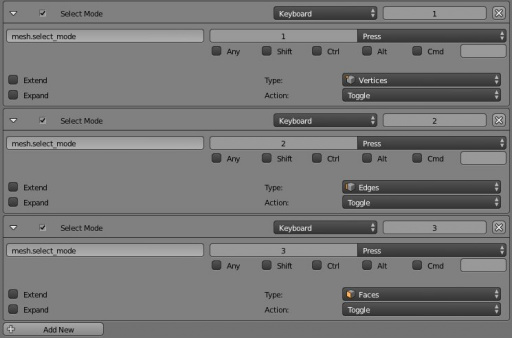
By default, to switch between the vertices, edges and polygons, you press Ctrl + Tab and in the dropdown menu select the desired option by clicking LMB or pressing 1,2,3.
I suggest replacing the hotkeys like this: 1 - vertices 2 - edges 3 - polygons. To select more than you need to press Shift +1,2,3. For example, I'm in the vertices mode. I press Shift +2 - editing vertices and edges, Shift +3 - editing vertices and polygons, Shift +2 +3 - edit vertices, edges and polygons.
You can select (Shift+1+2+3) and deselest (Shift+1+2+3) additional desired mod.
Of course this can also be done by clicking on icon with pressed Shift.
Example of creating (without Shift selection):
Good: - Fast switching between vertices, edges and polygons
Bad: - Can not switch between layers in editing mode, you need to change the hotkeys. But I think if you're in edit mode, editing is the primary task.
2.Multiple Loop Subdivide
Multiple Loop Subdivide
Let's look at how it works standard Loop Subdivide.
1. Press Ctrl + R
2. Move the cursor to the edges. Ghost Loop sticks to 50% of the center edge.
3. Click LMB to activate Loop Subdivide and slide over the edges.
4. Choose a location and click LMB to position the Loop Subdivide.
To create another Loop Subdivide, you need to repeat these step by step. What if we need to do 10 or 20 Subdivideb Loop?
Proposal. Multiple Loop Subdivide
How it should work
1. Press hotkey (maybe Ctrl + Shift + R)
2. Move the cursor to the edges. Ghost Loop stick directly to the cursor, not the mid-50% edge, and already slides along the edges. This will immediately put a loop where the cursor is located.
3. Press LMB for positioning Loop Subdivide.
4. Tool does not stop working. Repeat steps 2 and 3. MMB rotate the model and place loops, without interrupting tool works. 5. To stop the tool, press RMB or Estsape.
Example video http://www.youtube.com/watch?v=i2YLNVkSPOs
Wheel or + NumPad / - Numpad to control the number of loops.
You can choose what to use, the default Loop Subdivide (Ctrl + R) or Multi Loop Subdivide (Ctrl + Shift + R)
I think it's faster and more convenient for placing a plurality of loops.
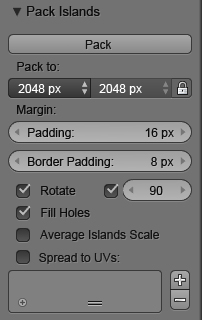
3. UV. Pack Islands. Smarter algorithm for more compact packing
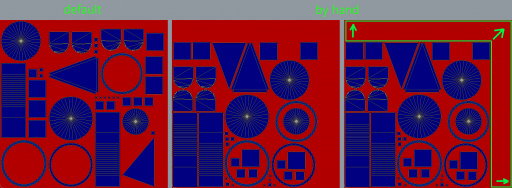
Blender UVs packing algorithm is not perfect, a lot of empty space, holes are not closed.
simple example:
We need better UVs packing algorithm with filling holes and compact packing
Is it possible to make the package more smart to better packaging? I think the machine (PC) handle this better and faster than a human.
Let the automatic packing lasts 5-10 minutes, it is still faster than manual packaging and save my energy))
Several principles of packaging:
Also we need more tools:
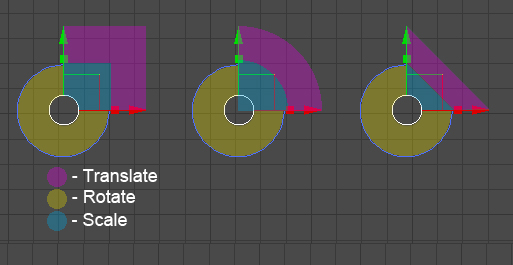
- Manipulators (Move, Rotete, Scale)
Press G + Y, or G + MMB, this is slower than hold and drag manipulator axis
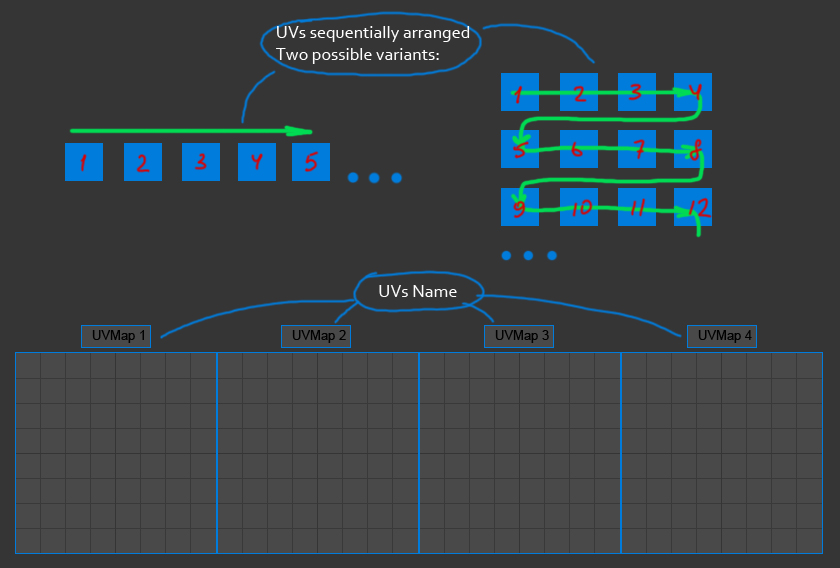
- Display several UVs on one canvas
in the N or T-panel choose amount UVs
- Packing Options
Visible - restrict viewport visibility for the object types.
Example. If you choose only the Mesh Type, in the viewport will be visible only mesh objects, other types of objects will not be visible.
Selected - restrict viewport selection for object types.
Example. If you choose only the Curve type of object, in the viewport will be select only Curves, other types of objects will not be selected.
In the popup menu:
You can select or deselect the types of objects by clicking LMB on the check box.
Press A to select all and deselect all object types.
Press Ctrl + LMB click to select one type of object and deselect all others.
Alt + scroll to select one of the types of objects without unfolding window object types.
You can combine Visible and Selected Restrict for faster navigation in the viewport, and easier manipulation of objects in a complex and difficult scenes.
Quick Transformation
The same as Transformation, Rotation, Scale in N-panel.
Needed if you want to make the transformation to a specific size.
To switch between Transformation, Rotation, Scale chooses a manipulator (without Shift + click to select multiple)
.![]()
Move your cursor to the x, y, z value and press Alt + RMB - Reset Single to default value (Transform and Rotate to 0, Scale to 1)
Move your cursor to the x, y, z value and press RMB and choose:
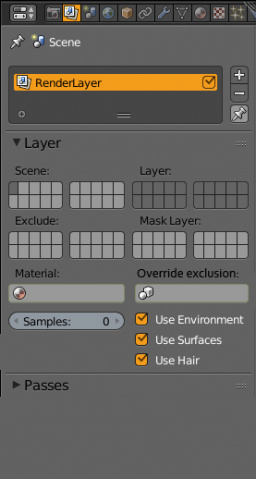
5. Cycles. Material to override exclusion
Select the objects that retain their materials
Create a group.
Select a group in the "Override exclusion:".
This group of objects will not change their materials. For example Emission shader for lighting.
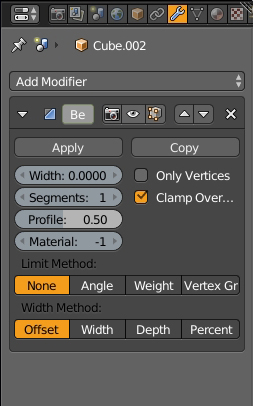
6. Bevel modifier
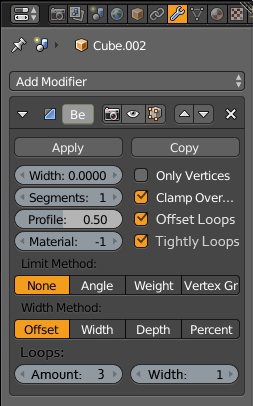
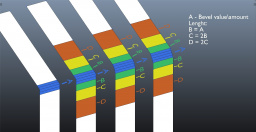
If Bevel modifier will have a loops around the the bevel
Ofset loops - enable loops
Amount - Number of loops
http://wiki.blender.org/uploads/3/31/Bevelmodif06.gif
Width - default =1.
wight change
http://wiki.blender.org/uploads/4/42/Bevelmodif08.gif
tightly loops - automatic reduction of the number of loops if they do not have enough space
http://wiki.blender.org/uploads/6/62/Bevelmodif09.gif
change bevel wight with enabled Ofset loops
http://wiki.blender.org/uploads/f/f3/Bevelmodif07.gif
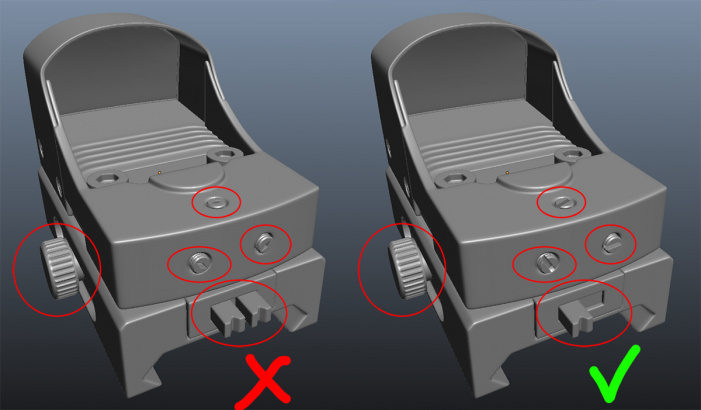
why I suggested it in modifier? To quickly create a procedural HardSurface.
1. you can quickly change the value of Bevel, or completely remove it
2. Only Bevel is not always enough, sometimes it needs additional loop.
7. Miror modifier
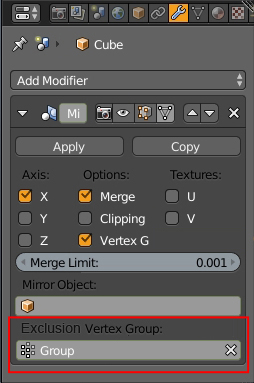
It would be very comfortable if add mirror modifier and not all of the geometry will be mirrored. I propose to add to the Mirror modifier exception vertex group. These vertices will not be mirrored.
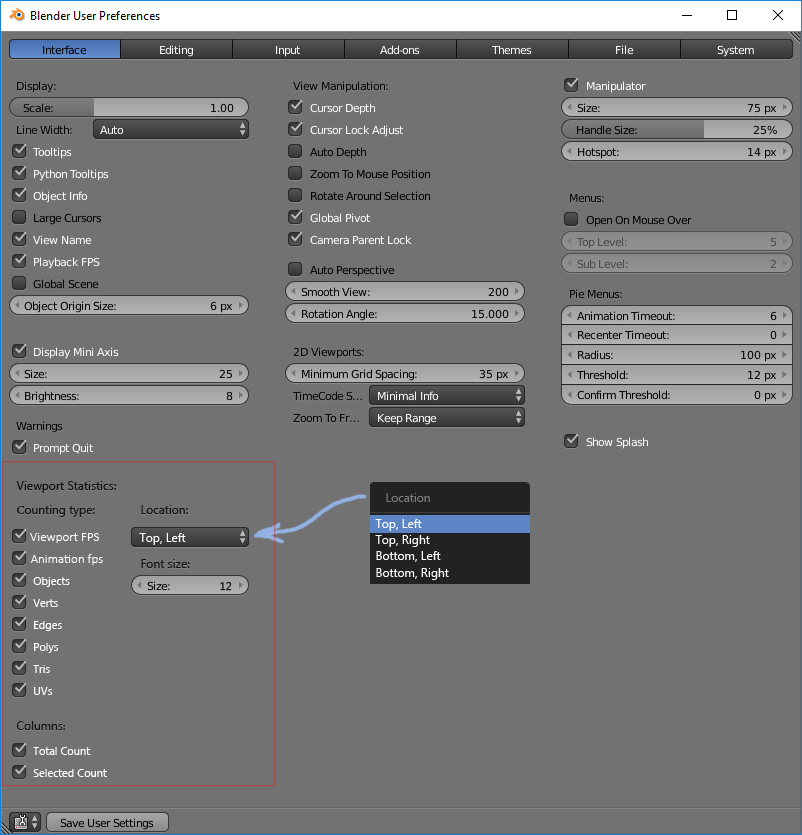
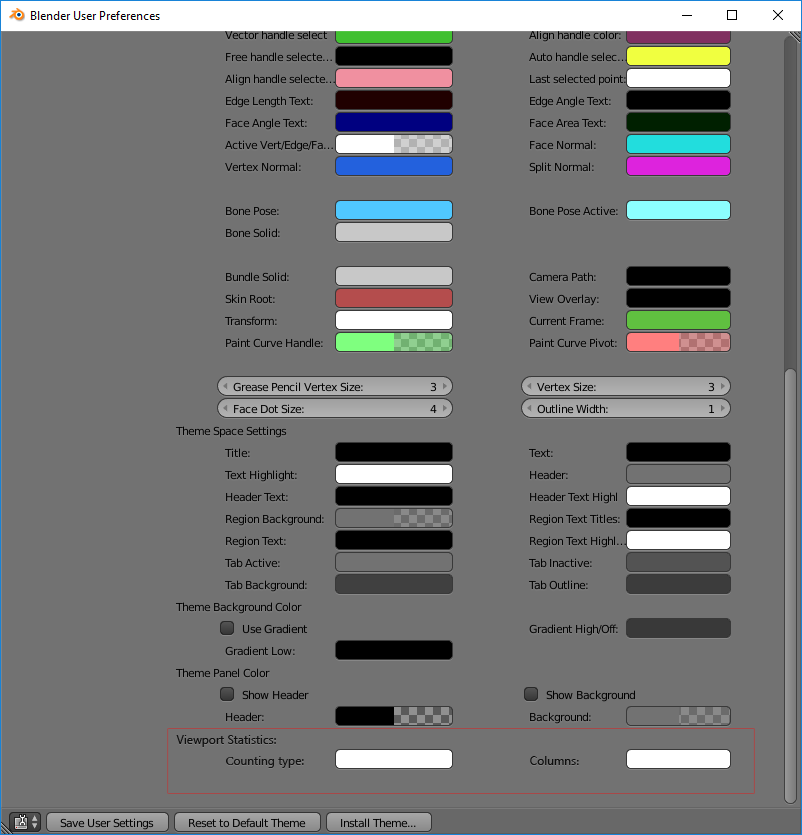
8. Viewport Statistics
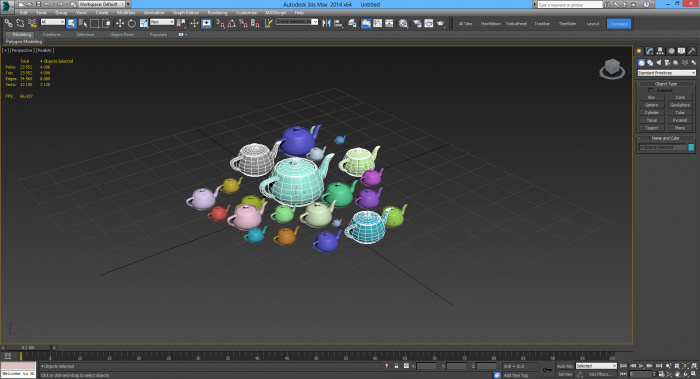
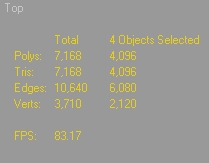
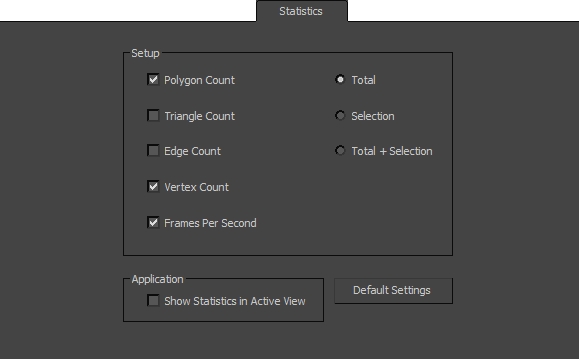
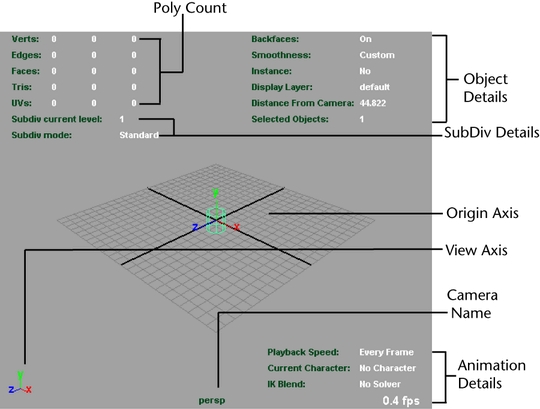
3ds max and Maya, and other 3d software hawe powerful viewport statistics. This is: vertices, edges, polygons, triangles, frames per second, UVs, etc. And the main feature of this is show polycount for the whole scene, and for the selected objects separately. it's good for the game development, when you need to know only one or several objects polycount.
This is a very powerful tool, it is very easy to use, easily customizable, and shows all the necessary information in one place
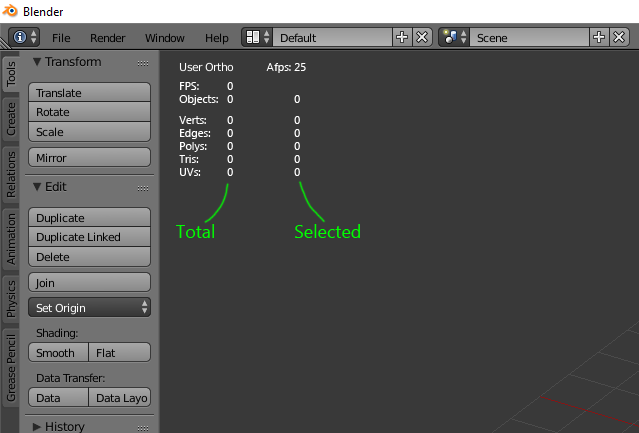
Concept:
FPS: - Viewport Frames Per Second
fps: - Animation Frames Per Second
Objects - Total in scen and Selected count of objecs
UVs - Number of UVs vertices
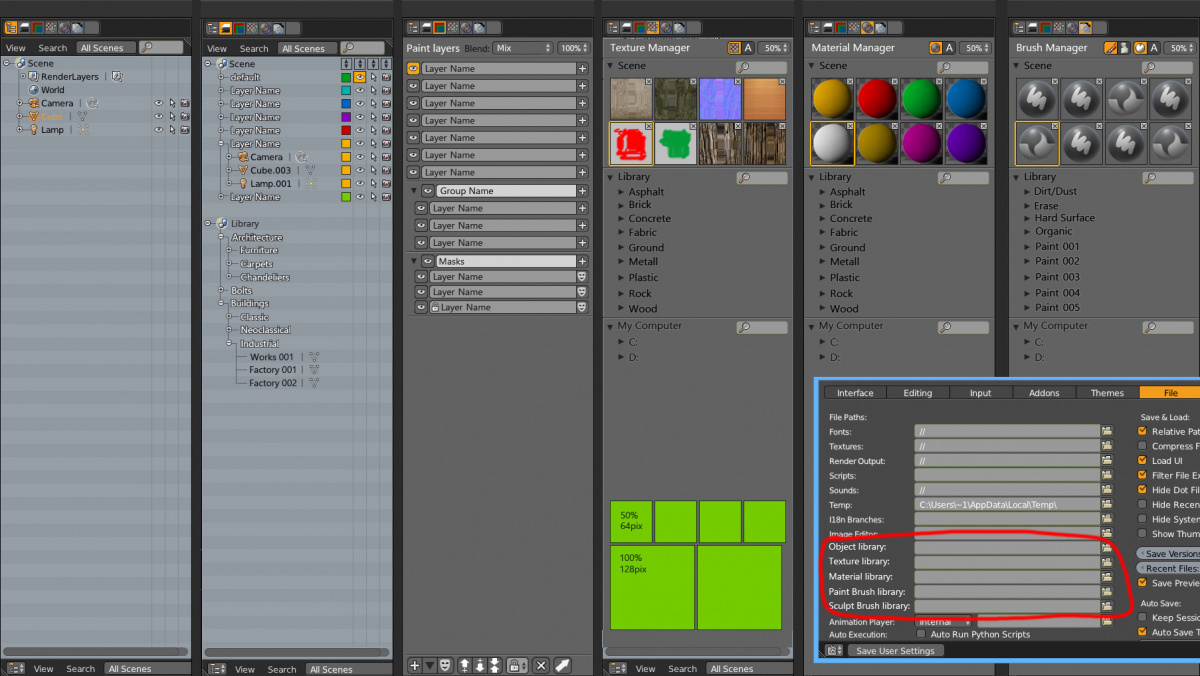
9. Outliner, Object Layer Manager and more
This unites himself:
- Outliner + Object layer manager
- Paint layer manager
- Texture, Video, Audio manager
- Material manager
- and Brush (paint/sculpt) manager
The main purpose of this tool: 1. More visual and fast control with objects, textures, sequences, video and audio files, materials, brushes. 2. Quick save and load them from the library (drag and drop).
"Manager" will be located in the panels , which will be opened in parallel Properties panel or on-site N-panel ( other hotkeys ) .
While it is only a sketch, based on a my personal feelings. If you make suggestions, I'll try to make them in the sketch.
Object Layer Manager - layers for the objects in the scene . There is the idea to make a connection to the library models collected on HDD. Paint Layer Manager - creating and working with layers for Texture paint. Save it in another format with or without preserving the layers . Texture Manager - more visual and easy to work with textures , quick search for them , loading and saving. Сataloging and management of rendering images. Maybe cataloging video, fast navigation and loading of the scene. Material Manager - work with the materials in the scene , saving and loading of your own library materials. Brush Manager - separate brush to paint and sculpt . Saving and loading new brushes from the library. Script manager? - cataloging scripts and text files, fast navigation and loading of the scene and saving to library?
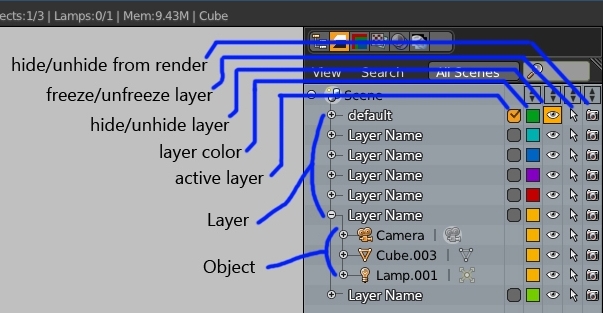
Object layer Manager
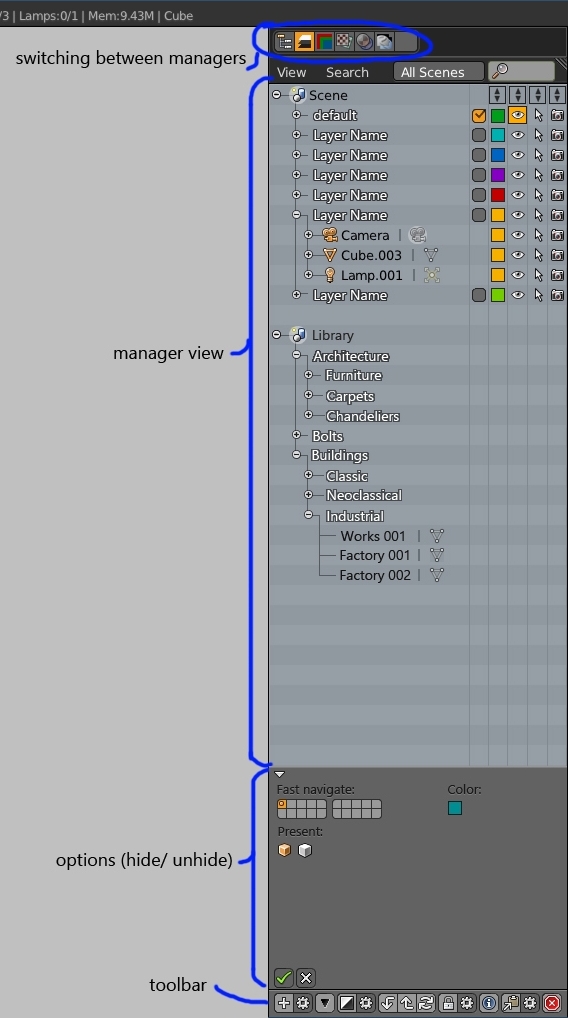
Object layer Manager (short OLM)- Modernized Outliner. Keeping all properties Outliner and added new features. Probably should unite Outliner and Obetst Lajer Manager in one tool, or make possible switch Outliner to OLM mode, or make their individual instruments.
Let's look at.
OLM work with Blender layers (short BL).
If I use the BL, the layers in the OLM are created and deleted automatically. If you create a layer in the OLM, then asked to choose a layer in BL. Or automatically places layers in BL on the numbered order (you can Change in options).
active layer -the active layer, it placed all new objects.
layer color - the color of objects in this layer, or the color of the wire.
hide \ unhide layer - hide \ show layers or objects in 3d vieschport.
eyes surrounded by color - indicator, this layer is selected. You can select multiple layers or objects, move them, delete them, freeze, hide.
freeze \ unfreeze layer - restrict viewport selection.
hide \ unhide from render - restrict rendering.
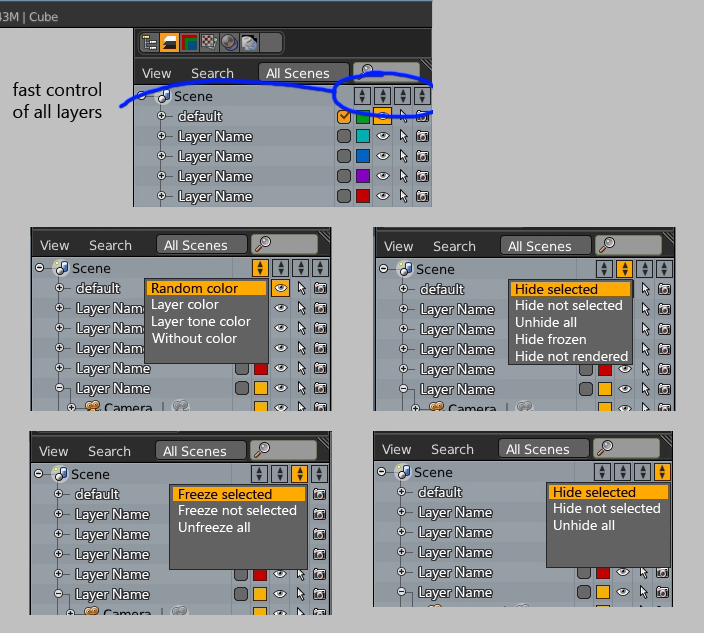
Fast control of the layers:
random color - in all layers all objects will be different colors regardless of layer
layer color - on a red layer all objects will be red in a green layer all objects will be green.
layer tone color - on a red layer all objects are shades of red, green in the layer, all objects will be shades of green.
without color - layers \ objects do not have color, or this setting does not affect the color.
hide selected - hide selected layers \ objects
hide not selected - hide layers \ objects that were not selected
unhide all - show all layers \ objects.
Hide frozen - hide layers \ objects that were restricted to move.
Hide not rendered hide layers \ objects that were restricted rendering.
Select multiple layers \ objects
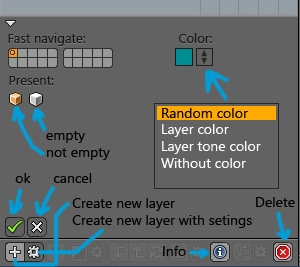
Toolbar and optoins
Create a new layer -Create a new layer with the default options
Create a new layer with setings - Create a new layer and choose properties
Info - layer information, you can change the layer properties
Delete - remove selected layers \ objects
Fast Navigate - associate layer with a blender layers
Color - layer color
Present - shows that the layer is empty or not empty
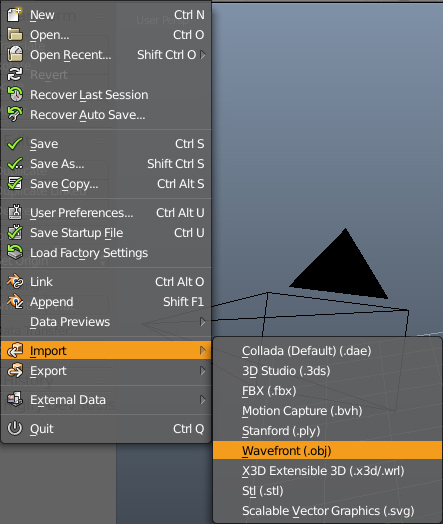
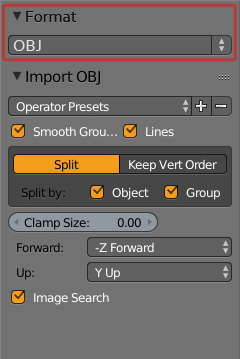
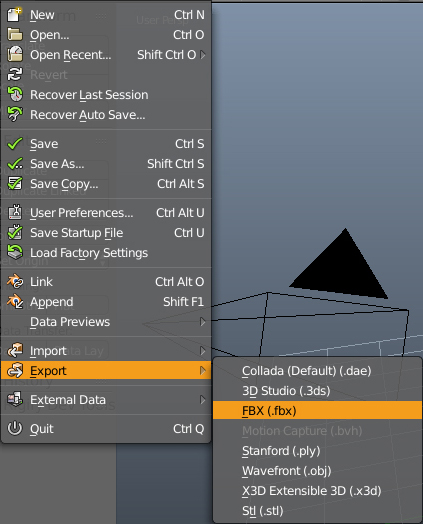
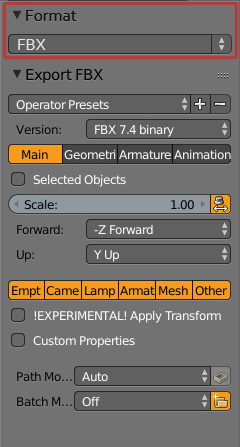
10. Import/Export Settings. File Format (not finished yet)
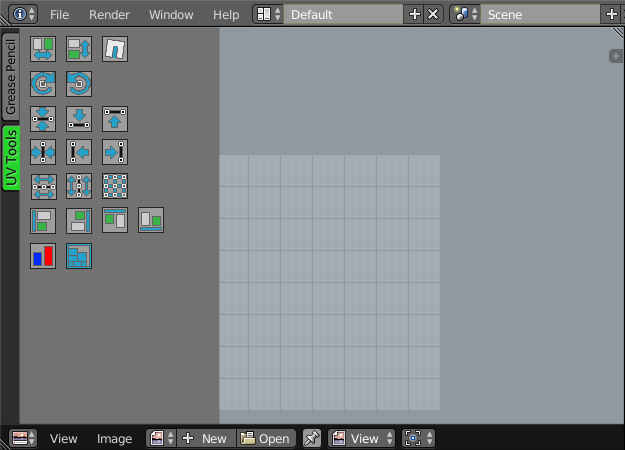
11. UV Tools (not finished yet)
https://wiki.blender.org/uploads/1/1c/UVmatooaxelproposalight001.gif
https://wiki.blender.org/uploads/f/fc/UVmatooaxelproposalight002.gif
https://wiki.blender.org/uploads/d/de/UVmatooaxelproposalight003.gif
https://wiki.blender.org/uploads/4/40/UVmatooaxelproposalight005.gif
[img]https://wiki.blender.org/uploads/2/28/TextoolsconceptAligntocenterHV.gif[/img] [img]https://wiki.blender.org/uploads/0/03/Textoolsconcepttocircle.gif[/img]
