「利用者:Phonybone/WrinkleMaps」の版間の差分
細 (1版 をインポートしました) |
|
(相違点なし)
| |
2018年6月29日 (金) 06:21時点における最新版
目次
Wrinkle Maps
This is a technique for creating believable wrinkles and folds using shape keys or textures.
The established method used for animating character clothing and similar cases is based on weighing shape keys with drivers. While creating shape keys is straightforward task for artists, setting up a bone and driver system for controlling each individual shape influence is a major hassle. For a typical character there has to be a set of measurement bones, control bones, driver(s) and shape key weights all for every individual wrinkle effect.
The wrinkle map method is based on measuring surface deformation and using this information to apply a local modulation factor automatically. This creates a vertex group that defines influence of each wrinkle shape rather than a global influence factor. The method is described in detail in the paper "Animating Wrinkles on Clothes" [1] [2]. While the paper describes deformation from detail texture maps on coarse geometry, the implementation of shape key deformation is more practical for typical Blender character animation workflows.
Texture-based wrinkle maps are going to be supported later.
Example: Simple wrinkles on a flat plane
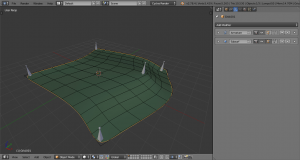
1. Base Mesh with Armature
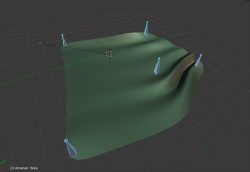
We start out with a grid mesh. A couple of simple deformation bones can be used to distort the grid.
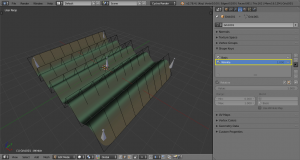
2. Shape Keys for Modeling Wrinkles
Adding wrinkles with shape keys is a typical character modeling/rigging step. The shape key should define the most extreme possible wrinkling stage. In our example we just add a bunch of regular ridges to the mesh.
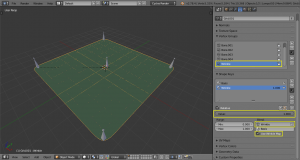
3. Declare Wrinkle Map
To use the shape key as a wrinkle map we have to:
- Set the overall weight to 1. A smaller weight can be used to tune down the overall wrinkle influence, but full influence is preferrable.
- Add a vertex group to allow localized influence of the shape key. This vertex group can be left empty.
- Tick the "Use Wrinkle Map" option. This will tell the wrinkle modifier to calculate displacement from the shape key (see next step).
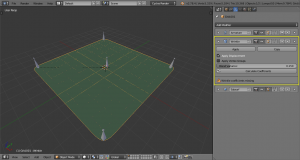
4. Add a Wrinkle Modifier
The modifier generates the actual displacement based on surface deformation. Additionally it can store the vertex group influence for later use in modifiers, e.g. for adding small scale noise after subdivision.
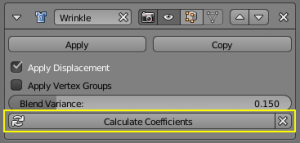
In order to generate correct shape key influence, the "wrinkle coefficients" need to be calculated once after the shape key has been defined. These coefficients should be recalculated whenever topology changes or the shape key is tweaked.
Coefficient recalculation could be done automatically with future depsgraph support. Currently the depsgraph support for shape key edits is too shaky to rely on it.
|
|
|
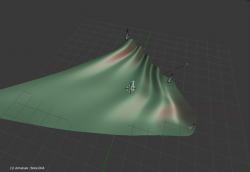
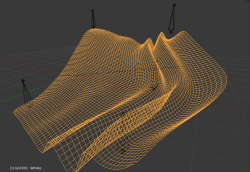
Now the wrinkle modifier applies the shape key locally in places where the surface is compressed. It attempts to compensate for changes in surface area by adding more of the shape key, such that the surface area stays the same. This simulates typical behavior of textiles and skin, where compression tends to bend and shear the surface until it reaches a force equilibrium.
[1] Hadap, Sunil, et al. "Animating wrinkles on clothes." Proceedings of the conference on Visualization'99: celebrating ten years. IEEE Computer Society Press, 1999.
