「Attic:Delete/WIP-Light-Spot-Lamp-Blender2.48」の版間の差分
細 (Robot: Automated text replacement (-{{Page/Header|2.48| +{{Page/Header|2.4|, -{{Page/Header|2.49| +{{Page/Header|2.4|, -{{Page/Header|2.50| +{{Page/Header|2.5|, -{{Page/Header|2.51| +{{Page/Header|2.5|, -{{Page/Header|2.52| +{{Page/Header|2.5|, -{{Pa) |
細 (1版 をインポートしました) |
(相違点なし)
| |
2018年6月29日 (金) 03:36時点における最新版
 |
This is an Archived Page showing the original content of a page at the point when it was moved and added/linked into wiki pages.
-- Terrywallwork -- 3rd October 2008 |
Spot Lamp
Mode: All Modes
Panel: Shading/Lamp Context
Hotkey: F5
Description
A Spot lamp emits a cone shaped beam of light from the tip of the cone, in a given direction.
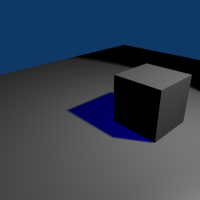
The Spot light is the most complex of the light objects and indeed, for a long time, among the most used thanks to the fact that it was the only one able to cast shadows. Today, with the integration of a ray tracer within the internal render engine of Blender, all lamps can cast shadows (except Hemi). Even so, Spot lamps' shadow buffers are much faster to render than raytraced shadows, especially when blurred/softened, and spot lamps also provide other functionality such as 'volumetric' halos.
Options
<DPL>
titlematch=Manual-DPL-INCLUDE-Lamp-Panel-Shared-Options-Blender-246
mode = userformat
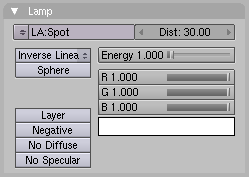
include = option-distance
</DPL>
<DPL>
titlematch=Manual-DPL-INCLUDE-Lamp-Panel-Shared-Options-Blender-246
mode = userformat
include = option-distance-spotlight, option-energy, option-color
</DPL>
<DPL>
titlematch=Manual-DPL-INCLUDE-Lamp-Panel-Shared-Options-Blender-246
mode = userformat
include = option-button-layer, option-button-negative, option-button-no-diffuse, option-button-no-specular
</DPL>
<DPL>
titlematch=Manual-DPL-INCLUDE-Lamp-Panel-Shared-Options-Blender-246
mode = userformat
include = option-sphere-spotlight
</DPL>
<DPL>
titlematch=Manual-DPL-INCLUDE-Lamp-Panel-Shared-Options-Blender-246
mode = userformat
include = option-lamp-falloff
</DPL>
<DPL>
titlematch=Manual-DPL-INCLUDE-Lamp-Panel-Shared-Options-Blender-246
mode = userformat
include = lin-quad-weight
</DPL>
<DPL>
titlematch=Manual-DPL-INCLUDE-Lamp-Panel-Shared-Options-Blender-246
mode = userformat
include = custom-curve
</DPL>
<DPL>
titlematch=Manual-DPL-INCLUDE-Lamp-Panel-Shared-Options-Blender-246
mode = userformat
include = inverse-square
</DPL>
<DPL>
titlematch=Manual-DPL-INCLUDE-Lamp-Panel-Shared-Options-Blender-246
mode = userformat
include = inverse-linear
</DPL>
<DPL>
titlematch=Manual-DPL-INCLUDE-Lamp-Panel-Shared-Options-Blender-246
mode = userformat
include = constant
</DPL>
Shadow & Spot Panel for a Spotlight lighting type
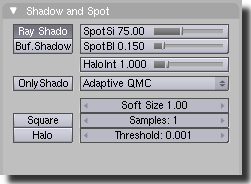
When a Spolight lighting type is selected the following default layout for the Shadow & Spot Panel is shown:
<DPL> titlematch=Manual-DPL-INCLUDE-Lamp-Panel-Shared-Options-Blender-246 mode = userformat include = panel-spot-and-shadow-lamp-sun-options </DPL> <DPL> titlematch=Manual-DPL-INCLUDE-Lamp-Panel-Shared-Options-Blender-246 mode = userformat include = options-shadow-spot-panel-spotlight-extra </DPL>
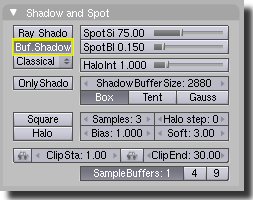
- Buf. Shadow
- When the Buf Shadow button is activated, the currently selected Spotlight generates shadows using a Shadow Buffer rather than using Raytracing.
- When the Buf Shadow button is activated, various extra options and buttons appear in the Shadow and Spot panel.
- A description of most of these options are listed below:
- ShadowBufferSize
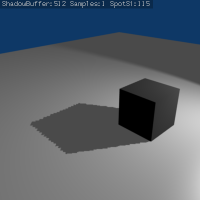
- The ShadowBufferSize Numeric Slider field can have a value from 512 to 10240. ShadowBufferSize represents the resolution used to create a Shadow Map. The Shadow Map is then used to determine where shadows lay within a scene.
- As an example, if you have a ShadowBufferSize with a value of 1024, you are indicating that the shadow data will be written to a buffer which will have a square resolution of 1024 pixels/samples by 1024 pixels/samples from the selected Spotlight.
- The higher the value of ShadowBufferSize, the higher resolution and accuracy of the resultant shadows, assuming all other properties of the light and Scene are the same, although more memory and processing time would be used. The reverse is also true if the ShadowBufferSize value is lowered, the resultant shadows can be of lower quality, but would use less memory and take less processing time to calculate..
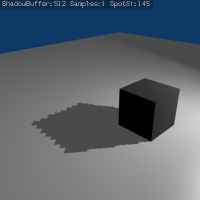
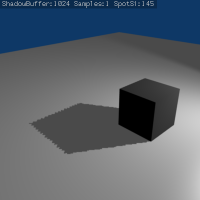
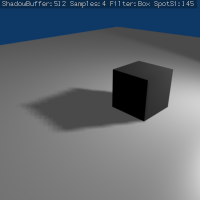
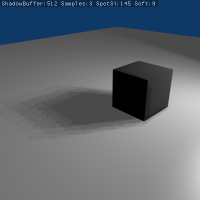
- The pictures above show the affect of different ShadowBufferSize values on the quality of shadows. In the above, the filtering has been turned off (Sample value set to 1) from the shadow generation, to make it easier to see the quality degradation of the shadows.
- As well as the ShadowBufferSize value affecting the quality of generated shadows, another property of Spotlights that affect the quality of its buffer shadows is the size of the spotlights lighted area (the SpotSi value).
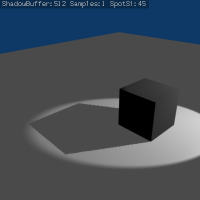
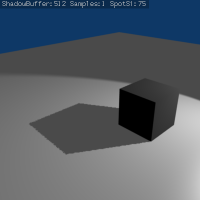
- Below are some examples of generated buffer shadows with identical ShadowBufferSize values, but different SpotSi values.
- As the SpotSi value is increased it can be seen that the quality of the cast shadows degrade.
- This happens because when the Spotlights lighted area is made larger (by increasing SpotSi) the shadow buffer area of the Spotlight would have to be stretched and scaled to fit the size of the new light area. The ShadowBufferSize resolution was not altered to compensate for the change in size of the Spotlight so the quality of the shadows degrade. If you wanted to keep the generated shadows the same quality, as you increased the SpotSi value you would also need to increase the ShaodwBufferSize value.
- The above basically boils down to:
- If you have a spotlight that is large you will need to have a larger ShadowBufferSize to keep the shadows good quality. The reverse is true also, if you have a Spotlight which covers a smaller area then the quality of the generated shadows will usually improve (up to a point) as the Spotlight covers a smaller area.
- Box
- The Box button indicates that shadows generated by buffer ahadow methods will be Anti-Aliased using a Box filtering method.
- This is the original filter used in Blender. It is relatively low quality and used for low resolution renders. It produces very sharp Anti-Aliasing. When this filter is used it only takes into account oversampling data which falls within a single pixel and doesn't take into account surrounding pixel samples. It is often useful for images which have sharply angled elements that go up/down/left/right (according to http://arkavision.com/?page_id=125).
- Tent
- The Tent button indicates that shadows generated by buffer shadow methods will be Anti-Aliased using a Tent filtering method. It is a simple filter that gives sharp results. It is an excellent general purpose filtering method. This filter also takes into account the sample values of neighbouring pixels when calculating its final filtering value.
- Gauss
- The Gauss button indicates that shadows generated by buffer shadow methods will be Anti-Aliased using a Gaussian filtering method. It has a very soft/blurry Anti-Aliasing result. As as result this filter is excellent with high resolution renders.
- More Information on Filtering Methods?
- The following links will give more information on the various Filtering/Distribution methods and their uses:
- Samples
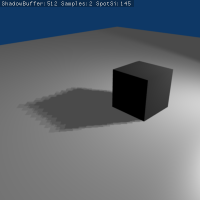
- The Samples Numeric Slider field can have a value between 1 and 16. It controls the number of samples taken per pixel when calculating shadow maps.
- The higher this value the more filtered, smoothed and Anti-Aliased the resultant shadows will be that are generated from the selected light, but the longer they will take to calculate and the more memory will be used. The Anti-Aliasing method used is determined by having one of the Box, Tent or Gauss buttons activated.
- As shown above, as the Sample numbers increase the more the edge of shadows become less Aliased/Jaggied. Having a Sample value of 1, is similar to turning off Anti-Aliasing for Buffer Shadows.
- Soft
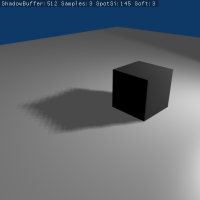
- The Soft Numeric Value Slider field can have a value between 1 and 100. The Soft value indicate how wide an area is sampled when doing Anti-Aliasing on buffered shadows. The larger the Soft value the more graduated/soft the area that is Anti-Aliased/softened on the edge of generated shadows.
- Above it can be seen that as the Soft size value rises, the softness of the blending of the shadow edges is more gradated. The blocky Aliasing is exaggerated by altering SpotSi and ShadowBufferSize values in the examples to more easily show the effect of the Soft field.
- Bias
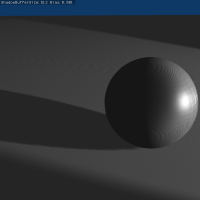
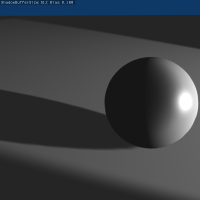
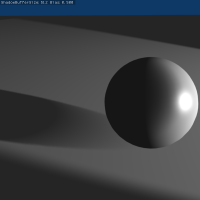
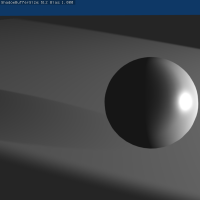
- The Bias Numeric Slider field can have a value between 0.001 and 5. Bias is used to add a slight offset distance between an Object and the Shadows cast by it. This is sometimes required because of inaccuracies in the calculation which determines weather an area of an Object is in shadow or not. Making the Bias value smaller results in the distance between the Object and its shadow being smaller. If the Bias value is too small an Object can get artefacts which can appear as lines and interference patterns on Objects. When this happens it is usually called "Self Shadowing" and can usually be fixed by increasing the Bias value to prevent self shadowing. Other methods for correcting self shadowing include increasing the size of the ShadowBufferSize or using a different buffer shadow calculation method such as Classic-Halfway or Irregular.
- The images above show the affect of different Bias values. With a Bias of 0.001 the scene is full of Self Shadowing interference, but the shadow coming from the back of the sphere is very close to the Sphere. With Bias at 0.100 most of the Self Shadowing interference has been eliminated (apart from small areas on the Sphere), but the start of the shadow point has moved slightly to the left of the Sphere. With Bias values at 0.500 and 1.000 the shadow start point moves even further away from the sphere and there is no Self Shadowing Interference.
- Self Shadowing Interference tends to affect curved surfaces more than flat ones, meaning that if your scene has a lot of curved surfaces it may be necessary to increase the Bias value or ShadowBufferSize value.
- Having overly large Bias values not only places shadows further away from their casting objects, but can also cause Objects that are very small to not cast any shadows at all. At that point altering Bias, ShadowBufferSize or SpotSi values, among other things may be required to fix the problem.
- Halo Step
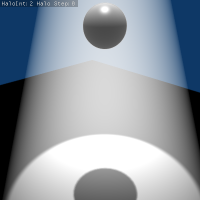
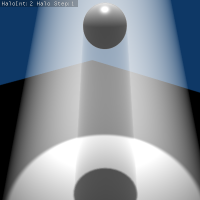
- Halo Step can have a value between 0 and 12. The Halo Step value is used to determine weather a light will cast Volumetric Shadows and what quality those resultant Volumetric Shadows will be.
- Above is a screenshot which shows a Volumetric Shadow being cast.
- For Volumetric Shadows to work you have to have the Halo button activated and have a high enough HaloInt value, so that the cast Volumetric Shadow is visible. Once these conditions have been met the Halo Step value can be altered to change the quality of Volumetric Shadows.
- If Halo Step is set to a value of 0 then no Volumetric Shadow will be generated.
- Unlike most other controls, as the Halo Step value increases the quality of Volumetric Shadows decreases (but takes less time to render), whereas when Halo Step value decreases the quality of the Volumetric Shadows increases (but takes more time to render).
- ClipSta & ClipEnd
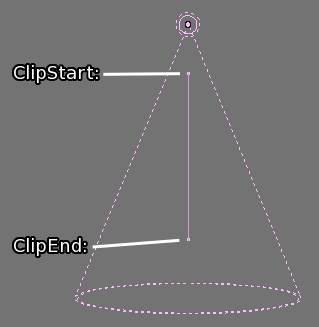
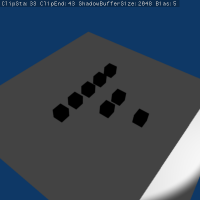
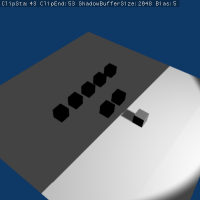
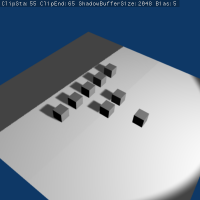
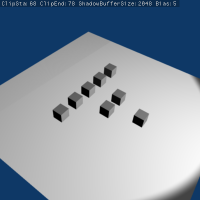
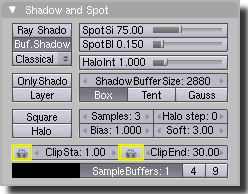
- When a Spotlight with buffered shadows is added to a scene, an extra line appears on the Spotlight, shown below:
- The start point of the line represents ClipSta;s value and the end of the line represents ClipEnd's value. Both ClipSta and ClipEnd values represent Blender Units.
- ClipSta can have a value between 0.10 and 1000.
- ClipEnd can have a value between 1 and 5000.
- Both values are represented in Blender Units.
- ClipSta (ClipStart) indicates the point after which Buffered Shadows can be present within the Spotlight area. Any shadow which could be present before this point is ignored and no shadow will be generated.
- ClipEnd indicates the point after which Buffered Shadows will not be generated within the Spotlight area. Any shadow which could be present after this point is ignored and no shadow will be generated.
- The area between ClipSta and ClipEnd will be capable of having buffered shadows generated.
- Altering the ClipSta and ClipEnd values helps in controlling where shadows can be generated. Altering the range between ClipSta and ClipEnd can help speed up rendering, save memory and make the resultant shadows more accurate.
- When using a Spotlight with Buffered Shadows, to maintain or increase quality of generated shadows, it is helpful to adjust the ClipSta and ClipEnd such that their values closely bound around the areas which they want to have shadows generated at. Minimising the range between ClipSta and ClipEnd, minimises the area shadows are computed in and therefore helps increase shadow quality in the more restricted area.
- Automatic ClipStart & ClipEnd
- As well as using the value based ClipSta and ClipEnd fields to control when buffered shadows start and end, it is also possible to have Blender pick the best value independently for each ClipSta and ClipEnd field.
- Blender does this by looking at where the visible vertices are when viewed from the Spotlights position.
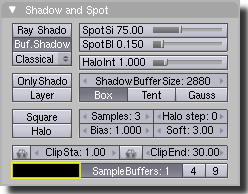
- Shadow Color
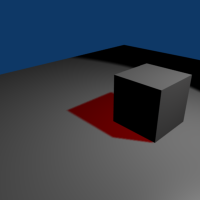
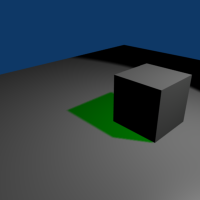
- When using buffered shadows it is possible to choose the color of the generated shadow, which does not have to bear any relation to the color of the light lighting the area.
- To change the color from the default (Black), click on the area highlighted in yellow and then select the required color.
- This Shadow Color selection box only becomes visible when using Buffered Shadows.
- The above images were all rendered with a white light and the shadow color was selected independently.
- Although you can select a pure white color for a shadow color, it appears to make a shadow disappear.
- Shadow Buffer Generation Type
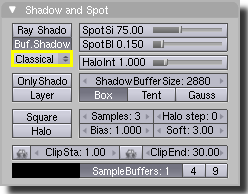
- Blender has more than one way to generate buffered shadows. The Shadow Buffer Generation Type drop down selector controls which generation type is used for buffered shadow generation. Below the field is highlighted in yellow:
- There are 3 shadow generation types, those being:
- Classical
- Classic-Halfway
- Irregular
- Classical shadow generation used to be the Blender default method for generation of buffered shadows. It used an older way of generating buffered shadows, but it could have some problems with accuracy of the generated shadows and can be very sensitive to ShadowBufferSize and different Bias values and all the Self-shadowing issues that brings up. It appears that the Classical method of generating shadows is in the position of being obsoleted and is really only still in Blender to works with older versions of Blender, Classic-Halfway should probably be used instead.
- Classic-Halfway is an improved shadow buffering method and is currently the default option selected in Blender. It works by taking an averaged reading of the first and second nearest Z depth values allowing the Bias value to be lowered and yet not suffer as much from Self-Shadowing issues. Not having to increase Bias values helps with shadow accuracy, because large Bias values can mean small faces can lose their shadows, as well as preventing shadows being overly offset from the larger Bias value.
- Classic-Halfway doesn't work very well when faces overlap, and Biasing problems can happen.
- Currently the Halo Step option doesn't work well in some cases. Especially when using planes (not volumes), errors can be introduced.
- Irregular, this shadow method is used to generate sharp/hard shadows that are placed as accurately as ray-traced shadows. This method offers very good performance because it can be done as a multi-threaded process.
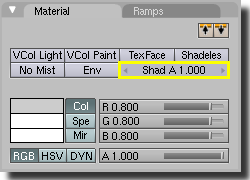
- The method supports transparent shadows by altering the "A Shad" Numeric Slider value:
- To use Irregular transparent shadows first select the object which will receive the transparent shadow. Then alter the Shad A value in the Material panel. This will only work when Irregular shadow buffer lighting is used.
- For more information on the different shadow generation methods see these links:
- SampleBuffers: 1, 4, 9
- The SampleBuffers setting can be set to values 1, 4 or 9 and represents the number of shadow buffers that will be used when doing Anti-Aliasing on shadows generated using shadow buffering.
- The higher the number of the SampleBuffers the smoother the Anti-Aliasing, but when using SampleBuffers of 4 you will use 4 times as much memory and with 9, nine times the memory. So Both memory and processing time can be increased, but you get better Anti-Aliasing on small moving objects.
- It seems that this option is used in special cases with very small objects, which move and need to generate really small shadows (such as strands). It appears that ormally pixel width shadows don't seem to anti-alias properly and increasing ShadowBufferSize also doesn't seem to help.
- Here is a message from Ton Roosendaal about its reason for being from a log message:
- Problem:
- > Temporal aliasing of shadowbuffers when small details move (like strands).
- >
- > In this case it doesn't work to simply increase the shadowbuffer size,
- > because strands are pixel-sized. Huge shadowbuffers make strand shadows
- > almost disappear. So... the shadowbuffer resolution has to be not too high.
- >
- > Instead of increasing the buffer size, we then create multiple buffers,
- > each on different subpixel positions (a bit like "FSA" :).
- >
- > So! Shadowbuffer sampling then works as follows;
- >
- > 1) You take multiple samples in the shadowbuffer, on different locations
- > inside (or around) the rendered pixel.
- > That option was already available as "Samp" button in Lamps
- >
- > 2) Set amount of sample buffers. It is default 1, but can be 4 or 9.
- >
- > The results of setting it to '4' or '9' buffers you can see here:
- > http://www.blender.org/bf/filters/index3.html
- >
- > Actually, deep shadowbuffers could solve it probably too! Anyhoo...
Unclear
I am not really clear on how SampleBuffers and Irregular shadows buffers work so if anyone has more info and came make thing clearer either contact me and I will update the page or update it, same goes for anything else you think should be changed on this page. Terrywallwork - 3 Oct 2008
|
Shadows
Spotlights can use either raytraced shadows or buffer shadows. Either of the two can provide various extra options. Raytraced shadows are generally more accurate, with extra capabilities such as transparent shadows, although they are quite slower to render. Buffered shadows are more complex to set up and involve more faking, but the speed of rendering is a definite advantage.
For more, detailed information see the Raytraced shadows or Buffered shadows sections. <DPL> titlematch=Manual-DPL-INCLUDE-Lamp-Panel-Shared-Options-Blender-246 mode = userformat include = panel-spot-and-shadow-quasi-monte-carlo </DPL> <DPL> titlematch=Manual-DPL-INCLUDE-Lamp-Panel-Shared-Options-Blender-246 mode = userformat include = what-is-volumetric-lighting </DPL>
Technical Details
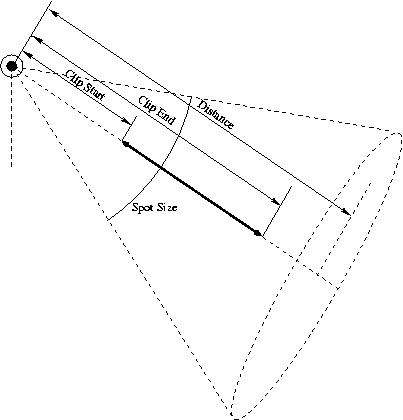
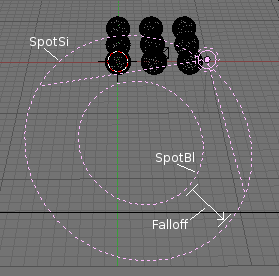
(Spot Light Scheme) shows the relationship between the light's properties and how they relate physically.
Examples
See Also
