「Meta:Guides/Style Guide/Images」の版間の差分
細 (→Clearing the text) |
細 (1版 をインポートしました) |
(相違点なし)
| |
2018年6月29日 (金) 03:43時点における最新版
目次
General guidelines
Screen capture
Blender’s interface is fully OpenGL rendered and scalable. This is great but will result in many non-uniformities if many users resort to screen dumps to show various types of settings.
For this reason, when you capture Blender's interface these are good habits:
- set your desktop interface resolution to 1024x768
- use Blender’s default UI theme
- press the ‘home’ button --while in the button window-- to set the default button size
- save captures in LOSSLESS format (that is, PNG format)
Blender's windowed mode
One way to capture screenshots at 1024x768 resolution while your display is at higher resolutions is to use the windowed mode command-line options. Run Blender as follows:
./blender -w -p 0 0 1024 768 This will start Blender in a window with the drawing pane at exactly 1024x768 pixels (the application frame will be larger because of the desktop insets). Then, to cut the Blender portion from the capture you made in windowed mode, in GIMP you can use a 'Fixed size' select region (set to 1024x768) |
Highlights
If you need to highlight a given portion of an image (a button, a value, or a group of buttons and values):
- use a yellow (R=255,G=255,B=0) frame 2 pixels thick all the way around.
- don't add special effects (shadows, different background, etc): just show blender elements as they are.
| Good | Bad |
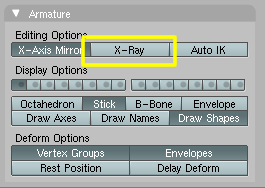
|
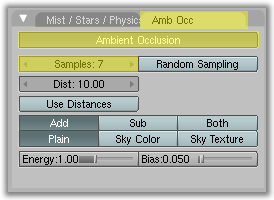
|
Image formats
- PNG is lossless so it is the preferred format for screen captures
- JPG is a compressed format, so it's preferred for normal images (renders, etc)
- GIF and other non-free formats are strongly discouraged
- TGA and other uncompressed formats are also discouraged
- SVG can be used in simple forms (no animations, no javascript: some browser doesn't support advanced features)
How to upload
In the sidebar click on Upload file
Dimensions
To maintain consistency, images should be set to show a width of 640 pixels at maximum. Blender's wiki has a fixed width of 640px so using larger images will result in badly formatted pages.
Clearing the text
To clear the text until the end of the image, insert {{clr}} in the text.
Note: you should use it only when really needed: that is, when you see misalignments that you want to fix.
Normal images
Just put the image name as a normal link without caption, and you're done.
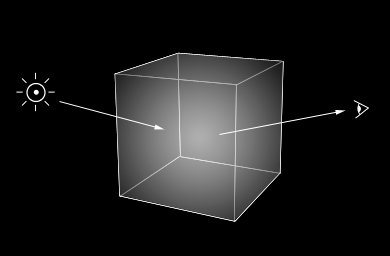
[[File:Volumerendering-volume eq.png]]
returns
Inlines and Icons
You can get inline images just by placing normal images within the text, without specifying the alignment.
Inline images and icons like [[File:BMovie.png]] are easy to place.
returns
Inline images and icons like ![]() are easy to place.
are easy to place.
Use inline images to show Blender’s icons in the text, they make descriptions much clearer. Since icons are standard (given a certain Blender's release) please use this set of icons
Alignment
You can add a positional argument ("left","center","right") to position the image in the text. For example:
[[File:Volumerendering-volume eq.png|left]]
Lorem ipsum dolor sit amet, consectetur adipiscing elit. Praesent velit neque, vulputate in molestie lacinia, rhoncus nec urna.
{{clr}}
returns
Lorem ipsum dolor sit amet, consectetur adipiscing elit. Praesent velit neque, vulputate in molestie lacinia, rhoncus nec urna.
[[File:Volumerendering-volume eq.png|center]]
Lorem ipsum dolor sit amet, consectetur adipiscing elit. Praesent velit neque, vulputate in molestie lacinia, rhoncus nec urna.
{{clr}}
returns
Lorem ipsum dolor sit amet, consectetur adipiscing elit. Praesent velit neque, vulputate in molestie lacinia, rhoncus nec urna.
[[File:Volumerendering-volume eq.png|right]]
Lorem ipsum dolor sit amet, consectetur adipiscing elit. Praesent velit neque, vulputate in molestie lacinia, rhoncus nec urna.
{{clr}}
returns
Lorem ipsum dolor sit amet, consectetur adipiscing elit. Praesent velit neque, vulputate in molestie lacinia, rhoncus nec urna.
Dimensioning
What if the image width is greater than 640px? This image is 819px wide: you have 2 ways to insert it.
Good dimensioning
[[File:3BSOD-Materials-Textures-hairy-cube1.jpg|300px]]
returns
Bad dimensioning
[[File:3BSOD-Materials-Textures-hairy-cube1.jpg]]
returns
Floating images (thumbs and frames)
You have to put this code right before the first line you want the image to appear next to:
[[<image name>|thumb|<position>|<width>px|<description>]]
or
[[<image name>|frame|<position>|<width>px|<description>]]
- Alignment
-
<position>can be "left", "center", or"right".
- Dimensions
-
- Thumbs can't be upscaled
- Frames images can't be dimensioned at all, so be careful to use only images smaller then 640px in width.
- Referencing floating images in the text
-
- Floating images have to bear a caption and be referenced in the text
- When referring to a floating image in the text, don't use wording like “the next picture” or “the following figure”
- If you have an image that you don’t know how to reference, very probably the image is unnecessary or your text is unclear
Examples
As you see below, we refer to the images by putting their caption inside the Literal template.
Thumbs
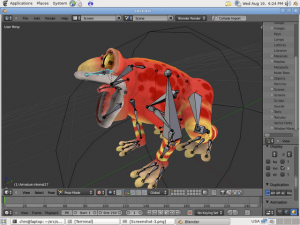
[[File:Frog-5.png|thumb|left|300px|Frog Rig (closed mouth)]]
Look at {{Literal|Frog Rig (closed mouth)}}: lorem ipsum dolor sit amet, consectetur adipiscing elit. Praesent velit neque, vulputate in molestie lacinia, rhoncus nec urna.
{{clr}}
returns
Look at Frog Rig (closed mouth): lorem ipsum dolor sit amet, consectetur adipiscing elit. Praesent velit neque, vulputate in molestie lacinia, rhoncus nec urna.
[[File:Frog-5.png|center|thumb|300px|Frog Rig (closed mouth)]]
Look at {{Literal|Frog Rig (closed mouth)}}: lorem ipsum dolor sit amet, consectetur adipiscing elit. Praesent velit neque, vulputate in molestie lacinia, rhoncus nec urna.
{{clr}}
returns
Look at Frog Rig (closed mouth): lorem ipsum dolor sit amet, consectetur adipiscing elit. Praesent velit neque, vulputate in molestie lacinia, rhoncus nec urna.
[[File:Frog-6.png|right|thumb|300px|Frog Rig (open mouth)]]
Look at {{Literal|Frog Rig (open mouth)}}: lorem ipsum dolor sit amet, consectetur adipiscing elit. Praesent velit neque, vulputate in molestie lacinia, rhoncus nec urna.
{{clr}}
returns
Look at Frog Rig (open mouth): lorem ipsum dolor sit amet, consectetur adipiscing elit. Praesent velit neque, vulputate in molestie lacinia, rhoncus nec urna.
Frames
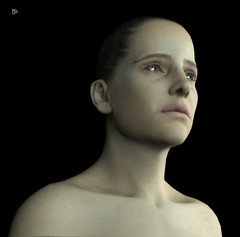
[[File:Subsurface Scattering Girl Image.jpg|left|frame|Subsurface Scattering Girl]]
Referring to {{Literal|Subsurface Scattering Girl}}, we can say that etc etc lorem ipsum dolor sit amet, consectetur adipiscing elit. Praesent velit neque, vulputate in molestie lacinia, rhoncus nec urna.
{{clr}}
returns
Referring to Subsurface Scattering Girl, we can say that etc etc lorem ipsum dolor sit amet, consectetur adipiscing elit. Praesent velit neque, vulputate in molestie lacinia, rhoncus nec urna.
[[File:Subsurface Scattering Girl Image.jpg|center|frame|Subsurface Scattering Girl]]
Referring to {{Literal|Subsurface Scattering Girl}}, we can say that etc etc lorem ipsum dolor sit amet, consectetur adipiscing elit. Praesent velit neque, vulputate in molestie lacinia, rhoncus nec urna.
{{clr}}
returns
Referring to Subsurface Scattering Girl, we can say that etc etc lorem ipsum dolor sit amet, consectetur adipiscing elit. Praesent velit neque, vulputate in molestie lacinia, rhoncus nec urna.
[[File:Subsurface Scattering Girl Image.jpg|right|frame|Subsurface Scattering Girl]]
Referring to {{Literal|Subsurface Scattering Girl}}, we can say that etc etc lorem ipsum dolor sit amet, consectetur adipiscing elit. Praesent velit neque, vulputate in molestie lacinia, rhoncus nec urna.
{{clr}}
returns
Referring to Subsurface Scattering Girl, we can say that etc etc lorem ipsum dolor sit amet, consectetur adipiscing elit. Praesent velit neque, vulputate in molestie lacinia, rhoncus nec urna.
Tables of images
When you have a set of images that have some relation to each other, you can put them in a simple table:
{|align=center
| [[Image:Manual-volumerendering-reflection-sc0.5.png|thumb|150px| Reflection: Green, Scattering: 0.5]]
| [[Image:Manual-volumerendering-reflection-sc1.0.png|thumb|150px| Reflection: Green, Scattering: 1.0]]
| [[Image:Manual-volumerendering-reflection-sc2.0.png|thumb|150px| Reflection: Green, Scattering: 2.0]]
| [[Image:Manual-volumerendering-reflection-sc5.0.png|thumb|150px| Reflection: Green, Scattering: 5.0]]
|-
| [[Image:Manual-volumerendering-refl_g-tr_y-sc0.5.png|thumb|150px| Reflection: Green, Transmission: Yellow, Scattering: 0.5]]
| [[Image:Manual-volumerendering-refl_g-tr_y-sc1.0.png|thumb|150px| Reflection: Green, Transmission: Yellow, Scattering: 1.0]]
| [[Image:Manual-volumerendering-refl_g-tr_y-sc2.0.png|thumb|150px| Reflection: Green, Transmission: Yellow, Scattering: 2.0]]
| [[Image:Manual-volumerendering-refl_g-tr_y-sc5.0.png|thumb|150px| Reflection: Green, Transmission: Yellow, Scattering: 5.0]]
|}
returns
See also
Please refer to the official Mediawiki doc about images
