「Doc:2.6/Manual/Extensions/Python/Add-Ons」の版間の差分
(→File locations) |
細 (1版 をインポートしました) |
(相違点なし)
| |
2018年6月29日 (金) 03:47時点における最新版
Page status (reviewing guidelines)
Partial page
Text
need to be updated to last change
|
Add-Ons
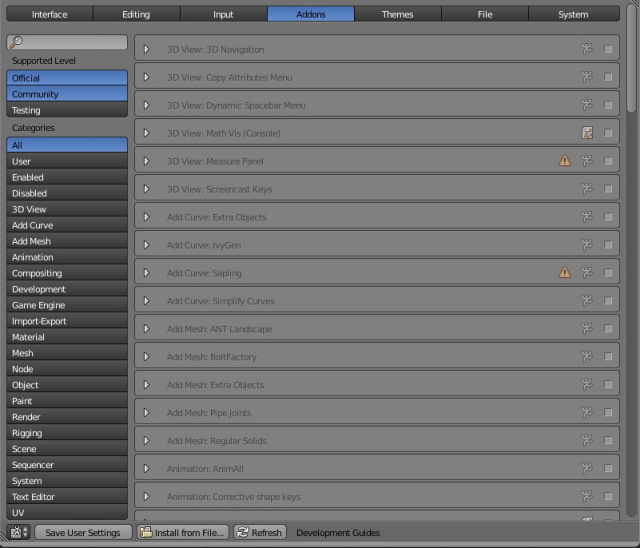
Add-On is the general term for any optional script that extends Blender's functionality. They are found in the Add-Ons tab of the User Preferences window. This tab allows to install, enable and disable Add-Ons. Blender comes with some useful Add-Ons already, but you can also add your own, or any interesting ones you find on the web. The Scripts Catalog provides an index of Add-Ons that are included with Blender as well as listing a number of external Add-Ons.
Installation of an Add-On
For a script to show up in the Add-Ons tab it will first have to be installed. For this you can use the Install Add-On button in the header of the Add-Ons window. Simply click the button and locate the script you wish to install. Once installed, the script will show up in the panel.
Alternatively you can manually install an Add-On. An Add-On is considered installed when it is located in the ../scripts/addons folder (where .. is the path to your Blender configuration folder). Simply moving the Add-On into that folder is enough.
Addons can be python scripts .py or .zip files (containing .py scripts).
File locations
- Windows 7 -
C:\Users\%username%\AppData\Roaming\Blender Foundation\Blender\2.6x\scripts\addons
- Windows XP -
C:\Documents and Settings\%username%\Application Data\Blender Foundation\Blender\2.6x\scripts\addons
- Linux -
/home/$user/.config/blender/$version/scripts/addons
Note that the AppData folder in Windows 7 and the .config folder in Linux is hidden. The location may also be different depending on your choices for setting up your operating system and Blender.
You can also create a personnal folder containing new addons and configure your files path in the File panel of the User Preferences. To create a personnal script folder:
- Create an empty folder (i.e. 'script_addon_2-6x')
- Add one folder named 'addons'. It has to named like this for Blender to recognize it.
- Put your new addons in this 'addons' folder.
- open the File panel of the User Preferences.
- Fill the Scripts entry with the path to your script folder (i.e. 'script_addon_2-6x').
For information on the location of blender directories
see: Configuration & Data Paths
Enabling and Disabling
Once an Add-On has been installed, it has to be enabled before it can be used. Simply place a check mark on the Enable Add-On box of the Add-On you wish to activate and you're done. The extra functionality of the Add-on is now integrated into Blender and can be used.
To disable the functionality again, uncheck the box. To get more information on a certain Add-on you can press the arrow at the left of the entry and any additional information that is available will be shown. If the Add-On does not activate when enabled, check the Console window for any errors that may have occurred when loading.
| Saving Add-On Preferences | |
| If you want an Add-On to be enabled everytime you start Blender, you will need to save your User Preferences. |
Development guidelines
If you are a script developer, you may be interested in the Add-Ons development guidelines.
