「Doc:2.6/Manual/Textures/Options」の版間の差分
(→Texture Type) |
(相違点なし)
|
2014年6月16日 (月) 21:29時点における版
Textures common options
In the Properties editor, choose the Texture context: this will show the Texture panel.
Textures Stack
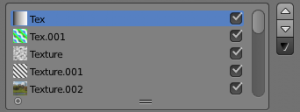
The list below these buttons represents the Stack of textures that we can manage. It can have up to eighteen Texture Slots:
- Tick or untick a texture to enable/disable it.
- Use the three buttons on the right side to move individual textures up and down in the stack or to copy/paste material's settings between slots.
The order in the Stack Textures defines how textures overlay each other for finally result image.
Texture Datablock
Select a slot in the Textures Stack to see its settings.
The first group of buttons below the stack displays the texture currently selected in the stack.
- Browse
- The first button below the stack displays the all available textures in the current file. Textures are stored globally, and can be linked to more than one material. If you have already created a texture that you want to reuse, select from this list.
- Name
- A name field where the name of the material can be changed.
- Number of users
- If the active texture is used by another material, a 2 button appears that can be used to make a single-user copy of the active texture. Use this button to quickly create a new texture based on an existing texture.
- Fake
- The F button assigns the active texture to a "Fake" material, so that the texture is saved with the file even if it has no "real" users.
- Add
- Replaces the texture of the active slot with a new texture.
- Unlink
- Removes the texture from the active slot.
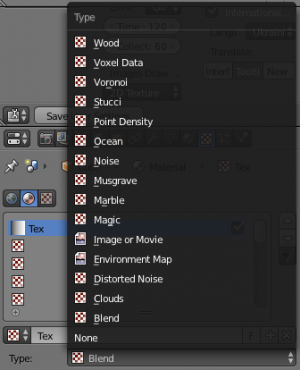
Texture Type
Choose the type of texture that is used for the current texture datablock.
- Procedural Textures
- Image and Video Textures
- Environment Map
- Volume Textures
- Ocean Texture
These types are described in detail in this section.
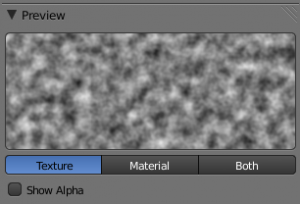
Preview
The texture preview panel provides a quick pre-visualisation of how the texture looks on its own, without mapping.
- Texture, Material, or Both
- Choose to display only the texture, only the material, or both.
- Show Alpha
- Show alpha in preview.
- If Alpha: Use is checked in the Image Sampling panel, the image's alpha channel is displayed.
- If Alpha: Use is unchecked, an alpha channel based on averaged rgb values is displayed like it would be used by the Alpha slider in the Influence panel.
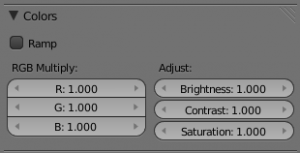
Colors
- The Ramp button activates a color ramp which allows you to remap the colors of a texture to new ones. See Ramps for information on using ramps.
- The color of a texture can be modified with the Brightness, Contrast, and Saturation buttons. All textures with RGB-Values — including Images and Environment Maps — may be modified with the RGB sliders.
- R, G, B
- Tint the color of a texture by brightening each red, green and blue channel.
- Brightness
- Change the overall brightness/intensity of the texture
- Contrast
- Change the contrast of the texture
- Saturation
- Change the saturation of the texture
Mapping
Here you can control how the texture will be mapped on the object.
Brushes
These options are not available for brushes because they wouldn't make sense
|
See Mapping section for details.
Influence
Here you can control what properties the texture will affect, and by how much.
They are detailed on the Influence section.
Brushes
These options are not available for brushes because they wouldn't make sense
|


