「Doc:2.6/Manual/Sequencer/Effects」の版間の差分
(Keyframing the Speed Control) |
(相違点なし)
|
2014年6月6日 (金) 00:58時点における版
Page status (reviewing guidelines)
Copy
This page is a copy of the same page in 2.4 manual, need to be updated
|
Sequencer Effects
Blender offers 16 built effects that are built into Blender, and are therefore universal. Some operate on two strips; some on one, and some create a new strip. Each effect enhances your content in some way or allows professional-quality transitions.
Add
The Add effect adds two colors together. Red and Cyan (Green and Blue) make White. Red and Blue make "Magenta" (i.e. Purple!). Red and Green make Yellow.
The Add Effect adds the colors of two strips together, Use this effect with a base image strip, and a modifier strip. The modifier strip is either a solid color or a black-and-whte mask, or another image entirely. The example to the right shows what happens when you add gray to an image, and animate the effect over time. The image gets bright because we are adding gray (R:.5, G:.5, B:.5) to say, a blue color (R.1, G:.1, B:.5) resulting in (R:.6, G:.6, B:1.0) which retains the original hue (relationship between the colors) but is much brighter (has a higher value). When applied to the whole image like this, the whole image seems to flash.
You can use this effect to increase the brightness of an image, or if you use a BW mask, selectively increase the brightness of certain areas of the image. The Mix node, in Add mode, does exactly the same thing as the Add sfx strip here, and is controlled the same way by feeding the Factor input.
Subtract Effect
This effect takes away one strip's color from the second. Make a negative of an image using this effect, or switch the order of the strips and just darken the strip. Subtracting a hue of blue from a white image will make it yellow, since red and green make yellow.
Cross and Gamma Cross
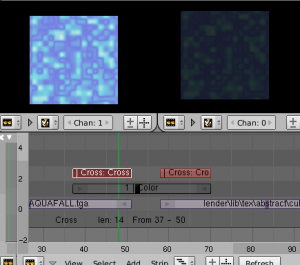
This effect fades from one strip to another, based on how many frames the two strips overlap. This is a very useful strip that blends the whole image from one to the other.
Gamma Cross uses color correction in doing the fade, resulting in a smooth transition that is easier on the eye.
Fade to Black
Many scenes fade to black, and then fade in from black, rather than directly from one to the other.
The strip setup to do this is shown to the right. The two strips are on Channel 1, and you Add->Color Generator strip to Channel 2, straddling the two main strips. Change the color to black, and add two Cross Effects; the first from Channel 1 to Channel 2 (black), and the second from Channel 2 to Channel 1. The first strip will fade to black, and then the second will fade in from black. Of course, you can use any transition color you want. Black is a relaxing intermediary; red is alarming. Use the dominant color in the second strip to introduce the second strip.
Multiply
The Multiply effect multiplies two colours. Blender uses values between 0.0 and 1.0 for the colours, he doesn't have to normalise this operation, the multiplication of two terms between 0.0 and 1.0 always gives a result between 0.0 and 1.0 (with the 'traditional' representation with three bytes – like RGB(124, 255, 56) –, the multiplications give far too high results – like RGB(7316, 46410, 1848) –, that have to be 'brought back', normalised – just by dividing them by 256! – to 'go back' to range of 0 to 255…).
This effect has two main usages:
- With a mask
- A mask is a B&W picture witch, after multiplication with a 'normal' image, only show this one in the white areas of the mask (everything else is black). The opening title sequence to James Bond movies, where the camera is looking down the barrel of a gun at James, is a good example of this effect.
- With uniform colors
- Multiplying a color with a 'normal' image allows you to soften some hues of this one (and so – symmetrically – to enhance the others). For example, if you have a brown pixel RGB(0.50, 0.29, 0.05), and you multiply it with a cyan filter (uniform color RGB(0.0, 1.0, 1.0), you'll get a color RGB(0.0, 0.29, 0.5). Visually, the result is to kill the reds and bring up (by 'symmetry' – the real values remain unchanged!) the blues an greens. Physically, it is the same effect as shining a cyan light onto a chocolate bar. Emotionally, vegetation becomes more lush, water becomes more Caribbean and inviting, skies become friendlier.
Note
This effect reduces the global luminosity of the picture (the result will always be smaller than the smallest operand). If one of the image is all white, the result is the other picture; if one of the image is all black, the result is all black!
|
Alpha Over, Under, and Over Drop
Using the alpha (transparency channel), this effect composites a result based on transparent areas of the dominant image. If you use a Scene strip, the areas of the image where there isn't anything solid are transparent; they have an alpha value of 0. If you use a movie strip, that movie has an alpha value of 1 (completely opaque).
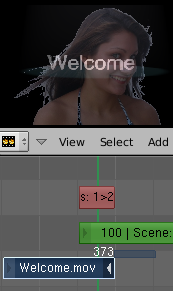
So, you can use the Alpha Over/Alpha Under effect to composite the CGI Scene on top of your movie. The result is your model doing whatever as if it was part of the movie. The Factor curve controls how much the foreground is mixed over the background, fading in the foreground on top of the background. The colors of transparent foreground image areas is ignored and does not change the color of the background.
Select two strips (⇧ ShiftRMB ![]() ):
):
- With Alpha Over, the strips are layered up in the order selected; the first strip selected is the background, and the second one goes over the first one selected. The Factor controls the transparency of the foreground, i.e. a Fac of 0.0 will only show the background, and a Fac of 1.0 will completely override the background with the foreground (except in the transparent areas of this one, of course!)
- With Alpha Under, this is the contrary: the first strip selected is the foreground, and the second one, the background. Moreover, the Factor controls the transparency of the background, i.e. a Fac of 0.0 will only show the foreground (the background is completely transparent), and a Fac of 1.0 will give the same results as with Alpha Over.
- Alpha Over Drop is between the two others: as with Alpha Under, the first strip selected will be the foreground, but as with Alpha Over, the Factor controls the transparency of this foreground.
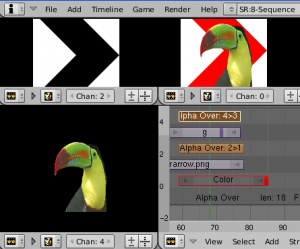
The example shows layering of AlphaOver effects. The very bottom channel is red, and an arrow is on top of that. Those two are AlphaOver to Channel 3. My favorite toucan is Channel 4, and Channel 5 alphaovers the toucan on top of the composited red arrow. The last effect added is tied to Channel 0 which will be rendered.
By clicking the PreMult Alpha button in the properties panel of the foreground strip, the Alpha values of the two strips are not multiplied or added together. Use this effect when adding a foreground strip that has a variable alpha channel (some opaque areas, some transparent, some in between) over a strip that has a flat opaque (Alpha=1.0 or greater) channel. If you notice a glow around your foreground objects, or strange transparent areas of your foreground object when using AlphaOver, enable PreMultiply.
The AlphaOver Drop effect is much like the Cross, but puts preference to the top or second image, giving more of a gradual overlay effect than a blend like the Cross does. Of course, all of the Alpha effects respect the alpha (transparency) channel, whereas Cross does not.
The degree of Alpha applied, and thus color mixing, can be controlled by an F-curve. Creating a Sine wave could have the effect of the foreground fading in and out.
Wipe
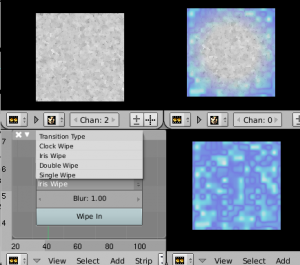
Wipe transitions from one strip to another. This very flexible effect has four transition types:
- Clock: like the hands of an analog clock, it sweeps clockwise or (if Wipe In is enabled) counterclockwise from the 9:00 position. As it sweeps, it reveals the next strip.
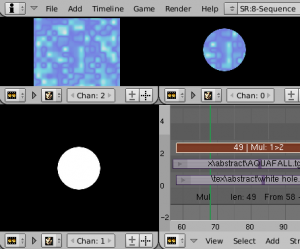
- Iris: like the iris of a camera or eye, it reveals the next strip through an expanding (or contracting) circle. You can blur the transition, so it looks like ink bleeding through a paper.
- Double Wipe: Starts in the middle and wipes outward, revealing the next strip. It can also Wipe In, which means it starts at the outside and works its way toward the middle. You can angle and blur the wipe direction as well.
- Single Wipe: Reveals the next strip by uncovering it. Controls include an angle control so you can start at a corner or side, and blur the transition.
The wipe will have no effect if created from a single strip instead of two strips. The duration of the wipe is the intersection of the two source strips and can not be adjusted. To adjust the start and end of the wipe you must adjust the temporal bounds of the source strips in a way that alters their intersection.
Note: some older plugins contain similar functionality.
Glow
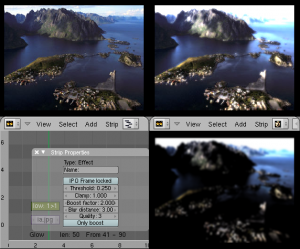
This effect makes parts of an image glow brighter by working on the luminance channel of an image. The Glow is the superposition of the base image and a modified version, where some areas (brighter than the Threshold:) are blurred. With the Glow strip properties, you control this Threshold:, the maximum luminosity that can be added (Clamp:), a Boost factor: for it, the size of the blur (Blur distance:), and its Quality:. The Only boost button allows you to only show/use the 'modified' version of the image, without the base one. To "animate" the glow effect, mix it with the base image using the Gamma Cross effect, crossing from the base image to the glowing one.
Transform
(Note: Transform does not work in Blender 2.49)
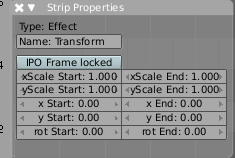
Transform is a swiss-army knife of image manipulation. It scales, shifts, and rotates the images within a strip. The example to the right shows what can be done with a single image. To make a smooth transition to the final effect, enable the Frame locked button and define a curve in the Ipo Window (Sequence mode).
With the Transform strip selected, uses the properties panel to adjust the settings of this effect:
- (x,y)Scale (Start,End):
- To adjust the scale (size). xScale Start defines the start width, xScale End the end width, yScale Start the start height, and yScale End the end height. The values higher than 1.0 will scale up the picture, while values lower than 1.0 will scale it down.
- (x,y) (Start,End):
- To adjust the position (shifting). x Start defines the horizontal start position, x End, the end one; positive values shift the image to the right, negative values, to the left. y Start defines the vertical start position, y End, the end one; positive values shift the picture to the top, negative values, to the bottom.
- rot (Start,End):
- The rotation is in degrees (360 for a full turn) and is counter-clockwise. To make an image spin clockwise, make the end value lower than the start one (e.g. start it at 360 and go down from there).
Color
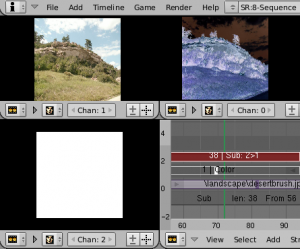
This effect works by itself to create a color strip. By default, when it is created, it is 50 frames long, but you can extend it by grabbing and moving one of the ends. Click on the color swatch in the Effect panel under Sequencer buttons, which is under the Scene (F10) tab, to pick a different color (by default, it is gray). Use this strip crossed with your main movie to provide a fade-in or fade-out.
Speed Control
Speed Control time-warps the strip, making it play faster or slower than it normally would. A Global Speed less than 1.0 makes the strip play slower; greater than 1.0 makes it play faster. Playing faster means that some frames are skipped, and the strip will run out of frames before the end frame. When the strip runs out of frames to display, it will just keep repeating the last one; action will appear to freeze. To avoid this, position the next strip under the original at a point where you want motion to continue.
Creating a Slow-Motion Effect
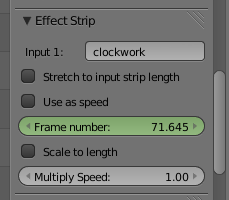
Suppose you want to sssslooow your strip dowwwwwwn. You need to affect the speed of the video clip without affecting the overall frame rate. Select the clip and Add->Effect->Speed Control effect strip. Click to drop it and press N to get the Properties. Uncheck the Stretch to input strip length option in the Effect Strip section. Set the Speed factor to be the factor by which you want to adjust the speed. To cut the displayed speed by 50%, enter 0.50. Now, a 275-frame clip will play at half speed, and thus display only the first 137 frames.
If you want the remaining frames to show in slo-mo after the first set is displayed, double the Length of the source strip (since effects strip bounds are controlled by their source strips). If you're using a speed factor other than 0.5 then use the formula
new_length = true_length / Speed_factor
That's it! Set your render to animate (in this example) all 550 frames.
Keyframing the Speed Control
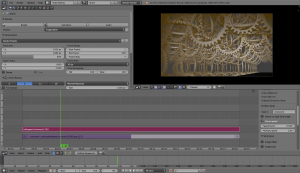
To get even finer control over your clip timing, you can use curves! While it is possible to keyframe the Speed factor, usually you want to keyframe the Frame number directly.
Uncheck Stretch to input strip length and uncheck Use as speed. You now have a Frame number field which you can keyframe. If you want the strip to animate at all you will have to insert some keyframes, otherwise it will look like a still. In most cases you will want to use the Graph editor view to set the curve interpolation to Linear since the default Bezier will rarely be what you want.
If you do choose to keyframe the Speed factor instead, remember to click the Refresh Sequencer button in the header of the Video Sequence Editor's strip view or your changes will not take effect.
Changing Video Frame Rates
You can use the speed control to change the frames per second (fps), or framerate, of a video. If you are rendering your video to a sequence set, you can effectively increase or decrease the number of individual image files created, by using a Global Speed value less than or greater than one, respectively. For example, if you captured a five-minute video at 30 fps and wanted to transfer that to film, which runs at 24 fps, you would enter a Global Speed of 30/24, or 1.25 (and Enable Frame Blending to give that film blur feel). Instead of producing 5*60*30=9000 frames, Blender would produce 9000/1.25=7200=5*60*24 frames. In this case, you set a Sta:1 and End:7200, set your Format output to Jpeg, 30fps, and image files 0001.jpg through 7200.jpg would be rendered out, but those images 'cover' the entire 9000 frames. The image file 7200.jpg is the same a frame 9000. When you read those images back into your film .blend at 24 fps, the strip will last exactly 5 minutes.
Multicam Selector
Ever wanted to do multicam editing with Blender? Now you can and it is mindbogglingly easy:
- Add your input strips on channels say 1 to 4 (you can use as many you like, interface get's a little bit clumky if you have more than 10, see below).
- Sync the strips up. There is no automatic sync feature in Blender, but you can open two viewer windows, choose one camera as the master channel and sync the other against them just by looking at the movement of legs or light flashes (depending of the show, you want to edit). We might add automatic sync feature based on global brightness of the video frames in the future. (Syncing based on the audio tracks, like most commercial applications do, isn't very clever, since the speed of sound is only around 340 metres per second and if you have one of you camera 30 meters away, which isn't uncommon, you are already 2-3 frames off. Which *is* noticeable...)
- Build small resolution proxies (25%) on all your input video strips.
- Use meta strips, so that every input camera fits in exactly one channel.
- Add a viewer window for every input channel and put it into 25% proxy display mode (I suggest to line them up on the left side on top of each other, but just do, whatever pleases your personal habits)
- Add a large viewer window for the final output and let it run on full resolution.
- Add a multicam selector effect strip *above* all the channel tracks
- Enlarge it, so that it covers the whole running time of your show (just change it's length or drag the right handle, the former is probably easier, since you can just type in a very large number and you are done)
- Cross you fingers :) (that's important :) )
- Select the multicam strip, if you take a look at the strip options (N-key), you will notice, that multicam is a rather simple effect strip: it just takes a selected channel as it's input. That's all. The magic comes with the convenient keyboard layout: when you select multicam, the keys 1-0 are mapped to a python handler, that does a cut on the multicam and changes it's input.
- So: you select the multicam strip, you start playback and hit the keys 1-4 while watching your show.
- You'll end up with a small multicam selector strip for every cut.
In reality, it boils down to: watch a few seconds to see, what's coming, watch it again and do a rough cut using the number keys, do some fine tuning by selecting the outer handles of two neighboring multicam for A/B rolling.
Adjustment Layer
The adjustment layer strip works like a regular input file strip except for the fact, that it considers all strips below it as it's input.
Real world use cases: you want to add some last finishing color correction on top of parts of your final sequencer timeline without messing with metastrips around. Just add an adjustment layer on top and activate the color balance.
Or: you can stack a primary color correction and several secondary color correction on top of each other (probably using the new mask input for area selection).

