「Doc:2.6/Manual/Sequencer/Audio」の版間の差分
(相違点なし)
|
2012年11月5日 (月) 08:29時点における版
Page status (reviewing guidelines)
Copy
This page is a copy of the same page in 2.4 manual, need to be updated
|
Sound Editing
Blender contains a multi-track Audio sequencing toolbox. You can add WAV, Mp3 files from your hard disk as a file, or as encoded within a movie, and mix them using an F-Curve as a volume control.
Options
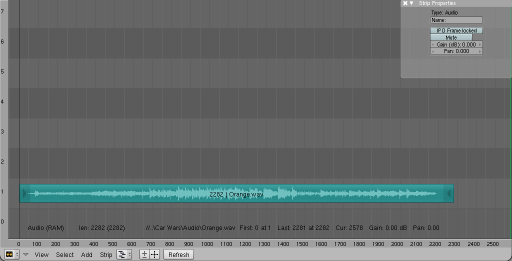
Audio-RAM loads a file into memory and plays it from there. You can only load stand-alone WAV files. Audio-HD plays the sound back from the hard disk and thus does not take up memory. With Audio HD, you can load stand-alone WAV files, but also audio tracks from movies.
For either, a green audio strip will be created. With Audio RAM, a waveform is created that shows you the waveform inside the green strip, scaled to the height of the green strip. Since Audio-RAM files are read into memory, changing the audio file will not affect playback, and you will have to re-open the file so that Blender re-reads the file.
Hiss, Crackle and Pop
Some audiophile users report that Hiss is introduced sometimes if Audio RAM is used. There must be some decoding or sampling going on, that does not occur when Audio HD is used, that introduces some playback noise. If you hear pops and crackles, usually that is a sign that your hardware cannot keep up in real-time playback. They will not be present in your final rendered animation output (but they may show up in Game mode).
Also, static hiss seems to occur whenever two or more audio strips are overlapping in the timeline…
|
Audio Mixing in the VSE
You can have as many Audio strips as you wish and the result will be the mixing of all of them. You can give each strip its own name and Gain (in dB) via the N menu. This also let you set a strip to mute or 'Pan' it; -1 is hard left, +1 is hard right, with percentages in-between.
Overlapping strips are automatically mixed down during ANIM processing. For example, you can have the announcer on channel 5, background music on channel 6, and foley sound effects on channel 7.
Working with Audio Tracks
An audio track (strip) is just like any other strip in the VSE. You can grab and move it, adjust its starting offset using RMB ![]() over the arrow end handles, and K cut it into pieces. A useful example is cutting out the "um's" and dead voice time.
over the arrow end handles, and K cut it into pieces. A useful example is cutting out the "um's" and dead voice time.
Animating Audio Track Properties
You want to set a value somewhere between 0.0 and 1.0, and the volume becomes that percent; 0.6 is 60%. You can add a gain to the volume through the strip properties (N). You can make a curve by having multiple points, to vary the volume over its length. Press ⇆ Tab to edit the curve, just like any old bezier F-curve.
In the Y direction, 1.0 is full volume, 0.0 is completely silent. Only the FFMPEG-output system is currently able to mix audio and video into one output stream. Use CtrlLMB ![]() to add control points, and ⇆ Tab to edit a curve.
to add control points, and ⇆ Tab to edit a curve.
Animating an audio strip affects the volume of the strip in the resulting composite. Use animation on an audio strip to fade in/out background music or to adjust volume levels. Layered/crossed audio strips are added together; the lower channel does not override and cut out higher channels. This makes Blender an audio mixer. By adding audio tracks and using the curves to adjust each tracks' sound level, you have an automated dynamic multi-track audio mixer!
Output
The output is therefore a video file if the ANIMATION button in the Render Panel of the Scene Context/Render Sub-context is used as described before. An audio file may be created via the MIXDOWN button in the Sequencer button of the Scene Context, Sound Sub-context. This WAV file contains the full audio sequence and is created in the same directory of the video file and with the same name but with a .WAV extension. You can mix Video and Audio later on with an external program or by adding it to, for example, an image sequence strip as described above.
The advantage of using Blender's sequence editor lies in the easier synchronization attainable by sequencing frames and sound in the same application.
To enable audio synchronisation after importing an audio track, select the Scene button (F10) in the buttons window then choose the Sound Block Button (small blue sine wave). In here you'll see the Sync and Scrub tools.
- Sync lets Blender drop image frames to keep up with realtime audio when you play an animation in the 3D window. This gives you a rough overview of the timing of your animation.
- Scrub allows you to drag your frame-marker or change frames in any window and it will play a clip of audio for that point in time.
Draging the frame-marker over a range of frames in the Action Editor will allow you to hear roughly where specific sounds occur so that you can key poses or shapes on this frame.
