「Doc:2.6/Manual/Lighting/Lamps/Lighting Rigs」の版間の差分
(→Troubleshooting and a Helpful Blend file) |
細 (1版 をインポートしました) |
(相違点なし)
| |
2018年6月29日 (金) 04:51時点における最新版
Lighting Rigs
A rig is a standard setup and combination of objects; there can be lighting rigs, or armature rigs, etc. A rig provides a basic setup and allows you to start from a known point and go from there. Different rigs are used for different purposes and emulate different conditions; the rig you start with depends on what you want to convey in your scene. Lighting can be very confusing, and the defaults do not give good results. Further, very small changes can have a dramatic effect on the mood and colors. At major studios, lighting is an entire step and specialty. Well, let’s get out of the darkness of confusion and let me enlighten you.
In all the lighting rigs, the default camera is always positioned nearly 15 degrees off dead-on, about 25 BU (Blender Units) back and 9 BU to the side of the subject, at eye level, and uses a long lens (80mm). Up close, a 35mm lens will distort the image. A long lens takes in more of the scene. A dead-on camera angle is too dramatic and frames too wide a scene to take in. So now you know; next time you go to a play, sit off-center and you won’t miss the action happening on the sidelines and will have a greater appreciation for the depth of the set. Anyway, enough about camera angles; this is about lighting.
Environment or Ambient Only
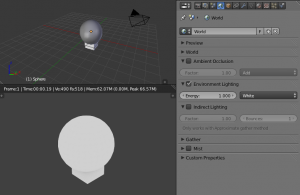
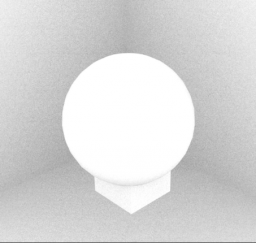
In the World context, there is a panel Environment Lighting, where you enable environment or ambient lighting of your scene. Ambient light is the scattered light that comes from sunlight being reflected off every surface it hits, hitting your object, and traveling to camera.
Ambient light illuminates, in a perfectly balanced, shadeless way, without casting shadows. You can vary the intensity of the ambient light across your scene via ambient occlusion. The ambient color is a sunny white.
Single Rig
The sole, or key, spot light rig provides a dramatic, showy, yet effective illumination of one object or a few objects close together. It is a single Spot light, usually with a hard edge. Halos are enabled in this render to remind you of a smoky nightclub scene. It is placed above and directly in front of the subject; in this case 10 BU in front and 10 BU high, just like a stage, it shines down at about a 40 degrees angle. We use quadratic attenuation.
You can make the spot wider by increasing Size Spot Shape and softening the edge by increasing Blend Spot Shape, and parent it to the main actor, so that the spot follows him as he moves around. Objects close to the main actor will naturally be more lit and your viewer will pay attention to them.
Moving this spot directly overhead and pointing down gives the interrogation effect. At the opposite end of the show-off emotional spectrum is one soft candlelight (Point lamp, short falloff Distance, yellow light) placed really up close to the subject, dramatizing the fearful “lost in the darkness” effect.
Somewhere in the macabre spectrum is a hard spot on the floor shining upward. For fun, grab a flashlight, head into the bathroom and close the door. Turn out the light and hold the flashlight under your chin, pointing up. Look in the mirror and turn it on. Ghoulies! Don’t blame me for nightmares, and I hope you get the point: lighting, even with a single light, varying the intensity, location and direction, changes everything in a scene.
Use this rig, with Environment Lighting light (and props receiving and being lit by ambient light in their material settings) for scenes that feature one main actor or a product being spotlighted. Do not use this rig for big open spaces or to show all aspects of a model.
Two-Point Rig
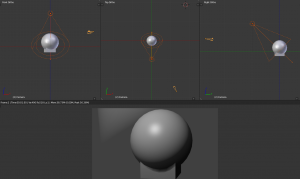
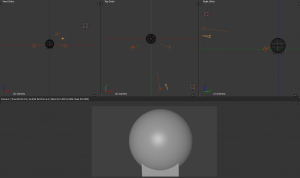
The two-point lighting rig provides a balanced illumination of an object. Shown to the right are the views of the standard two-point lighting rig. It is called the two-point because there are two points of light. The standard two-point lighting rig provides a balanced illumination of untextured objects hanging out there in 3D space. This rig is used in real studios for lighting a product, especially a glossy one.
Both lights are almost the same but do different things. Both emulate very wide, soft light by being Hemi. In real life, these lights bounce light off the inside of a silver umbrella.
Notice how we use low Energy to bring out the dimensionality of the sphere; I can’t stress that enough. Hard, bright lights actually flatten it and make you squint. Soft lights allow your eye to focus. We disable specular for right Hemi, so we don’t get that shiny forehead or nose.
The lamp on the left however, lets it be known that it is there by enabling specular; specular flare is that bright spot that is off center above midline on the sphere.
Use this rig to give even illumination of a scene, where there is no main focus. The Hemi’s will light up background objects and props, so Environment Lighting is not that important. At the opposite end of the lighting spectrum, two narrow Spot lights at higher power with a hard edge gives a “This is the Police, come out with your hands up” kind of look, as if the subject is caught in the crossfire.
Three-Point Rigs
The standard three-point lighting rig is the most common illumination of objects and scenes bar none. If you want to show off your model, use this rig. As you can see, the untextured unmaterialized sphere seems to come out at you. There are multiple thesis on this rig, and you will use one of two:
- Studio – used in a real studio to film in front of a green screen or backdrop. Use this rig when you are rendering your CG objects to alpha into the scene so that the lighting on the actors and your CG objects is the same.
- Standard – used in real life to light actors on a set, and gives some backlighting to highlight the sides of actors, making them stand out more and giving them depth.
Studio rig
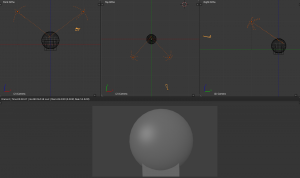
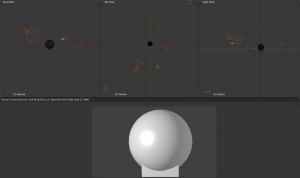
Shown to the right are the “Studio” top, front, and side views of the standard three-point lighting rig. It changes the dynamics of the scene, by making a brighter “key” light give some highlights to the object, while two side “fill” lights soften the shadows created by the key light.
In the studio, use this rig to film a talking head (actor) in front of a green screen, or with multiple people, keeping the key light on the main actor. This rig is also used to light products from all angles, and the side fill lights light up the props.
The key light is the Area light placed slightly above and to the left of the camera. It allows the specular to come out. It is about 30 BU back from the subject, and travels with the camera. A little specular shine lets you know there’s a light there, and that you’re not looking at a ghost. In real life, it is a spot with baffles, or blinders, that limit the area of the light.
The two sidelights are reduced to only fill; each of them are Hemi lights placed 20 BU to the side and 5 BU in front of the subject, at ground level. They don’t cause a spotshine on the surface by disabling specular, and at ground level, light under the chin or any horizontal surfaces, countering the shadows caused by the key light.
Use this rig to give balanced soft lighting that also highlights your main actor or object. It combines the best of both the single rig and the two-point rig, providing balanced illumination and frontal highlights. For a wide scene, you may have to pull the sidelights back to be more positioned like the two-point rig.
Standard Rig
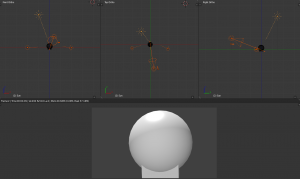
Without a curtain in back of your main subject, you have depth to work with. The left fill light has been moved behind the subject (so it is now called a backlight) and is just off-camera, while the right side fill light remains the same. The keylight gives you specular reflection so you can play with specularity and hardness in your object’s material settings. The key light gives that “in-the-spotlight” feel, highlighting the subject, while the backlight gives a crisp edge to the subject against the background. This helps them stand out.
In this rig, the key light is a fairly bright spot light. Use a slighter tinge of yellow because the light is so bright; it is the only light for that side. The other sidelight has been moved in back and raised to eye (camera) level. You need to cut the energy of the backlight in half, or when it is added to the remaining sidelight, it will light up the side too much and call too much attention to itself. You can vary the angle and height of the backlight to mimic a sun lighting up the objects.
Use this rig in normal 3D animations to light the main actor. Use this rig especially if you have transparent objects (like glass) so that there is plenty of light to shine through them to the camera. The tricky part here is balancing the intensities of the lights so that no one light competes with or overpowers the others, while making sure all three work together as a team.
Four-point Rig
The four-point lighting rig provides a better simulation of outside lighting, by adding a Sun lamp 30 Blender Units above, 10 to the side, and 15 BU behind the subject. This sunlight provides backlighting and fills the top of the subject; even producing an intentional glare on the top of their head, telling you there is a sun up there. Notice it is colored yellow, which balances out the blue sidelights.
Changing the key light to a Spot, select Inverse Square, disable Specular and pure white light combines with and softens the top sun flare while illuminating the face, resulting in a bright sunshine effect. Two lights above means sharper shadows as well, so you might want to adjust the side fill lights. In this picture, they are still Hemi, disable Specular.
Use this rig when the camera will be filming from behind the characters, looking over their shoulder or whatnot, because the sun provides the backlight there. Also use this rig when you have transparent objects, so there is light to come through the objects to the camera.
Another spot for the fill light is shining up onto the main actor’s face, illuminating the underside of his chin and neck. This gets rid of a sometimes ugly shadow under the chin, which if not corrected, can make the actor look fat or like they have a double chin; otherwise distracting. It evens out the lighting of the face.
Troubleshooting
If you run into a problem with your render, where there are really bright areas, or really dark ones, or strange shadows, or lines on your objects, here is what I suggest you do:
- First, try deactivating all materials (create a default, gray one, and enter its name in the Mat field, Layer panel, Render Layers context – to get back all your normal materials, just erase this text field!). See if you get those problems with just grayness objects. If you don’t have the problem anymore, that should tell you that you’ve got a materials-interacting-with-light problem. Check the material settings, especially ambient, reflection and all those little buttons and sliders in the Material context . You can set some lights to affect only certain materials, so if there’s an issue with only a few objects being really bright, start with those.
- Then start “killing” lights (e.g. moving them to an unused layer); regress all the way back to one light, make sure it’s smooth, then add them in one by one. As they add together, reduce power in the tested ones so they merge cleanly, or consider not adding it at all, or, especially, reduce the energy of the lamp you just introduced.
- You can also set lights to only light objects on a layer, so again, if some of the gray spheres have weirdness, check for that as well. Again, you may have done some of this accidentally, so sometimes deleting the light and re-adding it with defaults helps you reset to a known-good situation.
- Negative lights can be very tricky, and make your model blotchy, so pay special attention to your use of those special lights. Shadow-only lights can throw off the look of the scene as well. Overly textured lights can make your scene have random weird colors. Don’t go too far off a slight tinge of blue or yellow or shades of white, or your material may show blue in the Material context but render green, and you will be very confused.
- Look at your environment settings World context: Horizon, Zenith, and Environment Lighting.
