「利用者:Pepribal/Ref/Info/Menus/Add」の版間の差分
細 (1版 をインポートしました) |
|
(相違点なし)
| |
2018年6月29日 (金) 05:45時点における最新版
目次
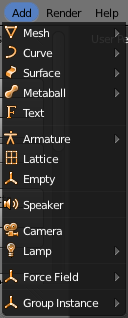
There are several predefined objects and primitives in Blender. The first step to create any object is to select one of the options in this menu.
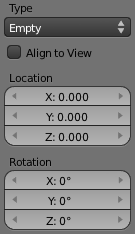
Objects are placed, by default, at the position of the 3D Cursor, aligned to the global space. You can change this (and other options) from the redo panel just after creating the object:
- Align to View rotates the new object properly so that it is aligned to the current view.
- Location values let you place the object in a position other than the default one.
- Rotation values let you rotate the object so that default alignment is overriden.
Some objects let you change its type just after creation from the same panel (Type selection button).
Text
Creates a Text object.
Lattice
Creates a Lattice object.
Empty
Creates an Empty object.
Speaker
Creates a Speaker object.
Camera
Creates a Camera object.
Group Instance
Lets you select from a list of existing object groups. Once selected, an Empty object will be created, with an instance of the selected group (group duplication active).
After creation, the redo panel (Add Group Instance) will let us change the group to instantiate.
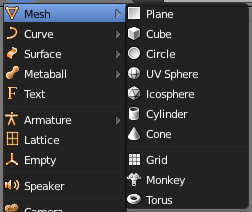
Plane
Creates a mesh with a single quad face.
Cube
Creates a cube mesh with 6 faces.
Circle
Creates a circle mesh. Arguments in the redo panel (Add Circle):
- Vertices defines the number of vertices of the circle.
- Radius defines the magnitude of the circle radius.
- If Fill is activated, the circle will be filled with a triangle fan of faces, with an extra vertex in the center. Otherwise, no faces will be generated.
UV Sphere
Creates a sphere using meridians (vertical, from pole to pole) and parallels (horizontal edge loops). Arguments in the redo panel (Add UV Sphere):
- Segments indicates the number of meridians.
- The number of parallels will be Rings minus one. If the edges connected to the two poles were considered edge rings, then Rings would define the total amount of edge rings.
- Size defines the radius of the sphere, that is the distance between the center and any vertex.
Icosphere
Creates a sphere made of triangles. Arguments in the redo panel (Add Ico Sphere):
- Every increment of Subdivisions will subdivide each triangle in four.
- Size defines the radius of the sphere, that is the distance between the center and any vertex.
Cylinder
Creates a cylinder. Arguments in the redo panel (Add Cylinder):
- Vertices defines the number of sides.
- Radius defines the radius of the cylinder, that is the distance between any vertex and the central axis.
- Depth defines the height of the cylinder.
- If Cap Ends is activated, each end of the cylinder will be capped with an extra vertex and a triangle fan of faces.
Cone
Creates a cone. Arguments in the redo panel (Add Cone):
- Vertices defines the number of sides.
- Radius defines the radius of the cone base, that is the distance between any vertex of the base and its center.
- Depth defines the height of the cone.
- If Cap End is activated, the base of the cone will be capped with an extra vertex and a triangle fan of faces.
Grid
Creates a subdivided plane. Arguments in the redo panel (Add Grid):
- X Subdivisions defines the number of edge loops in the (local) X direction.
- Y Subdivisions defines the number of edge loops in the (local) Y direction.
- The grid will form a square which sides have a length of 2 x Size.
Monkey
Creates a mesh of a monkey head.
Torus
Creates a torus via the revolution of a minor circumference along a major circumference. Arguments in the redo panel (Add Torus):
- Major Radius defines the radius of the major circumference.
- Minor Radius defines the radius of the minor circumference.
- Major Segments defines the number of segments of the major circumference.
- Minor Segments defines the number of segments of the minor circumference.
- When Use Int+Ext Controls is activated, the following arguments are used to define the circumferences radii, instead of Major Radius and Minor Radius:
- Exterior Radius defines the distance from the center to the farthest point of the torus surface.
- Inside Radius defines the distance from the center to the closest point of the torus surface.
- In case you want to reuse later the values entered in the Add Torus panel, you can manage the Operator Presets list to create, delete or reuse torus preset settings. These presets are stored as scripts in the proper presets directory.
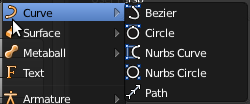
This submenu provides options to add one of the following curve objects:
- Bezier creates a simple Bezier curve with 2 control points.
- Circle creates a cyclic Bezier curve with 4 control points forming a circle.
- Nurbs Curve creates a NURBS curve with 4 control points and U endpoints disabled by default.
- Nurbs Circle creates a cyclic NURBS curve with 8 control points forming a circle.
- Path creates a straight NURBS curve with 5 control points and U endpoints enabled by default.
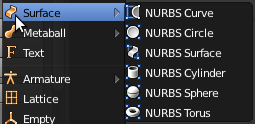
This submenu provides options to add one of the following NURBS surface objects:
- NURBS Curve creates a simple 1-dimension surface with 4x1 control points along the U coordinate. The curve must be extruded along the V coordinate to form a proper surface.
- NURBS Circle creates a 1-dimension surface with 8x1 control points along the U coordinate, with cyclic U activated, forming a circle. The curve must be extruded along the V coordinate to form a proper surface.
- NURBS Surface creates a simple surface with 4x4 control points.
- NURBS Cylinder creates a surface with 8x2 control points, with cyclic U activated, forming a cylinder.
- NURBS Sphere creates a surface with 4x8 control points, with bezier U and cyclic V activated, forming a sphere.
- NURBS Torus creates a surface with 8x8 control points, with cyclic U and cyclic V activated, forming a torus.
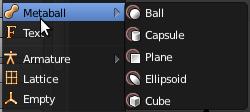
This submenu provides options to add one of the following metaball objects:
- Ball
- Capsule
- Plane
- Ellipsoid
- Cube
After creation, the metaball type can be changed from the Primitive control of the redo panel (Add Metaball).
The Armature submenu provides a single option: Single Bone, which creates an armature with a single bone.
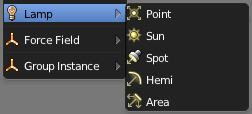
The Lamp submenu provides options to add one of the following lamp objects:
- Point
- Sun
- Spot
- Hemi
- Area
After creation, the lamp type can be changed from the Type control of the redo panel (Add Lamp).
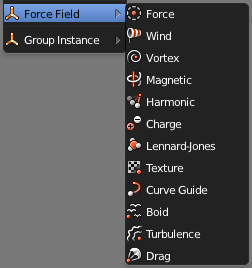
The Force Field options create an Empty object with force field enabled of one of the following types:
- Force
- Wind
- Vortex
- Magnetic
- Harmonic
- Charge
- Lennard-Jones
- Texture
- Curve Guide
- Boid
- Turbulence
- Drag
After creation, the force field type can be changed from the Type control of the redo panel (Add Effector).
