「利用者:Jwilkins/GSoC2011/Google Summer of Code 2011 Preliminary Documentation」の版間の差分
(Created page with "Preliminary Documentation Google Summer of Code 2011 Sculpt/Paint Enhancements Onion Branch =Introduction= The following is a rough draft of documentation for work done by J...") |
細 (1版 をインポートしました) |
(相違点なし)
| |
2018年6月29日 (金) 05:49時点における最新版
Preliminary Documentation
Google Summer of Code 2011
Sculpt/Paint Enhancements
Onion Branch
目次
Introduction
The following is a rough draft of documentation for work done by Jason Wilkins on Blender during the 2011 Google Summer of code. It documents the user visible changes in Onion branch at the end of the 12 week working period and is subject to significant changes.
Many features in Onion branch came from Nicholas Bishop's GSoC 2010 branch. It was important to merge Nick's work into Onion because of significant changes that were planned that would make merging later more troublesome. Any features that originated in soc-2010-nicholasbishop will be prominently noted.
User Documentation
New user visible changes in Onion include:
- An on-surface brush cursor for better visualizing where a brush will act on a surface
- A so-called "material capture" or MatCap viewport rendering mode for quickly visualizing what surface might look like by using a simple but powerful environment map
- A new stroke UI
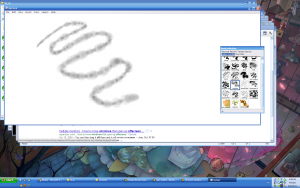
- Multisampling input from a mouse or pen in order to smooth it out
- The ability to use brushes from MyPaint
Merged from soc-2010-nicholasbishop:
- Masking areas of a mesh off so that sculpting and painting do not effect certain areas
- Hiding parts of a mesh so that they are not rendered and improve performance
- Vertex painting with the multires modifier
- A paint overlay for applying colored textures in vertex paint mode
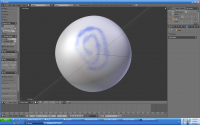
On-Surface Brush
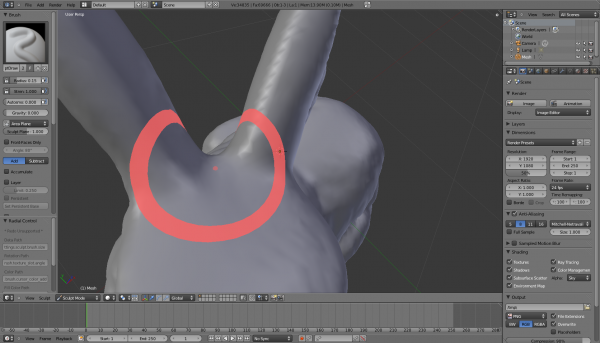
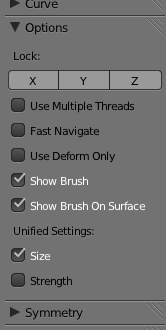
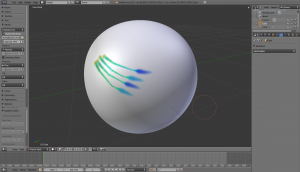
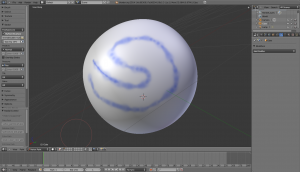
The on-surface brush cursor is enabled for each individual paint/sculpt mode by selecting both "Show Brush" and "Show Brush On Surface" on the "Options" panel of the edit mode's tool shelf.
The on-surface cursor will only be drawn when the cursor is over the object being edited, otherwise it will revert to the two-dimensional cursor.
The thickness and opacity of the cursor will reflect the strength of the brush and if pen pressure is being used it will change in real time as pressure changes.
The radial control (F-Key) used to resize, rotate or change the strength of the brush will also be drawn on the surface when the option is on.
MatCap
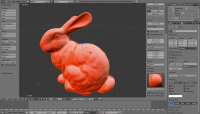
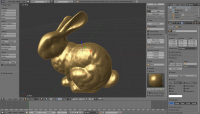
To enable MatCap visualization the viewport drawing mode must be changed to MatCap, the objects you wish to view must have their visualization modes set to MatCap, and you must have a MatCap image selected.
The viewport rendering mode is on the 3D View toolbar and by default is set to "Solid." The MatCap mode is considered to be more specialized than Solid or Textured so objects that have their mode set to "Textured" will not show a MatCap even if the object is set to Textured which is the default. Older .blend files will automatically have Textured objects updated to MatCap, however if a MatCap does not show it is worth checking the Object property panel to make sure it is set to be rendered with a MatCap.
To select a MatCap image, open the N-key tools and select a MatCap using the MatCap panel.
Wrap Texturing Mode
"Wrap" texture mode will apply a texture as if it was projected straight down onto the surface of an object instead of as if from the point of view of the user. In other words, the other texture modes, Fixed and Tiled, project the texture onto the surface as if from a flashlight onto the surface. This may look right if applied to a surface that is already facing the user, but for surfaces at an angle the texture will get stretched out. What is worse, this distortion will not be apparent until the user rotates the object. "Wrap" mode will always apply the texture as if you are looking straigh down at the surface.
In addition to distored textures, apparent distances between dabs for path strokes can become distorted. The result is more dabs being applied to surfaces viewed straight on and less dabs applied to surfaces viewed at an angle. To help with this a new "adaptive spacing" option is provided that will reduce the spacing between dabs if the surface is being viewed at an angle.
Input Sampling and Averaging
Although "Smooth Stroke" is provided to filter noise from user input, that particular method of smoothing the input is not generally applicable. To be more specific, Smooth Stroke has a very laggy feeling (It is even called "Lazy Mouse" in ZBrush).
Input averaging is a lower level function that takes multiple samples of input from a user specified number of past input and uses it to create an averaged input. What is sampled includes not just the mouse/pen position, but the tilt and pressure as well. The result is that noise in all subsequent values derived from these inputs is also filtered out.
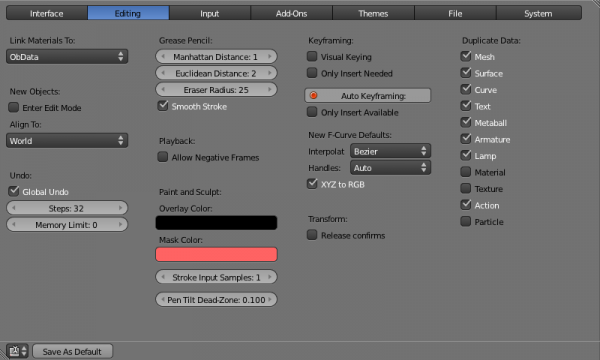
To change the number of samples used for average, go to the Editing panel of User Prefs and select the number of input samples for Sculpt/Paint.
Pen Tilt Dead Zone
If a pen is held straight up and down the angle at which the pen is being held will become chaotic. To help filter this out the pen tilt dead zone determines how much the pen must be tilted in order for a new angle to be registered.
Note: this feature is untested and probably does not work completely as intended at the moment because lower level drivers may have its own idea of what the dead zone is. It should work for sufficiently large dead-zones.
New Stroke UI
A new stroke UI exposes new features as well as organizes new features in a more compact and hopefully easier to understand form. Existing and new features will all be covered here to keep the text simple.
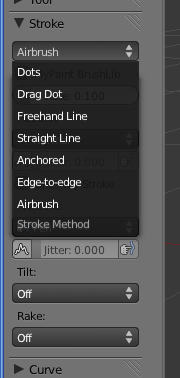
Stroke Methods
Dots is relatively raw input because it applies one dab for each mouse sample event. There is not attempt to evently space the dabs so slow movements will tend to be strong and continuous while fast movements will cause widely spaced unconnected 'dots', hence the name.
Drag Dot is the same as Dot except that only the last dab is recorded. This has the effect of dragging a dab around the surface of an object and allows for careful placement of single dabs. This is especially useful in conjunction with a texture map as it allows you to carefully place "stamps."
Freehand Line will evenly space dabs along the path of the input device. The spacing slider can be used to control how far apart dabs are in terms of a percentage of the brush radius. The adaptive spacing option reduces this spacing based on the angle of the view relative to the surface, which keeps spacing consistent even when the surface varies a lot.
Straight Line is the same as freehand line except that the line is drawn straight from the starting point to the current end point. One other difference is that all dabs in the straight line will have the same pressure, rake, and tilt settings. These settings are taken from the end point and are not interpolated. Only the position is interpolated.
The spacing can be made sensitive to tablet pressure by clicking the icon to the right of the spacing slider. Higher pressure then will cause dabs to be placed closer together.
Anchored mode applies a single dab where the size and rotation of the dab are controlled by dragging the cursor away from the original click position. Like drag dot this mode is good for carefully stamping a single dab but its emphasis is on placing the center and then carefully controlling the size and rotation.
Edge-to-Edge like anchored except that initial click determines one edge of the dab instead of the center. Dragging out the position increases the size and controls the position of the opposite edge. This mode is good for placing a dab exactly between two other points or created a string of dabs that each meet at an edge.
Airbrush is like Dots except instead of taking device positions whenever they occur it triggers them at regular real-time clock intervals. For example, a dab can be set to draw every 10th of a second. This means that even if the mouse does not move a new dab will be drawn on top of the previous one every 10th of a second which causes the dab to build up like an airbrush.
Input Options
The input options following the stroke method specify how the various inputs from the input device, be it a mouse or pen, will be interpreted.
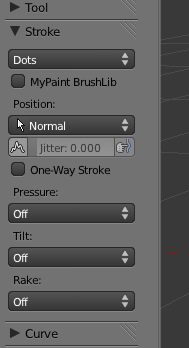
Position
Position is the set of controls for determining the x,y coordinates of the cursor. The position can be smoothed, snapped, and/or jittered. Smoothing and snapping are essentially mutually exclusive, however since Jitter is applied after smoothing both can be done. Think of it as adding back a controlled amount of noise to a smoothed signal.
Normal uses device input as it was sampled with no extra processing.
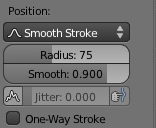
Smooth Stroke takes a weighted average of the current sample and the previous weighted average. As a result the entire history of the stroke influences the position of the cursor and the cursor looks as if it is being dragged around by the input device by a leash. There are two parameters that control this behavior, the first is the weighting factor used to average, the more of the past history is used the less influence device movements have on the cursor and the long and less responsive the leash. The other parameter is radius of the zone around the cusor position where movements will have no effect. This region allows for sharp turns despite the laggy nature of this mode because you can move the cursor through this region without moving the cursor and come out the other side to pull the cursor in a completely different direction.
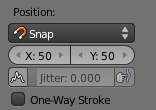
Snap will only allow the cursor to jump to points on a grid determined by the snap x and snap y parameters. A setting of 1 essentially means "off", while a setting of 50 means to snap to every 50 pixels. So, if you want to snap in the x axis but not on the Y axis you can set snap x to 50 and snap y to 1.
Jitter offsets the input coordinates by a random amount on each dot. The amount is a factor of the brush radius, so a setting of 1 has the potential to land one full brush radius away from the actual position.
One-Way Stroke when enabled dabs will only be applied if they are made in the same general direction as previous dabs. Moving the mouse or pen in the opposite direction will not draw. This is useful for making several strokes in one direction without lifting the pen or releasing the mouse button.
Pressure
Pressure is the amount of force applied to the surface of a tablet input device. If this is set to Off or the input device is a mouse, the pressure is considered to be maximum. Pressure can also be simulated on a curve and this simulation can also be used to filter real pressure. Finally, pressure can be jittered randomly.
If pressure is turned Off it is actually considered to be the maximum pressure at all times.
Setting pressure to Pen means the pressure input is read from the pen device, however if a mouse is used, the pressure is still considered to be maximum and not the pressure from the pen (which common sense would imply is zero).
Enabling Smooth will create a lag time in the response of the pressure curve that will smooth out an unsteady hand or overly sensitive tablet. The weighting factor determines how much of the previous weighted average is averaged with the current value.
Jitter adds noise to pressure value at each dab. The noise discontinuous so it may give better results to combine it with Smooth. The value of Jitter is what fraction of pressure is subtracted from the original value, so if pressure is 1 and Jitter is .10 then pressure will vary between .9 and 1. If the real pressure value is .5 then it will vary between .45 and .5.
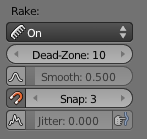
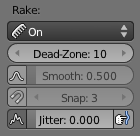
Rake
Rake is the first derivative of position, or the velocity vector of the cursor. This value can be smoothed, snapped, and jittered independently of position. In fact, if position is modified somehow but rake is set to normal then rake will be determined as if position was also normal. This makes rake and position completely indpendent and is one reason why it is a stroke setting and determined in each paint/sculpt mode because those modes may never see the real position of the cursor.
Setting Rake to Off sets the velocity to the zero vector and the rake angle to 0 degrees.
In Normal mode the rake vector is the difference between the current and previous sampled positions. If the difference is too small the vector is considered to be zero but the angle is held over from a previous good reading.
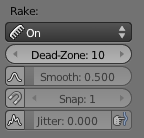
The Rake Dead-Zone determines how far the cursor has to move before rake direction is recalculated. This helps to smooth out the rake vector by making sure a movement is sufficiently large before the vector is recalculated however it makes the rake angle less responsive, however a more responsive rake angle is going to have more noise in it so there is a trade-off.
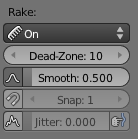
In rake Smooth mode a weighted average is taken between the current rake vector/angle and the previous weighted average. The smoothing factor determines how much of the previous value is counted.
Rake Snap is an integer determining how many slices to divide a circle into with each division of that circle being a stop on which to snap the rake angle. For example, a rake Snap of 3 forces the rake angle to be 0, 120, or 240.
Rake Jitter adds or subtracts a random number of degrees to the rake angle. A settings of 10 will add or subtract 10 degrees, while a setting of 180 means to basically pick any random angle because any orientation could result from adding or subtracting 180 degrees.
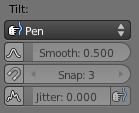
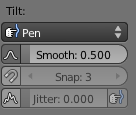
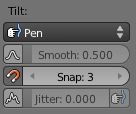
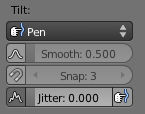
Tilt
Tilt is the angle that the pen is held relative to the surface of a tablet. It can be thought of as the vector formed by the shadow of a light shining straight down on the tablet.
If set to Off the pen is considered to be straight up and down, casting no shadow (the zero vector) and the tile angle is considered to be 0.
In Pen mode the tilt used as it is read from the device. The tilt dead zone setting in User Preferences will be used to determine if the tilt angle should not change if it the vector is too small.
In Tilt Smooth mode a weighted average is taken between the current tilt vector/angle and previous weighted average. The smoothing factor determines how much of the previous value is carried over.
Tilt Snap is an integer determining how many slices to divide a circle into with each division of that circle being a stop on which to snap the tilt angle to. For example, a tilt Snap of 3 forces the rake angle to be 0, 120, and 240.
Tilt Jitter randomly modifies the tilt vector from its original value. Currently the value given for tilt jitter is absolute, meaning that .1 will offset tilt by as much as .1 in any direction, similarly to how position is jittered. However this will probably be changed to be a percentage the same as jittering pressure, where the vector is only made smaller, because the tilt vector is not supposed to become greater than 1 in length and as it is implemented now the tilt vector could become too long.
Test Cursor
The current cursor implementation is a test cursor the visually represents all of the input values. Position is represented by the position of the cursor, of course, but there are other additional visualizations which may or may not become end-user features. Pressure is represented using concentric circles that widen to show more pressure. Rake is showed by an arrow inside the cursor that points in the direction of the velocity. Tilt is represented by an X that is offset from the center of the cursor depending on how much tilt there is. A line is drawn between the real mouse position and the cursor position to represent the difference between the smooth stroke and sample average position and the actual position of the cursor. Also, in smooth stroke mode the smoothomg radius used for sharp turns in drawn.
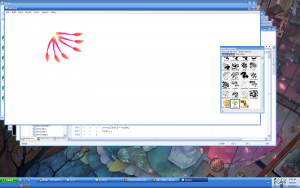
Using MyPaint .myp (Version 2) Brushes
MyPaint brushes currently sit on top of Blender's normal brushes. This means that the stroke method, position, tilt, and pressure are determined in the same way as the normally are by Blender, but are then passed to MyPaint BrushLib for further processing. In order to get a more exact match to the behavior of the brush in MyPaint, select the "Dots" stroke method, and normal pressure, rake, and tilt.
The implementation is currently incomplete because brushes that require an elliptical brush shape do not work properly.
To use a .myb file, select Use BrushLib and select a file. Currently the implementation will parse the file each time a stroke is started, so it is possible to edit and save the file between each stroke and see the effects immediately. Any errors are printed to the console window. A more user friendly interface is planned for the future.
It should also be noted that the apparent size of a dab and the size of the brush in the interface do not correspond very well. This is a problem in MyPaint as well.
Paint/Sculpt Masking (nick)
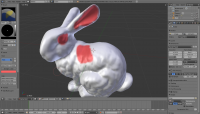
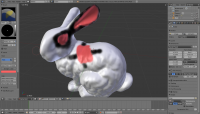
In Sculpt or Paint mode, selecting the 'Mask' option on the 'Brush' panel (on the 3D view tool shelf) will change a brush into a mask brush that applies a mask to an object instead of editing it.
The default color of the mask can be set in User Preferences.
Before one can apply a mask, one must add a mask layer using the mask controls on 'Select' panel of the sculpt or paint mode tool shelf. The mask controls on the Select panel allow one to add, rename, remove, enable, disable, fill, clear, invert, and change the color of a mask.
To add a mask layer, click the plus (+) on the Select panel. You will then be able to rename, delete, or change the color of the mask. When painting the mask onto an object the color will be drawn in a way that makes it always apparent, even if the object is completely black or completely white. You can make a mask invisible and temporarily disable it by clicking the check box next to the mask layer's name. You can also change its color from the default if you would like to differenciate it from other masks.
There are also three buttons that apply the mask to the entire model. 'Clear' will clear a mask if you want to erase it. 'Fill' will fill the entire model with the maximum mask if you would prefer to erase the parts you'd like to edit. And finally, 'Invert' will reverse the strength of the mask everywhere.
There is also an operator for taking a texture map and copying it to a mask layer. The button to do this is on texture property panel.
Mesh Hiding (nick)
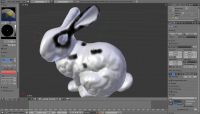
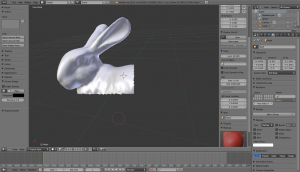
For performance reasons it may be preferable to not display an entire mesh at once while editing. Parts of a mesh can be quickly hidden by using the 'Select Area to Hide' and 'Select Area to Show' commands on the 'Select' panel of the paint/sculpt mode tool shelf. To use these commands, click the button then drag out a rectangular area to show or hide. The effects of these commands is cumulative. That means that if you select 'Select Area to Hide' again then it will hide more of the model that you select without revealing the areas previously hidden. To reset just click the 'Show Hidden Areas' button.
It should be noted that for Multiresolution models, the areas hidden are based on the lowest level of geometry. This means that if you subdivided a cube without ever applying the operator that there will only be 6 areas to show or hide. Therefore it is recommended that you apply multires at some reasonable level before subdividing further. Without multires, each area that can be shown or hidden is a single polygon.
Paint Overlay (nick)
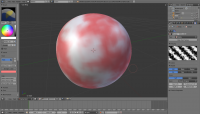
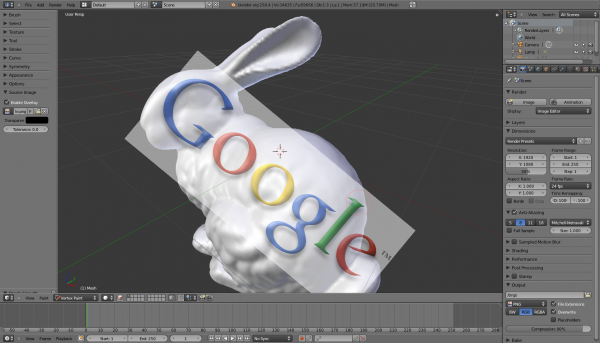
In previous versions of Blender vertex paint, the texture controls the strength of the color applied to the surface. In other words, a texture has not been used as a source for colors but as a filter. The texture overlay is an additional texture that can be used as a source of color stencil for painting colors onto a surface. The new 'Source Image' panel on the View 3D tool shelf can be used to enable and choose a texture overlay as well as select a color that can be considered transparent in leu of an alpha channel in the image.
While it is visible, the overlay can be manipulated by using the 'G' for grab, 'R' for rotate, and 'S' for scale keyboard shortcuts.
