Dev:Ref/Release Notes/2.63/BMesh
目次
Blender 2.63: BMesh
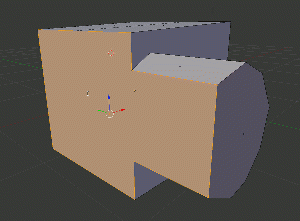
BMesh is the new Blender mesh system in 2.63, with full support for N-sided polygons instead of only triangles and quads. (r44256)
In particular there is a new Dissolve tool to remove vertices, edges and faces without making holes in the mesh, a new Inset tool to inset faces, and a much improved Knife tool which takes advantage of N-gons to generate clear cuts. Tools such as subdivide and loop cut will also generate clean topology because faces no longer have to be triangulated.
Compatibility
The new mesh format means that meshes saved in Blender 2.63 .blend files will be incomplete when loaded in older Blender versions (usually missing faces). When saving files, there is now a "Legacy Mesh Format" option to save Meshes compatible with older versions of Blender.
However note that in general opening and saving files in an older Blender will lead to loss of data from any new features, so even without BMesh it is strongly recommended to avoid this.
Create faces with N-gons
Before Blender 2.63, for creating a new face you'd had to select 3 or 4 verts in order and then create the face, repeating the process for every new polygon needed. Now with BMesh, you can create N-gons, regardless the number of verts.
How it works:
- Same as before, select two or more edges/faces, then hit F key.
Bevel
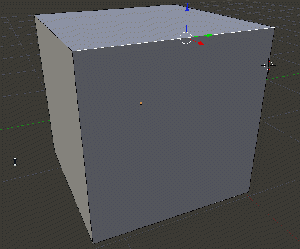
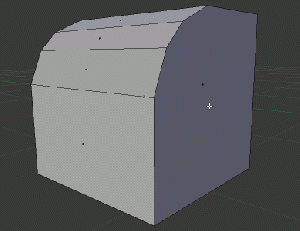
Bevel is back! Bevel basically allows you to add more geometry evenly spaced and rounded, normally used for rounding corners.
This was previously available only as a (very limited) modifier.
How it works:
- In edit mode, select one or more edges or a face.
- Hit W, then B (or find Bevel in the popup menu)
- On the last operator panel (Toolshelf [T]), two options are available:
- Percentage determines how big bevel is.
- Recursion Level determines how many times the bevel will be performed (number of subdivisions)
- Note: Recursion has been disabled in 2.63 due to stability issues, but it will be re-enabled soon. [1]
Inset
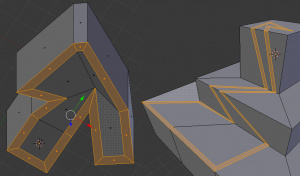
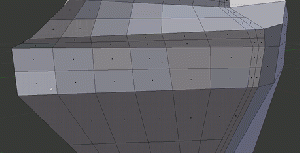
Think of it as like creating an edge loop, but relative to the selected edges, even in complex meshes.
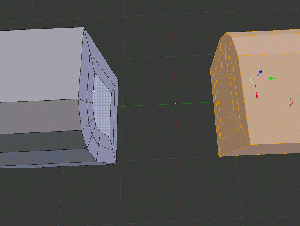
Inset causes the new geometry to be created within the selected geometry, while outset causes the geometry to be created surrounding selected value.
The image on the right illustrates an inset, followed by an outset.
How it works:
- In edit mode, select a face.
- Hit Ctrl + F for face operations menu, then hit I or look for "Inset Faces".
- On the last operator panel (bottom of Toolshelf [T]):
- Thickness slider determines the amount it is offset.
- Depth lets you move the effect up or down.
- Outset produces an outset instead of inset.
Dissolve
Instead of simply deleting faces, vertices and edges, you can now dissolve them, which effectively turns the selection into a single N-gon. Dissolve works slightly different based on if you have edges, faces or vertices selected. You can add detail where you need it, or quickly remove it where you don't.
How it works:
- In edit mode, select the verts/edges/faces to dissolve.
- Hit X, then D (or select "Dissolve" from the popup menu)
Limited Dissolve
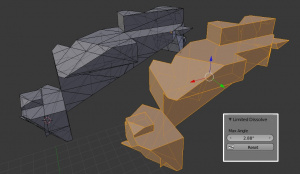
Limited Dissolve reduces detail on planer faces and linear edges with an adjustable angle threshold.
Where a selection to be Limited-Dissolved, and includes vertices and/or edges touching a hole, those edges/verts will not be dissolved. In example, take an open-faced cylinder with 32 vertices around, and 3 edge loops: one for each opening, and one in the middle. 2 rings of faces, 64 total faces. Limited Dissolve will have no affect on edges or vertices selected on the openings, but will limit the mesh appropriately on the edges/vertices away from the openings.
How it works:
- In edit mode, select the verts/edges/faces to dissolve.
- Go to the Mesh menu > Dissolve > Limited Dissolve
Knife
The knife tool has been completely rewritten, this new knife is much more capable and flexible and as you can see from the image on the right, you can make pretty arbitrary cuts with ease. Again though, good topology is still important, so use the knife with care!
How it works:
- In edit mode, K or Shift-K*
- Hovering over the mesh, a green dot will appear where the cut will happen.
- Left click to set the cutting points (Press Ctrl to cut through the middle of an edge).
- Press Spacebar or Enter to accept.
* Shift-K cuts only the selection and cuts through all faces (not just front faces)
Bridge
Previously available through LoopTools addon, it is now built-in. Select two edge loops (within the same/connected mesh ) and it will create a bridge between those two points.
How it works:
- In edit mode, select the faces to bridge.
- Hit Ctrl + E for Edge operations menu, then look for Bridge Two Edge Loops.
Vertex Slide
A feature that was previously available only through addon, now is built-in!.
This tool lets you slide a vertex along an edge.
How it works:
- Enter edit mode, select a single vertex.
- Hit Shift + V and select the edge on which you want to slide this vertex.
If more than one vertex is selected, it will slide the active one (white on default theme).
General Improvements
- Shape Keys: previously, if you altered the topology on a mesh with Shape Keys, you'd end up affecting the Rest (Basis) position as well, which is not desired most of the times. Now with BMesh, new vertices will be placed properly in all Shape Keys at once.
- Edge Data: extruded edges now preserve their data such as Seam and Sharpness. And their Vertex Color and Weight Paint data has a better interpolation on newly extruded faces.
- Edge Rotate: edge rotate can now rotate multiple edges at once.
- Rip Tool: the Rip tool has been re-written, besides working much accurately than before, it can now execute multiple rips at once, and split a single vertex in a face fan.
- Vertex Connect Tool: under the J key, you can now connect two vertices by an edge, splitting the face in two.
BMesh Python API
This API gives access to blenders internal mesh editing api, featuring geometry connectivity data and access to editing operations such as split, separate, collapse and dissolve.
Design & Implementation
BMesh is a non-manifold boundary representation. It was designed to replace the current, limited EditMesh structure, solving many of its design limitations and maintenance issues.
References
Images and tool descriptions from "What's so special about ngons anyways?" by Mike Fleischauer.
