Doc:2.6/Manual/Modeling/Meshes/Weight Paint Tools
目次
Weight Tools
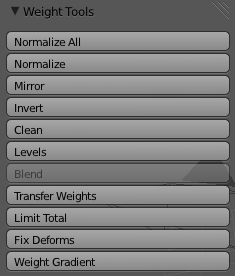
Blender provides a set of helper tools for Weight Painting. The tools are accessible from the Tool Shelf in Weight Paint mode. And they are located in the weight tools panel.
Some of the tools also provide a Subset parameter (in the Operator panel, displayed after the tool is called) with following options:
- Active Group
- Selected Pose Bones
- Deform pose Bones
- All Groups
| About the Blend tool | |
| The Blend tool only works when “Vertex selection masking for painting” is enabled. Otherwise the tool button is greyed out. |
Normalize
Normalization makes sure that the sum of the weights for each vertex in all of the groups is equal to 1. This tool normalizes all of the vertex groups.
Mirror
This tool mirrors the weights from one side of the mesh to the opposite side(only mirror along x-axis is supported). But note, the weights are not transferred to the corresponding opposite bone weight group. By default mirror applies only to the active group, however there is an option to operate on All Groups.
| Mirror to opposite bone | |
| If you want to create a mirrored weight group for the opposite bone within a symmetric character, then you will first create a copy of the current bone group, then rename the weight group to the name of the bone on the opposite side, and finally perform the Mirror tool. |
Invert
Replaces each Weight of the selected weight group by 1.0 – weight.
Examples:
- original 1.0 converts to 0.0
- original 0.5 remains 0.5
- original 0.0 converts to 1.0
Note: Please see how the parameter setting changes the behaviour.
Clean
Removes weights below a given threshold. This tool is useful for cleaning your weight groups from very low (or zero-) weights.
Levels
Adds an offset and a scale to all weights of the selected Weight Groups. with this tool you can raise or lower the overall “heat” of the weight group.
Note: No weight will ever be set to values above 1.0 or below 0.0 regardless of the settings.
Blend
Blends the weights of selected vertices with unselected vertices.
Hint: this tool only works in vertex select mode.
Transfer Weights
Limit total
Reduce the number of weight groups per vertex to the specified Limit. The tool removes lowest weights first until the limit is reached.
Hint: The tool can only work reasonably when more than one weight group is selected.
Weight Gradient
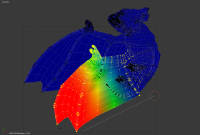
This is an interactive tool that for applying a linear/radial weight gradient, this is useful at times when painting gradual changes in weight becomes difficult.
The gradient tool can be accessed from the Toolbar as a key shortcut (AltLMB ![]() drag) - Linear, (Alt⇧ ShiftLMB
drag) - Linear, (Alt⇧ ShiftLMB ![]() drag) - Radial.
drag) - Radial.
- The following weight paint options are used to control the gradient
- Weight - The gradient starts at the current selected weight value blending out to nothing.
- Strength - Lower values can be used so the gradient mixes in with the existing weights (just like with the brush)
- Curve - The brush falloff curve applies to the gradient too, so you can use this to adjust the blending.
| Weight Painting survival tips | |
A few tips that will save you some hassle when painting weight:
|

