Dev:Doc/Building Blender/Mac
目次
Building Blender for macOS
Building Blender for OSX needs a bit of preparation. However the steps are not very complicated and if you follow the instructions carefully you should be able to build Blender.
macOS version 10.9 and newer are supported.
Build steps in a nutshell
- Install Xcode Development Tools
- Install CMake
- Download sources from Git
- Download external libraries from Subversion
- Optional: Install CUDA Toolkit 9
- Use make to build Blender
- Optional: generate an Xcode project with CMake.
Install Xcode Development Tools
Download the newest Xcode package from the Mac App Store for your system (it's free).
Install CMake
CMake is a tool for generating build environments and it supports make and Xcode (among others).
Download CMake here and install it to the Applications folder. Then make it available from the command line:
export PATH="/Applications/CMake.app/Contents/bin":"$PATH"
echo PATH="/Applications/CMake.app/Contents/bin":"\$PATH" >> ~/.profile
It may be necessary to write to .bash_profile instead of .profile if the former exists.
If you have a package manager like Homebrew or MacPorts, you can also install CMake through that.
Download Sources and Libraries
Now you are ready to get the latest Blender source code from Blender.org's Git repository. Copy and paste the following instructions into a terminal window. These will create a blender-build folder off your home directory and download the latest source code, as well as addons and external libraries.
mkdir ~/blender-build
cd ~/blender-build
git clone http://git.blender.org/blender.git
cd blender
make update
For additional information on using Git with Blender's sources, see: Tools/Git
Building
The easiest and fastest solution is to build Blender with the default settings, and simply run this in the Terminal:
cd ~/blender-build/blender
make
After the build finished, you will find blender.app ready to run in ~/blender-build/build_darwin/bin.
Updating
If you later want to update to and build the latest version, run:
cd ~/blender-build/blender
make update
make
If building fails, it sometimes helps to remove the ~/blender-build/build_darwin folder to get a completely clean build.
Optional: Build as an Xcode project
If you like to work with the Xcode IDE and build Blender from within it, you need to generate an Xcode project.
Generating the Project
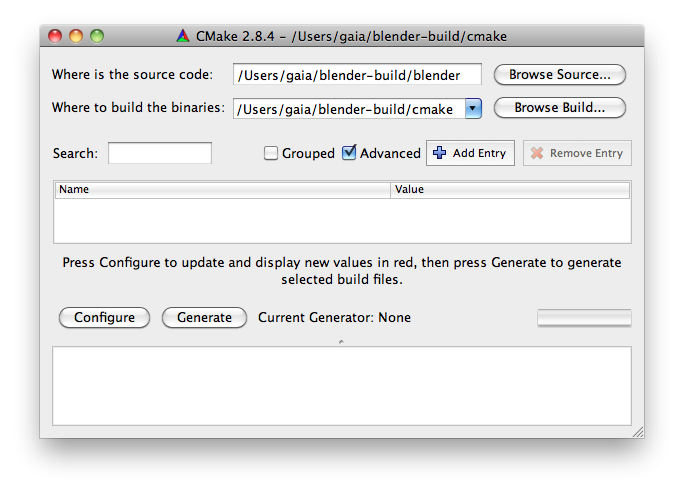
Find the CMake App in your Application folde and double click on it to start it.
As you can see all you have to enter is the location of the sources in ~/blender-build/blender and a destination directory which i have chosen to be ~/blender-build/cmake (any location outside of the source directory is allowed).
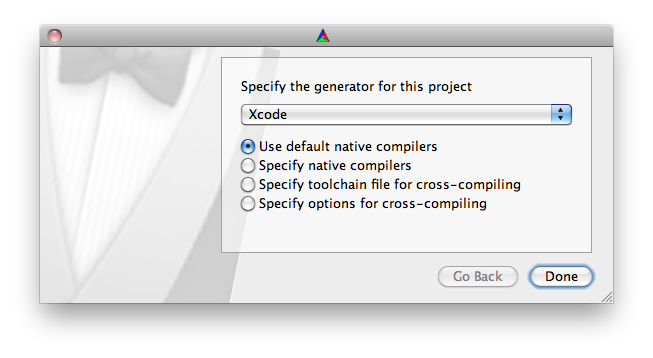
Now Press the "Configure" Button. You get another Popup:
Here you can select which generator you want to use, choose Xcode. Now press the '"Done'" Button.
You get back to the previous seen but now you will see a big red list of options. You can scroll through the option list and set parameters to your needs. Click Configure again and the red highlighting should disappear. Then click Generate and your build environment will be created into the build folder.
Building Blender in Xcode
Now you can go to the folder where you generated the project, and double click Blender.xcodeproj to open it in Xcode. Choose "Automatically Create Schemes" if asked.
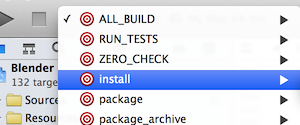
1. Change the Active Scheme popup in the upper left corner of the XCode 5 project window from ALL_BUILD to Install
2. Select menu Product->Scheme->Edit Scheme
- Edit Scheme is located all the way at the bottom of the list of targets. Or just Press Command-<.
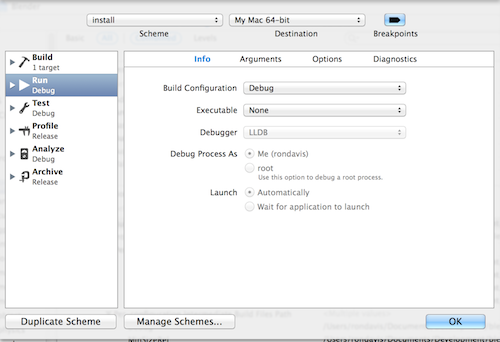
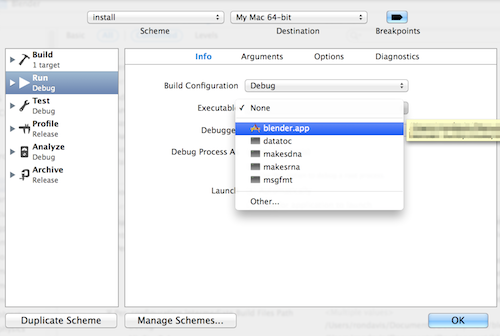
3. Select the Run item from the left view and you will see something like this:
4. Select the Blender App from the Executable popup menu.
- You may leave the Debugger options at the defaults.
5. Click OK to save changes.
Now clicking the Run triangle next to the Active Scheme popup should now build the application and launch Blender under the debugger.
