利用者:Mats Halldin/Sandbox/Incubator-001
- Future destination: Doc:Tutorials/Modeling/Objects/Making a rope
目次
Introduction
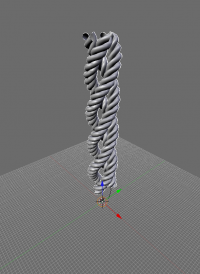
We are going to create a short mesh segment using the screw tool, then add a stack of modifiers to extend the segment.
You can download the completed rope here: ファイル:Tutorials-rope-tutorial-final.blend
| Save regularly | |
| Throughout this tutorial, remember to save you work every now and then. As often, Blender offers several alternatives: F2, CtrlW, CtrlS. |
Making the mesh segment
- Throughout this tutorial we are going to make frequent use of hotkeys. However, Blender offers a series of alternatives for manipulating geometry in 3D space, including gestures and manipulators, and what tool to use in what context is entirely up to you.
- We are going to use the 3D cursor and the various pivot points modes in this tutorial, and therefore, before starting modelling, we have to make sure these points of reference are set-up properly.
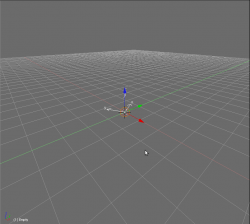
Make sure the 3D cursor is centred on the origin (⇧ ShiftC) and that the pivot is located on the 3D cursor (.).
Add an empty
- Taking a basic shape and an offset value as its input, the array modifier is ideal for repetitive shapes such as ropes. In this tutorial, we are going to use an angle as our offset value and therefore we need to apply a simple rotation to one object and use that transformation as our offset on another object. So, we'll start off by adding an empty object to our scene. Because our rope will have three strands, we'll then rotate the empty 120 degrees (360/3).
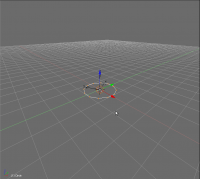
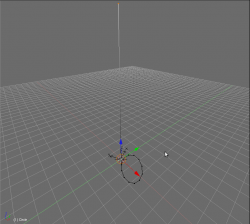
In top view (Num7) (I know I'm old school) add an empty (Space Add » Empty) and rotate it 120 degrees about the Z axis (in sequence type RZ120).
Add a circle
- Next we need a base shape to work with, a "section" through our the strands of our rope which we are then going to extend along the rope's main axis. So, for a rope, a simple circle will do just fine. Because the strands of the rope are twisted around each others, we then need to move and rotate our circle in order to have it oriented along the strands' main axes. First we move the circle away from the Z axis, the axis of extrusion and rotation, to make space for the other two strands, and then we rotate the circle towards the axis of our strand.
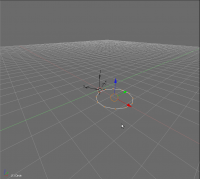
Add a circle with, say, 12 segments (Space Add » Mesh » Circle, 12 segments, radius 1, no fill).
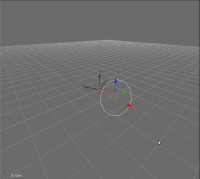
⇆ Tab into edit mode and move the circle 1.2 blender units (BU) along the X axis (GX1.2). RX60 to rotate the circle 60 degrees about the X axis.
Array modifier with object offset
- We now have a section for one of our three strands. Next we are going to use our empty to create two copies of our section for the other two strands.
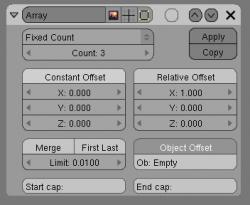
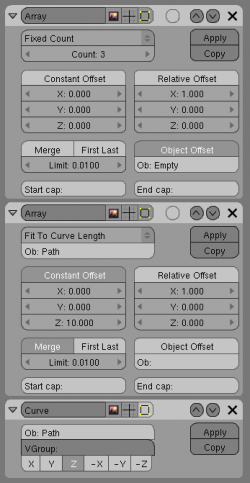
In the Editing panel (F9) add an array modifier. Turn Relative offset off and Object Offset on. Enter the name of your empty (typically Empty). Change Count to 3.
If you ⇆ Tab into object mode, you should now see three circles rotated around the Z axis.
| New to array modifiers? | |
| ⇆ Tab into object mode and select the empty. Rotate it and move it around a bit. Use Esc to abort and CtrlZ to undo your edits. Then select the circle object. Move and rotate it in both object mode and edit mode to see the difference. |
Screw tool
- With our sections in place, we now want to twist the strands of the rope along the Z axis, a job ideal for the screw tool. Its main inputs are an angle, a step value, and an axis -- a "string of vertices" disconnected from our simple mesh (the circle). So next we'll need to create a simple line to keep the screw tool satisfied.
Back in edit mode, ⇧ ShiftD followed by S0 to duplicate the selection and scale all vertices down to the origin. Then AltM followed by 11 to merge them to a single vertex. And finally EZ10 to extrude the vertex 10 BU up the Z axis.
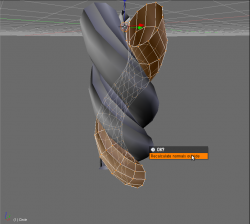
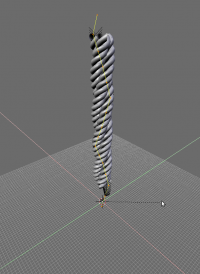
Still in edit mode, in the editing panel (F9) find the Mesh Tools menu. Enter Degrees: 360, Steps: 12, and Turns: 1. Turn Clockwise off. Select all vertices (AA).
The screw tool is view-dependent, so we need to reorient our 3D view. Go to either front view (1 NumPad) or side view (3 NumPad). Click Screw. If you have several 3D views open you will need to mouse click in one of them.
Mesh clean-up
- We now have created our rope mesh, but we still need to fix a few things. First, we don't need our screw axis any more, so we'll delete it. Then we'll want our rope mesh to be smooth, and therefore we'll need to make sure the normals of our faces are pointing in the right directions.
Let's clean things up. A to deselect everything and with your mouse over the top vertex press L to select linked vertices. Then X Vertices to delete them.
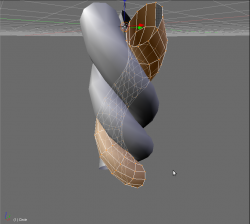
A to select everything and W Set Smooth. CtrlN Recalculate Normals Outside to get rid of the black areas.
Making a helix
- Next we want to extend our rope segment to get a rope. To achieve this we need to (1) tell the segment to copy itself enough times to fit the length of the curve and (2) add a curve and tell the segment to follow it.
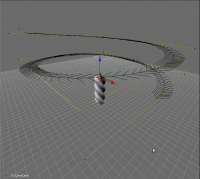
- First we'll add a curve to our scene. For the purpose of this tutorial, we'll pick a simple spiral.
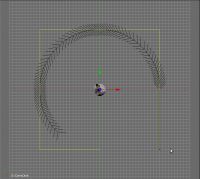
⇆ Tab into object mode and add a NURBS Circle (Space Add » Curve » NURBS Circle). Scale it up, say by 20 S20. In the editing panel make it 3D. Use ⇧ ShiftC and + NumPad/- NumPad to rearrange your view.
⇆ Tab into edit mode and C to break the circle up.
Deselect the first control point (⇧ ShiftRMB ![]() click) and GZ1 to move the selection up 1 BU.
click) and GZ1 to move the selection up 1 BU.
Ctrl- NumPad to deselect the next control point and then move the remaining selection up the Z axis again and then deselect the next control point. Repeat until the last control point has been moved.
AA to select everything and ⇧ ShiftD followed by Z8 to duplicate and move the copy 8 units up the Z axis.
RMB ![]() select the first control point of the newly created curve and the last control point of the old one. F to unite them.
select the first control point of the newly created curve and the last control point of the old one. F to unite them.
Lastly, in the editing panel's Link and Materials menu change the name of your curve (OB:CurveCircle by default) to Path.
Rope segment follow curve
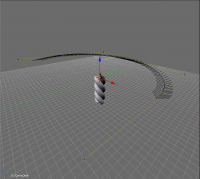
- Next we'll add a second array modifier and a curve modifier to our rope segment. Together they are going to duplicate the rope segment along our curve. For each copy created by the modifier, we want a constant offset along our Z axis equal the length of our rope segment (10 BU). and to get a smooth transition between the copies we'll tell the modifier to merge them.
Now, ⇆ Tab into object mode and select your rope segment. In the editing panel add an array modifier.
Turn Relative Offset off and change Fixed Length to Fit to Curve length. Enter Path as a name.
Enable Constant Offset and set Z to 10. Enable Merge.
Then add a curve modifier, enter Path for a name and make sure Z is the selected axis.
Posing the rope
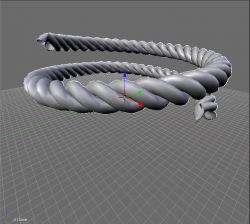
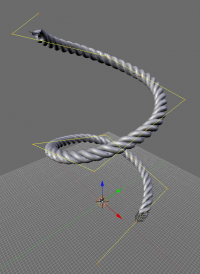
In object mode, select the curve and switch to front view 1 NumPad. Make sure the pivot is on the 3D cursor (.) and that all control points are selected (AA). SZ scale the curve down until the rope is resting on it self (should be 0.5).
| Extrude the rope and pose it | |
| Select the last control point and E to make it longer. Try to find a natural pose for the rope. Maybe make it hang or make a knot. |
Adding start and end caps
- WIP
- Note on start and end caps:
- Object center should be the same as "main object's" center.
- Distinction between edits in object mode and edit mode.
Both ends of the rope are still open. This is easily fixed using the Start Cap and End Cap functions of the second array modifier in our stack.
Select the rope and tab into edit mode. To see what you're doing, temporarily disable the first two modifiers in the modifier's stack. A to deselect everything and Ctrl+alt+shift+m to select non-manifolds (i.e. all "loose ends" of the mesh.)
What is a "non-manifold"?
Simply put, it is where a mesh is not forming a continuous, "smooth" surface with a clear inside and outside. For example when an edge is shared by more or less than two faces or when a mesh contains "hidden" geometry.
|
Shift+d followed by Esc to copy the selected vertices without moving them. Then P > Selected to make the copied vertices a separate object. ⇆ Tab back into object mode and enable all modifiers again (to make it easier to see the newly created mesh object).
| Selecting hidden objects | |
| Blahblah |
Select the newly created object. Delete the last two modifiers in the stack. ⇆ Tab into edit mode and, with all vertices selected, W>Set Smooth and Ctrl+n>Recalculate Normals to clean-up the mesh.
A to deselect everything. Move your mouse to locate the cursor next to the top-most circle and L to select linked vertices. , to relocate the pivot to the center of the selected circle.
Now, extrude/scale these vertices three times using ES; first 0.9, then 0.5, and finally 0. Alt+m>At Center to merge all selected vertices into a single vertex.
Again, L to select all of the extrude circle and P to make the selection a separate object.
A to select the lower circle and extrude/scale as above. Rename it End. ⇆ Tab into object mode, select the other circle and rename it Start.
Now select the rope again. In the second array modifier enter Start and End for start and end caps respectively.
Twinning a rope around a rope
- Now, suppose what we really want is a hawser, a really fat rope made of several smaller ropes. Time to have a look at what a few edits in the modifier stack can achieve. We are first going to reshape our curve to adapt it to its new task. Next, because we in this case already have an array that is doing what we are looking for, we are simply going to copy our first modifier.
Select the curve and ⇆ Tab into edit mode.
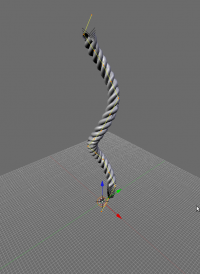
Make sure all control points are selected (AA), and scale it up the Z axis ten BU (SZ10). Then narrow it down (S followed by ⇧ ShiftZ0.2).
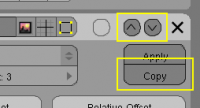
⇆ Tab into object mode and select the rope. In the top-most modifier click Copy. A copy of the first modifier has now been added in the modifier stack below the first modifier. To make things a bit more clear, rename the new modifier hawser (top left corner, by default displaying Array).
We want the hawser modifier at the bottom of the stack. So click the down arrow in the upper right corner of the modifier to move it down. Repeat until it is at the bottom of the stack.
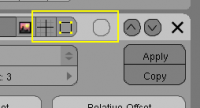
| Turning modifiers on and off | |
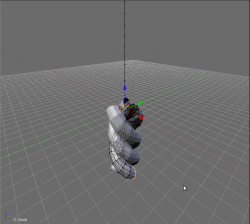
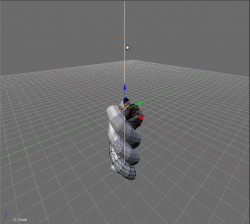
| Each modifier has a set of buttons that allow us to turn them on and off in edit mode and in object mode in various combinations. For example, to view only a one of the strands in our rope, simply turn off the left-most of the buttons highlighted in the right image above for the first and last modifier in the stack. |
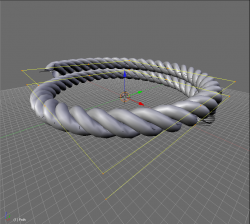
To narrow the distance between the three ropes further, simply select the curve again and in edit mode scale it down some more, for example S followed by ⇧ ShiftZ0.5.
Download the finished hawser here: ファイル:Tutorials-rope-tutorial-hawser.blend
| Poly count | |
| You can, of course, extend this "coiling a coil about a coil" modifiers' stack as many times as you want. Do keep in mind though, what we are doing here is creating a lot of geometry that will never be displayed in a rendered image (because most of the vertices we add are actually inside the model and hidden from view.) Before soon the number of vertices will make the model heavy to work with. In many contexts, a simple low-poly mesh and some simple bump or normal maps is the prefered method for adding more details. |
