利用者:Rking/Doc:2.6/Manual/3D interaction/Transform Control/Transform Orientations
Transform Orientations
Mode: Object and Edit modes
Hotkey: AltSpace
Orientations affect the behavior of Transformations: Location, Rotation, and Scale. You will see an effect on the 3D Manipulator (the widget in the center of the selection), as well as on transformation constraints (like axis locking). This means that, when you hit GX, it will constrain to the global x-axis, but if you hit GXX it will constrain to your Transform Orientations x-axis.
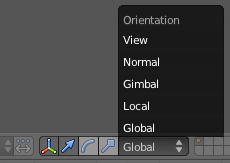
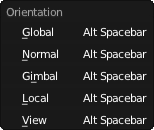
The Orientations options can be set on the 3D View's header (or "footer", since it is at the bottom of the view by default), or with AltSpace or through the Orientation menu in a 3D view header.
In addition to the four builtin options, you can define a Custom Orientation.
Our Demo Cube
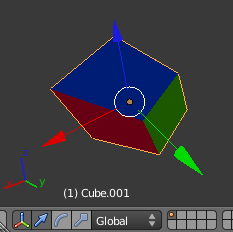
Please note two things:
- The "Mini-axis" in the lower-left corner, which represents the Global x/y/z orientation.
- The "Object Manipulator" widget emanating from the selection, which represents the current Transform Orientation.
- If you click on one of the axes of the Manipulator with LMB
 , it will allow you to constrain movement to only this direction. An example of a keyboard eqivalent is GZZ.
 - If you ⇧ ShiftLMB
 click, it will lock the axis you clicked on and allow you to move in the plane of the two remaining axes. The keyboard analogue is G⇧ ShiftZ⇧ ShiftZ.
- If you click on one of the axes of the Manipulator with LMB
The Orientations
- Global
- The manipulator matches the global axis.
In this, the Global orientation, the orientation's x,y,z are identical to the world's x,y,z. When this mode is selected an exceptional behavior occurs: GXX uses the Local x-axis instead of the (redundant) Global x-axis.
- Local
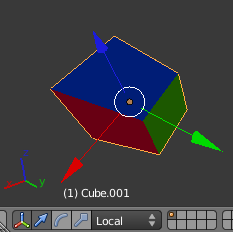
- The manipulator matches the object axis.
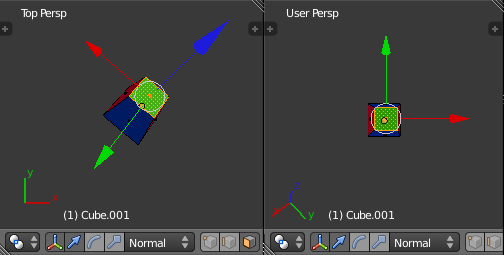
Notice that, here, the Manipulator is at a slight tilt (it is most visible on the object's y-axis, the green arrow). This is due to our 15º rotation of the object. This demonstrates the difference between local coordinates and global coordinates. If we had rotated the object 90º along its x-axis, we would see that the object's "Up" is the world's "Forward" -- or the object's z-axis would now be the world's y-axis. This orientation has an effect on many parts of the interface, so it is important to understand the distinction.
- Normal
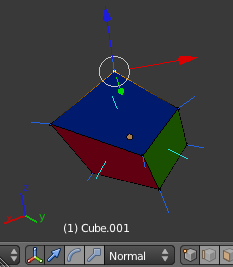
- The z-axis of the manipulator will match the normal vector of the selected object. In Object Mode, this is equivalent to Local Orientation, but in Edit Mode, it becomes more interesting.
As you see, the light blue lines indicate the faces' normals, and the darker blue lines indicate the vertex normals (these were turned on in the N Properties Panel under Mesh Display » Normals » Face and Vertex). Selecting any given face will cause our Manipulator's z-axis to align with that normal. The same goes for Vertex Select Mode. Edge Select is different--A selected Edge has the z-axis aligned with it (so you will have to look at the Manipulator widget to determine the direction of x and y). If you select several elements, it will orient towards the average of those normals.
A great example of how this is useful is in Vertex Select Mode: Pick a vertex and then do GZZ to tug it away from the mesh and shove it into the mesh. To make this even more useful, select a nearby vertex and hit ⇧ ShiftR to repeat the same movement---except along that second vertex's normal instead.
- Gimbal
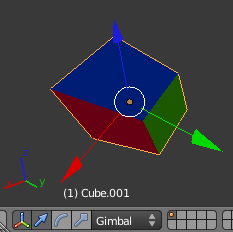
Gimbal's behavior highly depends on the Rotation Mode that you are in (accessible in the N Properties Panel in the 3D View, in top section, Transform).
- In XYZ Euler rotation mode, the default rotation mode, the object Manipulator's z-axis will always point to the global z-axis, where the other two will remain perpendicular to each other.
- In the other Euler rotation modes, the last axis applied will be the one for which the Manipulator stays fixed. So, for YZX Euler, the x-axis of the Manipulator will be the same as the global x-axis.
- In Axis Angle rotation mode, the x, y, and z coordinates define a point relative to the object origin through which an imaginary "skewer" passes. The w value is the rotation of this skewer. Here, the Manipulator's z-axis stays aligned with this skewer.
- In Quaternion - Though Quaternion rotation is very different from the Euler and Axis Angle rotation modes, the Manipulator behaves the same as in Local mode.
- View
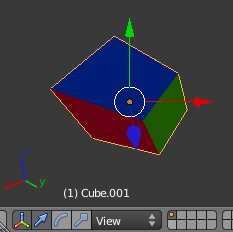
- The manipulator will match the 3D view, Y → Up/Down, X → Left/Right, Z → Towards/Away from you.
This way you can constrain movement to one View axis with GXX.
- Custom Orientations
- (See below, Custom Orientations).
Custom Orientations
Mode: Object and Edit modes
Hotkey: CtrlAltSpace
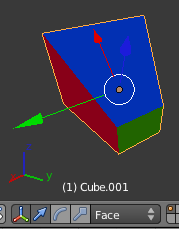
You can define custom transform orientations, using object or mesh elements. Custom transform orientations defined from objects use the local orientation of the object whereas those defined from selected mesh elements (vertices, edges, faces) use the normal orientation of the selection.
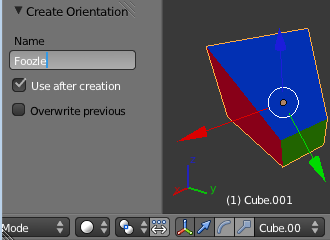
The default name for these orientations comes from whatever you have selected. If an edge, it will be titled, "Edge," if an object, it will take that object's name, etc. The Toolshelf (T in the 3D View) allows you to rename the custom orientation after you hit CtrlAltSpace.
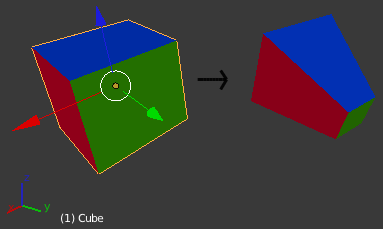
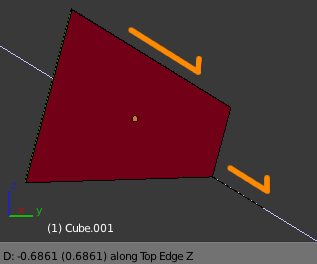
The technique of creating custom orientations can become important in creating precise meshes. In Figure 1, to achieve this effect:
- Select the object's sloping top edge
- Create a Custom Orientation with CtrlAltSpace and rename it "Top Edge".
- Select the objects's bottom, right edge.
- Extrude with E.
- Cancel the extrusion's default movement by hitting RMB
 or Escape.
 - Hit G to reiniatiate movement.
- Hit ZZ to constrain to the "Top Edge" orientation.
Transform Orientations Panel
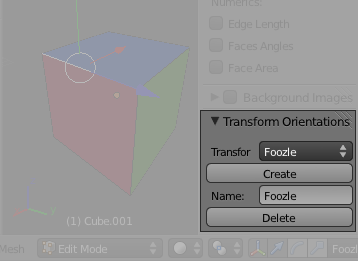
The Transform Orientations panel, found in the "N Properties Panel," can be used to manage transform orientations: selecting the active orientation, adding and deleting custom orientations.
目次
Orientation to View
The current orientation acts as a secondary view option. If you hit ⇧ Shift plus Numpad 1, Numpad 3, or Numpad 7, the view alignment will not use the global, as it normally does, but instead the selected orientation. You can also hit Ctrl⇧ Shift + Numpad 1, Numpad 3, or Numpad 7 to align to the opposite side of the selected orientation's axes.
