Doc:2.6/Manual/Animation/Basics/Motion Paths
Page status (reviewing guidelines)
Page reviewed and in good shape |
Keyframe Visualization
There are some important visualization features in the 3D views that can help animation.
Keyframe Visualization
When the current frame is a keyframe for the current active object, the name of this object (shown in the bottom left corner of the 3D views) turns yellow.
Motion Paths
Mode: Object mode
Panel: Object
This feature allows you to visualize the animation of objects by displaying their position over a series of frames.
Before we look at its options (all regrouped in the same Visualisations panel, in the Editing context, let’s first see how to display/hide these paths. You have to do it manually – and you have to first select the objects you want to show/hide the motion paths. Then,
- To show the paths (or update them, if needed), click on the Calculate Path button.
- To hide the paths, click on the Clear Paths button
Remember: only selected object and their paths are affected by these actions!
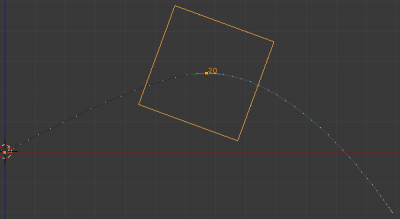
The paths are drawn in black with white dots indicating frames, and a blue glow around the current frame.
Options
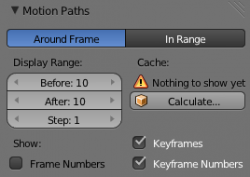
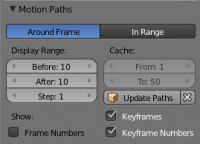
- Around Frame
- Around Frame, Display Paths of poses within a fixed number of frames around the current frame. When you enable this button, you rather get paths for a given number of frames before and after the current one (again, as with ghosts).
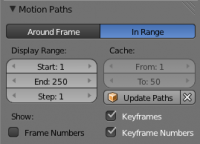
- In Range
- In Range, Display Paths of poses within specified range.
- Display Range
- Before/After
- Number of frames to show before and after the current frame (only for ‘Around Current Frame’ Onion-skinning method)
- Start/End
- Starting and Ending frame of range of paths to display/calculate (not for ‘Around Current Frame’ Onion-skinning method)
- Step
- This is the same thing as the GStep for ghosts – it allows you the only materialize on the path one frame each n ones. Mostly useful when you enable the frame number display (see below), to avoid cluttering the 3D views.
- Frame Numbers
- When enabled, a small number appears next to each frame dot on the path, which is of course the number of the corresponding frame…
- Keyframes
- When enabled, big yellow square dots are drawn on motion paths, materializing the keyframes of their bones (i.e. only the paths of keyed bones at a given frame get a yellow dot at this frame).
- Keyframe Numbers
- When enabled, you’ll see the numbers of the displayed keyframes – so this option is obviously only valid when Show Keys is enabled.
- Cache
- From/To
- These are the start/end frames of the range in which motion paths are drawn. You cannot modify this range without deleting the motion path first.
- Calculate Paths/ Update Paths
- If no paths have been calculated, Calculate Paths will create a new motion path in cache. In the pop up box, select the frame range to calculate.
- If a path has already been calculated, Update Paths will update the path shape to the current animation. To change the frame range of the calculated path, you need to delete the path and calculate it again.


