Dev:IT/2.5/Py/Scripts/Cookbook/Code snippets/Materials and textures
< Dev:IT | 2.5/Py/Scripts/Cookbook/Code snippets
2011年5月14日 (土) 05:40時点におけるwiki>ValterVBによる版 (Created page with "{{Page/Header|2.5x|Dev:IT/2.5/Py/Scripts/Cookbook/Code_snippets/Three_ways_to_create_objects| Dev:IT/2.5/Py/Scripts/Cookbook/Code_snippets/Actions_and_drivers|100}} =Materiali e ...")
Materiali e textures
Materiali
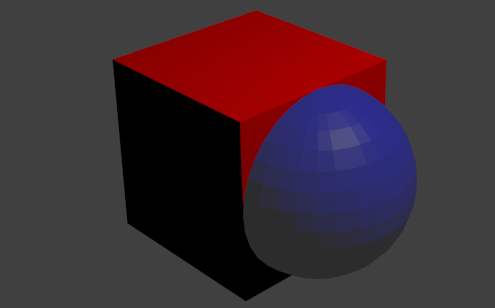
Questo programma aggiunge un materiale opaco rosso, e un materiale semitrasparente blu. E li assegna rispettivamente a un cubo e una sfera.
#----------------------------------------------------------
# File material.py
#----------------------------------------------------------
import bpy

def makeMaterial(name, diffuse, specular, alpha):
    mat = bpy.data.materials.new(name)
    mat.diffuse_color = diffuse
    mat.diffuse_shader = 'LAMBERT'
    mat.diffuse_intensity = 1.0
    mat.specular_color = specular
    mat.specular_shader = 'COOKTORR'
    mat.specular_intensity = 0.5
    mat.alpha = alpha
    mat.ambient = 1
    return mat

def setMaterial(ob, mat):
    me = ob.data
    me.materials.append(mat)

def run(origin):
    # Create two materials
    red = makeMaterial('Red', (1,0,0), (1,1,1), 1)
    blue = makeMaterial('BlueSemi', (0,0,1), (0.5,0.5,0), 0.5)

    # Create red cube
    bpy.ops.mesh.primitive_cube_add(location=origin)
    setMaterial(bpy.context.object, red)
    # and blue sphere
    bpy.ops.mesh.primitive_uv_sphere_add(location=origin)
    bpy.ops.transform.translate(value=(1,0,0))
    setMaterial(bpy.context.object, blue)

if __name__ == "__main__":
    run((0,0,0))
Textures
Questo programma crea un materiale con due texture, una texture immagine mappata con colore alpha, e una texture procedurale mappata come bump map.
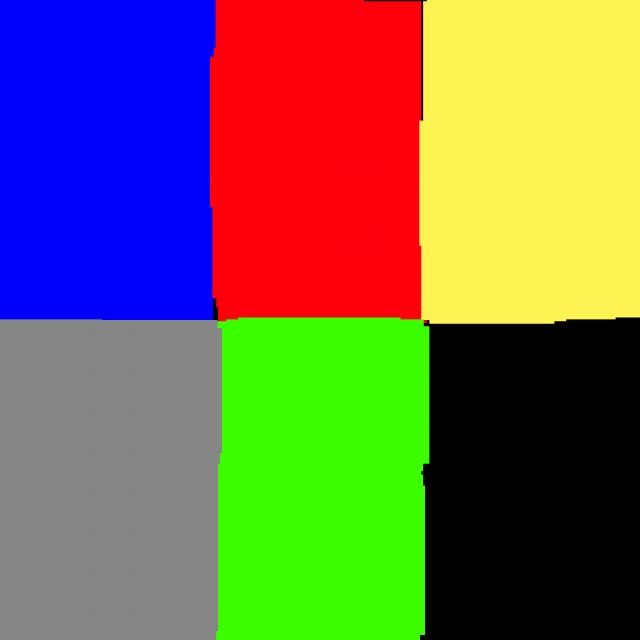
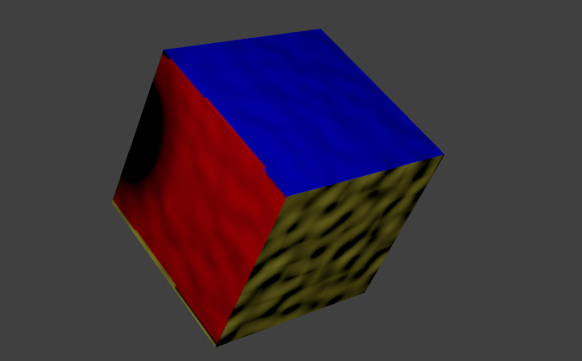 Usa questa immagine come texture e cambia il nome in color.png:
#----------------------------------------------------------
# File texture.py
#----------------------------------------------------------
import bpy, os

def run(origin):
    # Load image file. Change here if the snippet folder is
    # not located in you home directory.
    realpath = os.path.expanduser('~/snippets/textures/color.png')
    try:
        img = bpy.data.images.load(realpath)
    except:
        raise NameError("Cannot load image %s" % realpath)

    # Create image texture from image
    cTex = bpy.data.textures.new('ColorTex', type = 'IMAGE')
    cTex.image = img

    # Create procedural texture
    sTex = bpy.data.textures.new('BumpTex', type = 'STUCCI')
    sTex.noise_basis = 'BLENDER_ORIGINAL'
    sTex.noise_scale = 0.25
    sTex.noise_type = 'SOFT_NOISE'
    sTex.saturation = 1
    sTex.stucci_type = 'PLASTIC'
    sTex.turbulence = 5

    # Create blend texture with color ramp
    # Don't know how to add elements to ramp, so only two for now
    bTex = bpy.data.textures.new('BlendTex', type = 'BLEND')
    bTex.progression = 'SPHERICAL'
    bTex.use_color_ramp = True
    ramp = bTex.color_ramp
    values = [(0.6, (1,1,1,1)), (0.8, (0,0,0,1))]
    for n,value in enumerate(values):
        elt = ramp.elements[n]
        (pos, color) = value
        elt.position = pos
        elt.color = color

    # Create material
    mat = bpy.data.materials.new('TexMat')

    # Add texture slot for color texture
    mtex = mat.texture_slots.add()
    mtex.texture = cTex
    mtex.texture_coords = 'UV'
    mtex.use_map_color_diffuse = True
    mtex.use_map_color_emission = True
    mtex.emission_color_factor = 0.5
    mtex.use_map_density = True
    mtex.mapping = 'FLAT'

    # Add texture slot for bump texture
    mtex = mat.texture_slots.add()
    mtex.texture = sTex
    mtex.texture_coords = 'ORCO'
    mtex.use_map_color_diffuse = False
    mtex.use_map_normal = True
    #mtex.rgb_to_intensity = True

    # Add texture slot
    mtex = mat.texture_slots.add()
    mtex.texture = bTex
    mtex.texture_coords = 'UV'
    mtex.use_map_color_diffuse = True
    mtex.diffuse_color_factor = 1.0
    mtex.blend_type = 'MULTIPLY'

    # Create new cube and give it UVs
    bpy.ops.mesh.primitive_cube_add(location=origin)
    bpy.ops.object.mode_set(mode='EDIT')
    bpy.ops.uv.smart_project()
    bpy.ops.object.mode_set(mode='OBJECT')

    # Add material to current object
    ob = bpy.context.object
    me = ob.data
    me.materials.append(mat)

    return

if __name__ == "__main__":
    run((0,0,0))
Materiali multipli
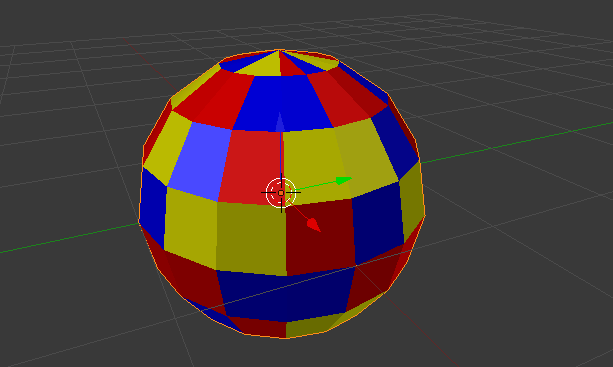
Questo programma aggiunge tre materiali sulla stessa mesh.
#----------------------------------------------------------
# File multi_material.py
#----------------------------------------------------------
import bpy

def run(origin):
    # Create three materials
    red = bpy.data.materials.new('Red')
    red.diffuse_color = (1,0,0)
    blue = bpy.data.materials.new('Blue')
    blue.diffuse_color = (0,0,1)
    yellow = bpy.data.materials.new('Yellow')
    yellow.diffuse_color = (1,1,0)

    # Create mesh and assign materials
    bpy.ops.mesh.primitive_uv_sphere_add(
        segments = 16,
        ring_count = 8,
        location=origin)
    ob = bpy.context.object
    ob.name = 'MultiMatSphere'
    me = ob.data
    me.materials.append(red)
    me.materials.append(blue)
    me.materials.append(yellow)

    # Assign materials to faces
    for f in me.faces:
        f.material_index = f.index % 3

    # Set left half of sphere smooth, right half flat shading
    for f in me.faces:
        f.use_smooth = (f.center[0] < 0)

if __name__ == "__main__":
    run((0,0,0))
UV layers
Questo programma aggiunge due UV layers a una mesh.
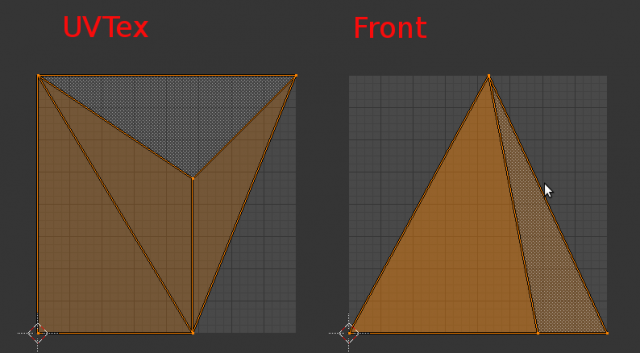
#----------------------------------------------------------
# File uvs.py
#----------------------------------------------------------
import bpy
import os

def createMesh(origin):
    # Create mesh and object
    me = bpy.data.meshes.new('TetraMesh')
    ob = bpy.data.objects.new('Tetra', me)
    ob.location = origin
    # Link object to scene
    scn = bpy.context.scene
    scn.objects.link(ob)
    scn.objects.active = ob
    scn.update()

    # List of verts and faces
    verts = [
        (1.41936, 1.41936, -1),
        (0.589378, -1.67818, -1),
        (-1.67818, 0.58938, -1),
        (0, 0, 1)
    ]
    faces = [(1,0,3), (3,2,1), (3,0,2), (0,1,2)]
    # Create mesh from given verts, edges, faces. Either edges or
    # faces should be [], or you ask for problems
    me.from_pydata(verts, [], faces)

    # Update mesh with new data
    me.update(calc_edges=True)

    # First texture layer: Main UV texture
    texFaces = [
        [(0.6,0.6), (1,1), (0,1)],
        [(0,1), (0.6,0), (0.6,0.6)],
        [(0,1), (0,0), (0.6,0)],
        [(1,1), (0.6,0.6), (0.6,0)]
    ]
    uvMain = createTextureLayer("UVMain", me, texFaces)

    # Second texture layer: Front projection
    texFaces = [
        [(0.732051,0), (1,0), (0.541778,1)],
        [(0.541778,1), (0,0), (0.732051,0)],
        [(0.541778,1), (1,0), (0,0)],
        [(1,0), (0.732051,0), (0,0)]
    ]
    uvFront = createTextureLayer("UVFront", me, texFaces)

    # Third texture layer: Smart projection
    bpy.ops.mesh.uv_texture_add()
    uvCyl = me.uv_textures.active
    uvCyl.name = 'UVCyl'
    bpy.ops.object.mode_set(mode='EDIT')
    bpy.ops.uv.cylinder_project()
    bpy.ops.object.mode_set(mode='OBJECT')

    # Want to make main layer active, but nothing seems to work - TBF
    me.uv_textures.active = uvMain
    me.uv_texture_clone = uvMain
    uvMain.active_render = True
    uvFront.active_render = False
    uvCyl.active_render = False

    return ob

def createTextureLayer(name, me, texFaces):
    uvtex = me.uv_textures.new()
    uvtex.name = name
    for n,tf in enumerate(texFaces):
        datum = uvtex.data[n]
        datum.uv1 = tf[0]
        datum.uv2 = tf[1]
        datum.uv3 = tf[2]
    return uvtex

def createMaterial():
    # Create image texture from image. Change here if the snippet
    # folder is not located in you home directory.
    realpath = os.path.expanduser('~/snippets/textures/color.png')
    tex = bpy.data.textures.new('ColorTex', type = 'IMAGE')
    tex.image = bpy.data.images.load(realpath)
    tex.use_alpha = True

    # Create shadeless material and MTex
    mat = bpy.data.materials.new('TexMat')
    mat.use_shadeless = True
    mtex = mat.texture_slots.add()
    mtex.texture = tex
    mtex.texture_coords = 'UV'
    mtex.use_map_color_diffuse = True
    return mat

def run(origin):
    ob = createMesh(origin)
    mat = createMaterial()
    ob.data.materials.append(mat)
    return

if __name__ == "__main__":
    run((0,0,0))