Doc:2.6/Manual/Modeling/Texts/Editing
Page status (reviewing guidelines)
Partial page
|
目次
Text Editing
Text Boxes
Mode: Object or Edit modes
Panel: Font (Editing context, F9)
Text “Boxes” allow you to distribute the text amongst rectangular areas within a single text object. An arbitrary number of freely positionable and re-sizable text frames are allowed per text object.
Text flows continuously from the lowest-numbered frame to the highest-numbered frame with text inside each frame word-wrapped. Text flows between frames when a lower-numbered frame can’t fit any more text. If the last frame is reached, text overflows out of it.
Text frames are very similar to the concept of frames from a desktop publishing application, like Scribus. You use frames to control the placement and flow of text.
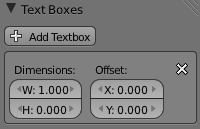
Frames are controlled in the Text Boxes panel.
Frame size
By default the first frame for a new text object, and any additional frames, has a size of zero for both Width and Height, which means the frame is initially not visible.
Frames with a width of 0.0 are ignored completely during text flow (no wordwrap happens), and frames with a height of 0.0 flow forever (no flowing to the next text frame).
In order for the frame to become visible, the frame’s Width must be greater than 0.0.
Note
Technically the height is never actually 0.0 because the font itself always contributes height.
|
(Frame width) is a text object with a width of 5.0. And because the frame width is greater than 0.0 it is now visible and is drawn in the active theme color as a dashed rectangle. The text has overflowed because the text has reached the end of the last frame, the default frame.
Adding/Deleting a Frame
To add a frame click the Add Textbox button on the Text Boxes panel. A new frame is inserted just after (in text flow order) the current one, with its attributes (position and size). Be sure to modify the offset for the new frame in the X and/or Y fields. Just an X modification will create a new column.
To delete the current frame, click the Delete button. Any text in higher frames will be re-flowed downward into lower frames.
Example: Text Flow
With two or more frames you can organize text to a finer degree. For example, create a text object and enter “Blender is super duper”. This text object has a frame; it just isn’t visible because its Width is 0.0.
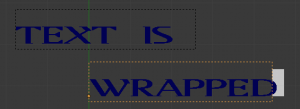
Set the width to 5.0. The frame is now visible and text is wrapping according to the new width, as shown in (Text 2). Notice that the text has overflowed out of the frame. This is because the text has reached the end of the last frame, which just happens to be the default/initial frame.
When we add another frame and set its width and height, the text will flow into the new frame.
Example: Multiple columns
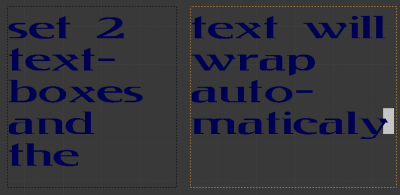
To create two columns of text just create a text object and adjust the initial frame’s Width and Height to your requirements, then insert a new frame. The new frame will have the same size as the initial frame. Set the X position to something greater or less than the width of the initial frame; see (Text 5).
Assigning Materials
Mode: Edit mode
Panel: Link and Materials (Editing context, F9)
Each character can have a different Material index in order to have different materials on different characters.
You can assign indices either as you type, or after by selecting blocks of text and clicking on the Assign button in the Materials panel.
For example, to create (Red Green Blue) you would need to create three separate materials and three separate material indices. Each word would be assigned a Material index by selecting the characters for each word and clicking the Assign button. (Red Green Blue) is still one single Text object.


