利用者:Pepribal/Ref/3DView/Sidebars/Properties/Transform
目次
Transform panel
This panel is used to check and edit transformation data of the selected elements. Depending on the current mode and the type of the selection, the contents of the panel will vary.
Object mode
In this mode we can see and edit the following buttons:
- Location coordinates for each axies.
- Rotation coordinates for each axis. Depending on the rotation mode selected the controls will vary:
- Axis Angle: X, Y and Z correspond to the axis definition, while W corresponds to the angle around that axis, in radians.
- Quaternion: X, Y, Z and W correspond to the quaternion components.
- Any euler mode: X, Y and Z correspond to the euler rotation of each axis.
- Rotation mode selector.
- Scale coordinates for each axis.
- Lock buttons: these buttons let you lock transforms by axis. When the button is locked, the corresponding transformation value can't be changed in any interactive operation (even the corresponding handle of the 3D manipulator disappears). However, the value can still be changed using non-interactive operations, like editing the corresponding number button in the Transform panel, or using python.
- In the case of quaternion or axis angle rotations, the 4L lets you lock rotations by rotation component instead of by axis, so a 4th lock button will appear (one for each component).
- Dimension local coordinates appear when the object has geometry, and it defines the actual global units of that geometry, in the direction of the local coordinates. Changing these directly, the corresponding scale coordinates change accordingly.
Edit mode
In edit mode, the controls present in the panel depend highly on the type of the object being edited.
Mesh objects
When nothing is selected, the panel is empty.
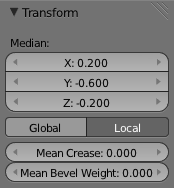
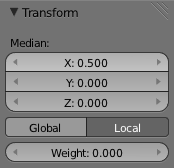
The first controls (X, Y, Z) show the coordinates of the selected vertex if there is only one vertex selected, or the coordinates of the median point of the selected vertices, if there is more than one vertex selected.
The Global and Local buttons let you choose if those coordinates are relative to the object center (local) or the global origin (global).
When an edge is selected, two more buttons appear: Crease, with the crease value of the edge, and Bevel Weight, with its associated bevel weight. When more than one edge is selected, these buttons show the median values of the selected edges, and change their names to Median Crease and Median Bevel Weight.
Curve objects
When nothing is selected, the panel is empty.
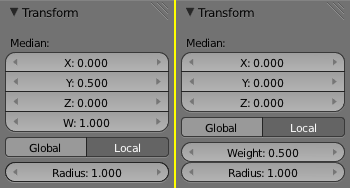
The first controls (X, Y, Z) show the coordinates of the selected point or handle if there is only one of them selected, or the coordinates of the median of the selected points and/or handles, if there is more than one of them selected.
The Global and Local buttons let you choose if those coordinates are relative to the object center (local) or the global origin (global).
In case of a nurbs curve, there is a fourth component available (W), which defines the weight of the selected control point or the median weight of the selected control points.
Radius lets you select the radius of the selected point (or the median radius of the selected points) used for beveling.
Weight
Surface objects
When nothing is selected, the panel is empty.
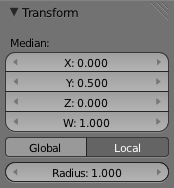
The first controls (X, Y, Z) show the coordinates of the selected points if there is only one of them selected, or the coordinates of the median of the selected points, if there is more than one of them selected.
The Global and Local buttons let you choose if those coordinates are relative to the object center (local) or the global origin (global).
There is a fourth component available (W), which defines the weight of the selected control point or the median weight of the selected control points.
Radius
Meta objects
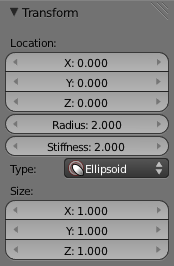
The panel shows the active metaelement data.
In the first place, the local position of the metaelement (X, Y and Z location coordinates).
Radius and Stiffness define the radius and stiffness of the active object, related to the red and green circles, respectively. Stiffness must be in the 0.0 - 10.0 range.
The next select button lets you choose the type of the active metaelement. Depending on its type, you can define its size in a per axis basis:
- Ball doesn't let you define any dimension.
- Capsule lets you define the capsule length with X.
- Plane provides X and Y coordinates.
- Ellipsoid lets you define X, Y and Z dimensions.
- Cube lets you also define X, Y and Z size.
Text objects
In this case the panel is empty.
Armature
Lattice objects
When nothing is selected, the panel is empty.
The first controls (X, Y, Z) show the coordinates of the selected point if there is only one of them selected, or the coordinates of the median of the selected points, if there is more than one of them selected.
The Global and Local buttons let you choose if those coordinates are relative to the object center (local) or the global origin (global).
Weight
Pose mode
Other modes
In sculpt, vertex paint, texture paint, weight paint and particle modes, the appearance and funcionality of the panel is the very same as in object mode.

