利用者:Liquidape/Mirrored Normal Maps
目次
Mirrored Normal Maps
Mirrored Normal Maps are supported in Blender as of version 2.57. There are plenty of pitfalls in working with Mirrored Normal Maps in Blender, as with any tool, but I will try to steer you around most of them.
Sculpt your mesh
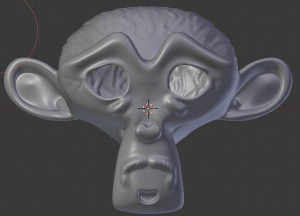
Create a Mirrored High Poly Mesh through sculpting or whatever method you prefer. This could be done through the sculpt tool with use of the multires modifier, through traditional modeling techniques, or by using another sculpting program such as ZBrush or Mudbox. Exact mirroring is not required, but it should be close. I personally used Blenders Sculpt functionality to work on this example mesh
Prepare your Low Poly Mesh
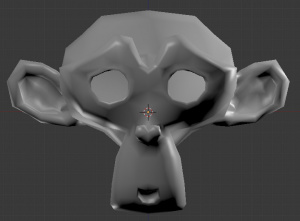
- Create a low poly version of the object that has the same silhouette as the high Poly object. This can be done through a number of methods including: Retopology, Duplicating the High Resolution object and removing the multires modifier, applying the multires modifier on a lower level, or by just modeling the low Res from scratch.
- Delete half of the low poly mesh, and place a mirror modifier on the mesh. Merge and Clipping should be on. This will make the center line down the mesh share normals so there is not duplicate topology causing issues.
- Mark seams for unwrapping your mesh
- Triangulate your mesh CtrlT Triangulation must be symmetrical. Assuming that your object is symmetrical, CtrlT should work fine.
Center your mesh
Your mesh MUST be exactly centered. If it is not, the normal map will probably show seams down the center line
|
Finalized Asset
Do not make ANY changes to your low poly from this point forward. The Mesh should be in final form. This is the mesh that will be exported to any third party programs.
|
Prepare your UVs
- Unwrap your mesh
- Arrange your UV islands with as much space between islands as possible and with as little stretching as possible. Note that the UV islands are only comprised of half your mesh. (It should be noted that this is not really a requirement for the normal mapping to work but just a good practice because it gives better quality mapping in general for diffuse, specular, and other maps too.)
- Add a new blank texture while your low poly object is in edit mode, this makes it the active texture that you will bake to.
Baking your Normal Map
- Make sure your high poly object and low poly object occupy the same space. They should both be on the origin
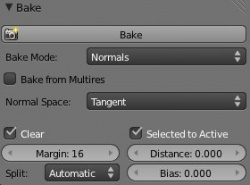
- On the Bake tab set the following settings:
- Select your high poly object, then select your low poly object, and finally, click the Bake button in the Bake Tab. I find doing these selections in the outliner to be the easiest way to make the selections in the proper order.
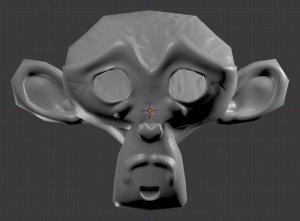
- Congratulations. You have a half normal map and a model that will accept it mirrored. Don't forget to save the image!
- At this point you can, but do not have to, apply the mirror modifier on the low poly mesh.
Margin Setting
The margin setting is very important. Set it to something higher than the default 2, this setting will be what 'hides' the seams between UV Islands. (I personally start at 16 and move up from there if seams are still visible).
|
Apply the Normal Map to the low poly object
- Add a new material to your map
- Add an image texture to the new material
- Select the Normal Map you just created
- Under The Image Sampling Tab Check 'Normal Map' and verify 'Tangent' is selected on the dropdown
- Set Mapping to UV
- Set Influence to Normal at 1.0
- Set the Shading Mode to GLSL to view your final product
- If you are exporting to use your model in another product, be sure to export Normals with your object and read the notes below on possible issues.
Download the example file(v2.63): ファイル:XMirrorNMapBake.blend
Other Normal Mapping Notes
On Tangent Spaces: Tangent spaces are something that an artist does not like to think about, but cause lots of problems. There is no 'industry standard' on what tangent spaces to use. Think of it like one guy measuring in metric and the other in imperial - they are both technically correct, but they are incompatible. But even worse than my imperial/metric analogy, there is no clear way to convert between tangent spaces! There is a bunch of fragmentation in the industry on what tangent space to use and it causes headaches for all. Really, the only way to get a perfect model with no seams is to bake that model in the final engine that it is going to be used in. Of course, there are few tools in the engines to do that! Other then that, the best you can do as an artist is cover up and use creative modeling to hide seams.
Mikktspace
Mikktspace is an open implementation of normal mapping that is pushing to become industry standard and alleviate all this artist pain. Any program using this implementation of Normal Maps will be compatible with each other.
Note: For xNormal compatibility with mikktspace you must check the option, "Compute Binormal on the fly in the shader"
| Uses Mikktspace | Rumored to adopt Mikktspace |
| Blender | Unity3d |
| xNormal |


