利用者:Sculptorjim/Materials/Properties/SubSurface Scattering
Subsurface Scattering
Mode: All Modes
Panel: Shading/Material Context → Subsurface Scattering
Many organic and some inorganic skins are not totally opaque right at the surface, so light does not just bounce off the top surface. Instead, some light also penetrates the skin surface, and scatters around inside, taking on the color of the insides and emerging back out to blend with the surface reflection. Human/animal skin, the skin of grapes, tomatoes, fruits, wax, gels (like honey, or Jello) and so on all have subsurface scattering (SSS), and photo-realism really cannot be achieved without it.
SSS can be found in the Material buttons, and is limited to diffuse shading only, it does not affect specular shading.
How it works
Actually calculating the light path beneath the surface of an object would be practically impossible. But it has been shown that it is not necessary to do this, and that one can use a different approach.
Blender calculates SSS in two steps:
- At first the brightness of the surface is calculated, from the frontside of the object as well as from it's backside. This is pretty much the same as in a normal render. Ambient-Occlusion, Radiosity, the type of diffuse Shader, the light color etc. is taken into account.
- In the second step the image is rendered finally, but now the SSS shader replaces the diffuse shader. Instead of the lamps the calculated lightmap is used. The brightness of a surface point is the calculated "Average" of the brightness of it's surrounding points. Depending on your settings the whole surface may be taken into account, and it's a bit more complicated than simply calculating the average, but don't bother too much with the math behind it.
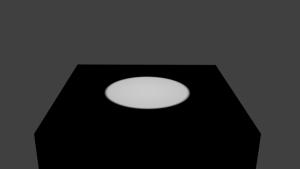
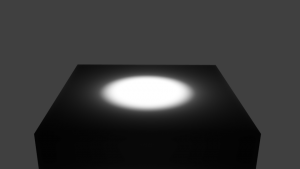
Instead let's see what SSS does to a distinct light point.
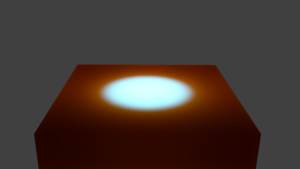
If you turn on SSS the light is distributed over a larger Area. The size of this area depends on the radius values. Instead of distributing all colors with the same amount, you may choose different radius values for each of the RGB-Colors.
If you use a very large radius value for a color, its light is evenly distributed over the whole object.
Enabling Subsurface Scattering
- Enable SSS by clicking on the Subsurface Scattering button.
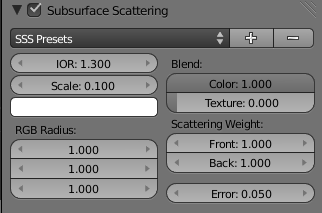
- Accessible at the top are various presets. Add new or remove old presets by clicking the + and - buttons. When you select a pre-set, the Radius values, the RGB Radius and the IOR are set for you. The remaining options are not set (because they are mostly dependent on the size of your object).
SubSurface Scattering doesn't need raytracing. But since it is dependent on the incident light and shadows, you need proper shadow calculation (which may need raytracing).
Options
The numeric sliders control how the light is scattered:
- IOR
- The Index Of Refraction value determines the falloff of incident light. Higher values means that light falls off faster. The effect is quite subtle and changes the distribution function only a little bit. By the examination of many different materials a value of 1.3 to 1.5 have been found to work well for most materials. If you know the exact material you are trying to simulate, see our IOR table.
- Scale
- The scale of your object, in Blender units, across which you want the scattering effect to take place. Scale 1.0 means 1 Blender unit equals 1 millimeter, scale 0.001 means 1 Blender unit equals 1 meter. If you want to work out what scale value to use in your scene, just use the formula: (size in blender units)/(real world size in millimeters)=scale.
- <Swatch>
- The color swatch has two effects.
- If you think of the SSS as a strange sort of lamp, this would be the lights color.
- It also affects the scattering — the darker the color the more light is scattered.
- So if you set it to green, the lit areas of the object will appear as green, and green is scattered only a little. Therefore the darker areas will appear in red and blue. You can compensate the different scattering by setting a larger radius for the color.
- RGB Radius
- The light blurring radius. As the light travels through the object and back up to emerge from the surface at some other point, it creates a path length. These sliders allow you to adjust the average length of that path. The longer the path length is, the more evenly this color is distributed.
- Blend
-
- Color
- This controls how much the R, G, B option modulates the diffuse color and textures. Note that even with this option set to 0.0, the R, G, B option still influences the scattering behavior.
- Texture
- How much the surface texture is blurred along with the shading.
- Scattering Weight
-
- Front
- Factor to increase or decrease the front scattering. When light enters through the front of the object, how much is absorbed or added? (Normally 1.0 or 100%).
- Back
- Factor to increase or decrease the back scattering. Light hitting an object from behind can go all the way through the object and come out on the front of the object. This happens mostly on thin objects, like hands and ears.
- Error
- This parameter controls how precisely the algorithm samples the surrounding points. Leaving it at 0.05 should give images without artifacts. It can be set higher to speed up rendering, potentially with errors. Setting it at 1.0 is a good way to quickly get a preview of the look, with errors.
Developing your own SSS material
Follow these simple steps to make your own SSS material:
- Set the SSS color on a value of your choice, normally the predominant color of the object. If you want to use different radiuses for the colors, don't make it too dark.
- Set the scale factor. If you want to see much translucency you need small objects or large scale values.
- Set the radius values.
- Adjust the brightness with the Front and Back values.
Examples
Skin
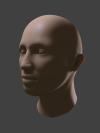
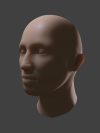
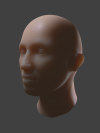
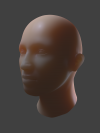
| Increasing SSS scale (.blend) | ||||
See also
