Doc:2.6/Tutorials/Simulation/Hair/Using the Particle Mode
目次
Drawing Hairs
Here I have for you a simple tutorial for a simple technique to make very efficient hair for stills, but it can be used also for animation.
Putting the hairs on the model
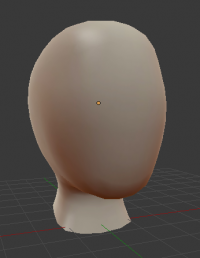
We start with our finished mesh on which we want to apply hairs:
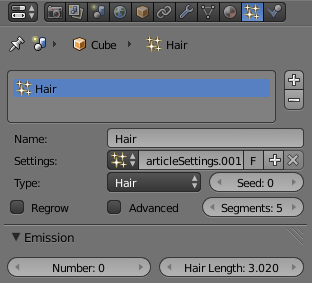
Now from the properties menu go into the particle tab and set everything as highlighted:
- Type: this should be set to "Hair"
- Segments: it's about the number of control points the hairs have. 5 is generally enough unless you have extra long hair
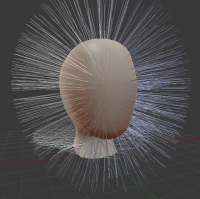
Don't be scared; we are still far from our final result. Now we will set the length for the longest hair under "length".
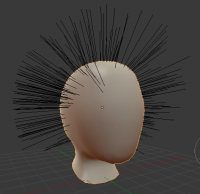
Set the hair number to 0. Your model should become bald once again.
Adding Hairs
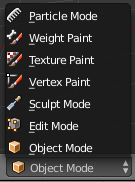
Now go into Particle Mode.
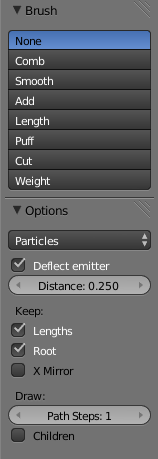
and from the Tool panel (Shortcut T) you choose the Add brush.
- Radius: is the size of the stroke
- Count: is the number of hair drawn, so to not get bored adding each hair you can draw many and faster
By the way, don't draw many; just a few to define where your hair should be.
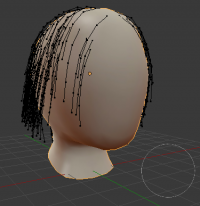
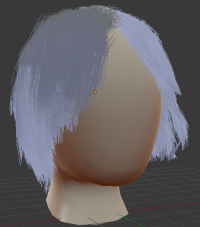
You can now cut the hairs if you have some particular haircut, or else you can do this later. Now you should use the Comb brush, and pull down all your hairs. If they look to you too stuck to the head you can use the Puff brush to push them away, but be careful; it makes them curly! If you mess them up you can use smooth to clean up your mistakes (combing again also does the job). For a cut like mine I'm going to cut them now.
Feel free now to use all the tools you need to make your hairstyle.
Children
These hairs aren't enough, so, instead of putting thousands of them we are only going to add some children; they are faster to render and also to animate, and do the job.
Hair children are hairs that use the deformations of the hairs we drew above, and have some cool utilities that let us make complex hair like curly or wavy.
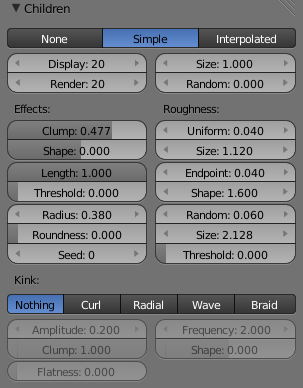
So, from the particle panel let's set children to Simple (as we work there is no need to interpolate them; we are going to set up personally how they are going to work)
Now here there are many settings. Now after setting the number of children we want in render (I use the same also in view, but you need a good computer), the two most important ones overall are the clump factor, and the radius: on it the roundness and the uniform are pretty useful.
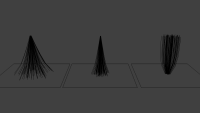
- Clump: defines the shape of the hair strand; higher values will it make end together, lower values instead will let it start together and end wide.
- Radius: defines how far from the hair particle the children are cast; combined with the clump it determinrs how big the strand root is.
- Roundness: determines how softly the particle points are interpolated; that means if you have sharp edges on your base they will now become bigger and softer curves. It's useful in pushing the hairs out from the head, and not having them just falling from it
- Uniform: is like the random factor, but it affects the strand altogether and not hair by hair, keeping the strands together and making them wavy.
Kink, well this is how you make curly, round or whatever hairs, you can play around with the settings to generate very cool effects.
Cleaning Up
Now let's return to the Particle Mode menu. And from the Tool panel check "children". You will see about how your hairs are going to look; to make them smoother you can also increase the Path Steps.
Usually I discover a lot of holes and I have to add many more hairs to the head, so I use the Add brush.
If I click "interpolate" the new hair will follow the already existing ones, and this will avoid me from needing to comb all the new hairs, and risk messing up what I've already done.
Now it's all up to the render, it's useful now to make some test renders, and see if any hair is out of place. If this happens, you probably have to edit one by one. To do this, like during the modeling edit mode you can select hair points, just choose which selection mode you want to use and with G you can move vert by vert; with X you can remove them.
To edit them better you probably have to uncheck in the Tool panel Deflect emitter, Roots, and Length.
- Deflect emitter: prevents the hair from getting under the casting mesh; uncheck this to put the hair roots inside the head if you see them floating around.
- Roots: keeps the roots where you drew them; if you need to move them, uncheck it.
- Length: keeps the length as it is when you edit the hairs.
Be careful with these last tools, you can mess up the whole thing if you, for example, comb a head without fixed roots.
You would have to play a lot also with the children settings to achieve a good result.
Rendering
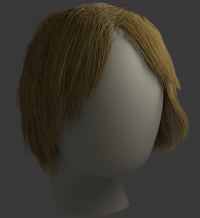
Here's now after combing, moving, editing, smoothing, adding, removing; here we have a render (I used cycles for it)
The cycles settings are well explained here at the bottom: [Hair]
On some builds you can find the "scaling" setting; usually you have to keep it low (about 0.5-7 for me) it depends to your mesh scale.
If you are making hairs for a still, don't worry about the ones where the camera won't see; no one will care.
Tip: If you use separate hair simulations you can get more control on more complex or untidy haircuts!
