利用者:Sozap/VSE
目次
Using the Sequence Editor for Color Grading
Color Grading is the process of altering and enhancing colors of an image or moving picture.
Generally done as the last creative step in a movie, color correction can be used to adjust colors and luminance of the shots so that they look all the same, and also, in a more creative way to change or reinforce the mood of an image.
Color grading can be done in two way :
Primary color correction, when you change the whole image at once,
and secondary color correction where you tweak only one color or one part of the picture.
Generally you start by doing primary color correction on your image so you get a global idea of what you want, and then you adjust the last bits by doing several secondary color corrections.
Layout example
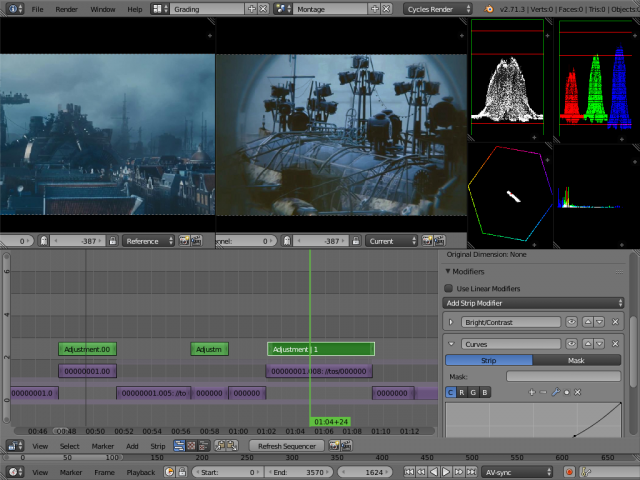
In the image below you can see all that we'll need for precise color correction:
The timeline, two different view of the edit, with one reference shot and the current frame on the timeline. Also scopes to analyse the ranges of luminosity and color/saturation of the images. And of course strip modifier panel to actually do the color correction.
Using strip modifiers to color correct
The best way to color correct a strip in the sequencer is to use modifiers. They are filters that you can chain to tweak colors, or just some part of it using masks.
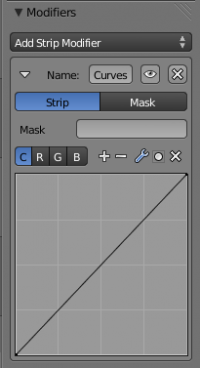
The modifier stack is available in sequence properties panel. Using modifiers is pretty much straightforward as it works like objects modifiers.
By clicking Add Strip Modifier button you can add some color correction tools like Color Balance, HUE Correct, RGB Curves and Brightness/Contrast.
If you like to color correct only a part of a picture to do secondary color grading, you can provide a mask to the modifier. It can be another sequence strip (usually a black and white image only used for masking), or a mask datablock generated with UV Image editor or movie clip editor.
Using adjustment layers
As you can put strip modifiers directely on you sequencer strip, it's far more convenient to use Adjustement layers.
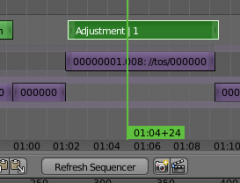
They work as an effect track that alters the output of everything down the layer stack. The use is simple, just put an Adjustment layer on top of one or several strips, use some strip modifiers on the adjustment layer, and these modifiers affect now all your strips.
It can be found under the effects menu :
http://wiki.blender.org/index.php/Doc:2.6/Manual/Sequencer/Effects
Some use cases can be:
-Use it to turn all your shots in black and white,
-Switching between two sets of strips modifiers using an opacity curve
-Once you've color corrected one shot and you have to do another one very similar
, you can duplicate the adjustment layers and tweak your settings on the second shot.
Comparing images in the sequencer view
When doing color grading you always want to have a reference shot and compare it with the one your working with.This ensure that color and luminance match trought the various shots of your movie.
For easy comparaison between shots, blender comes with Split view to see both reference and current frames in different editor spaces.
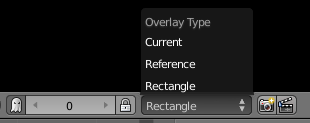
The first step to use split view would be to enable the Show Overlay option in the header (available for preview sequencer display only).
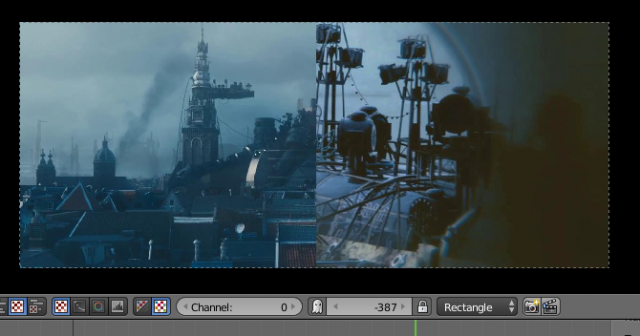
Once this option is enabled extra controls would be available in the header as it's shown on the image below.
The first slider and lock button control the offset of the reference frame relative to current frame and it's still possible to lock the reference frame to its current position. The next menu describes the way the reference frame should be displayed. Default is a Rectangle, which means the rectangle area of reference frame will be displayed on top of current frame. This area can be defined by pressing O key over the preview.
- Reference overlay type means that only the reference frame is displayed in the preview region of the sequencer.
- Current overlay type means only the current frame is be displayed in the preview region of the sequencer.
It is also possible to have several Sequencer Editors opened and they can use different overlay types, so it's possible to have current and reference frames displayed in different windows.
Using Luma Waveform and Vectorscope to check your work
To be sure you are doing things right it's a good habit to have these viewers open while doing color corrections, so you can look at image informations. ex: be sure that the black and white are not clamped , or your colors are not too saturated. more information on viewers can be found here : http://wiki.blender.org/index.php/Doc:2.6/Manual/Sequencer/Modes
Tips and Tricks
White balance with inverse color balance
using mask with modifiers (blur)
negative effect with curves
