Extensions:2.6/Py/Scripts/System/BlenderCloud
Blender Cloud Addon
| UI location | Add-on preferences, and Ctrl+Shift+Alt+A | ||
|---|---|---|---|
| Usage | The Blender Cloud addon provides an interface to synchronise settings, as well as to browse the texture library of the Blender Cloud, download textures, and load them into the current scene. It uses Blender ID credentials managed by the Blender ID addon. | ||
| Version | 1.8.0 | Author(s) | Sybren A. Stüvel and Francesco Siddi |
| Blender | 2.78 | License | GPLv2+ |
| Category | System | ||
| File name | |
|---|---|
| Current version download | https://cloud.blender.org/r/downloads/blender_cloud-latest-addon.zip |
| Links | Report a problem: developer.blender.org
Changelog: CHANGELOG.md |
|---|
目次
Installing the addon
- If you don't have one already, sign up for an account at the Blender ID site and subscribe to the Blender Cloud.
- Install and log in with the Blender ID.
- Install the Blender Cloud addon in Blender (User Preferences → Addons → Install from file...) by pointing it to blender_cloud*.addon.zip.
- Enable the addon in User Preferences → Addons → System.
Blender Sync
The Blender Sync feature synchronises your settings with Blender Cloud. It contains a copy of your settings for each Blender version you're using, just as you are used to on your harddisk. After installing the Blender Cloud addon, open its settings in User Preferences → Addons → System. There are two buttons:
"Save {current Blender version} settings" saves your current userprefs.blend and startup.blend to Blender Cloud. This also saves your settings locally, so you do not have to press the "Save User Settings" button.
"Find version to load" connects to Blender Cloud to see for which versions of Blender there are settings. Once pressed, it shows the most recent version available:
If you want to load from a different version of Blender, for example if you have just saved your 2.77 settings on one machine, and want to load it into Blender 2.78 on another machine, just press the "..." button.
This two-step process (first "Find versions..." and then "Load settings") is done on purpose. We believe that it is important to have you, the user, in control over what Blender does. As a result, the Blender Cloud Addon will never perform network communication without your approval.
Some settings are machine/OS dependent, and will not be synced
- All file paths. For example, you can set your script directory to your Dropbox directory, and be confident that it remains so, even when you sync between Linux and MacOS.
- The monitor DPI and Virtual Pixel Mode settings, since not every machine has the same monitor.
- The CUDA compute device.
Texture Browser
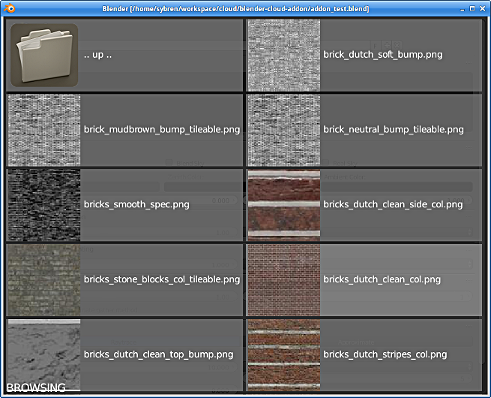
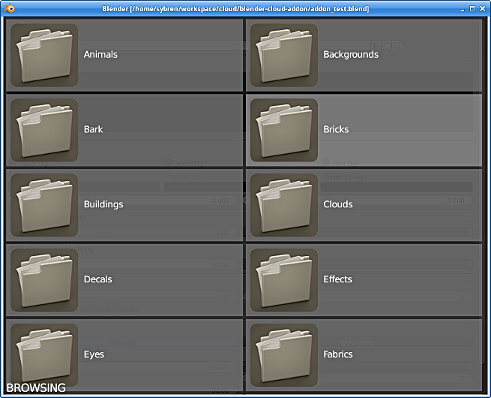
After installing the Blender Cloud addon, press Ctrl+Alt+Shift+A to
activate it. Downloaded textures are loaded into image datablocks.
The download location can be configured in the addon preferences, and defaults to //textures, i.e. relative to your current blend file.
From the image editor you can share images to your Blender Cloud home project. You will also find a button for this on your render results. The shared images are simply assets in your home project, albeit displayed a little differently by default. If you take away the “?t” from the URL you exit "theatre mode"; there you can click on the “Edit asset” button to change the name, description, etc.
Images are uploaded as-is; if you want to share a scaled-down version of an image, scale it down first. Render sharing uses the render settings.
After sharing an image, Blender will place a link on your copy/paste clipboard. You can paste that link in a chat or email and share it with anyone you want.
We cannot promise that your shared images will stay on Blender Cloud forever. It’s a way to easily share between people, but not a permanent storage to show off your work. We will introduce limits on the maximum lifespan of a shared image. No worries, we’re not Snapchat, so they won’t disappear after a few seconds.
Building an installable ZIP file
Regular users shouldn't have to do this.
To build a ZIP file that can be installed by Blender, run python setup.py bdist. This creates a ZIP file in the dist directory. This command requires Git to be installed and available from the CLI as git.
The addon requires:
- The Pillar Python SDK
- CacheControl
- lockfile, as this is a dependency of CacheControl.
These dependencies should either be installed somewhere where Blender can find them (i.e. importable with 'import pillarsdk' for example), or be bundled as wheel files in blender_cloud/wheels. The python setup.py wheels command gathers the dependencies and bundles them as wheel files.


