利用者:Soylentgreen/Image Textures
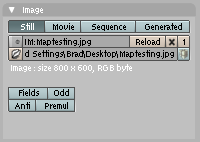
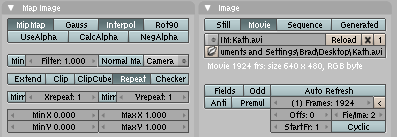
If you choose the Texture Type Image in the Texture Panel, the Image Panel appears. By left click on Load Image an image file in one of Blenders supported file formats can be loaded.
Supported file formats are BMP, JPG, PNG and TGA. Others - like PSD - are partially supported. For animations you may use numbered image sequences, also accepted are uncompressed or JPG compressed AVIs. On Windows platforms all videos with a supported codec should work.
You can use absolute as well as relative Paths. The // (double Backslash) means the working directory, .. (two dots) point at the parent directory.
The Button ![]() saves the image inside the blend-file, Reload loads an eventually changed image version from disk.
saves the image inside the blend-file, Reload loads an eventually changed image version from disk.
Various Image Options
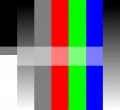
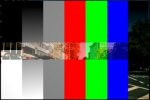
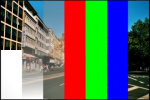
I'm going to use two different textures to demonstrate the different Image options. The background image is an ordinary JPG-file, the foreground image is a PNG-file with various Alpha- and Greyscale values. The vertical bar on the right side of the forground image is an Alpha blend, the horizontal bar has 50% Alpha.
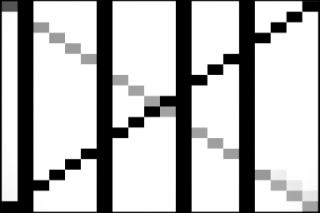
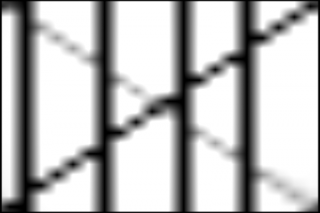
- InterPol: This option interpolates the pixels of an Image using a filter. This becomes visible when you enlarge the picture. Turn this option OFF to keep the pixels visible - they are correctly anti-aliased. This last feature is useful for regular patterns, such as lines and tiles; they remain 'sharp' even when enlarged considerably. When you enlarge this 10x10 pixel Image
 , the difference with and without InterPol is clearly visible (Enlarged Imagetexture).
- UseAlpha: Works with PNG and TGA files since they can save transparency information (Foreground Image with UseAlpha).
- CalcAlpha: Calculates an alpha channel based on the RGB values of the Image.
Black (0,0,0) is transparent, white (1,1,1) opaque (Forground Image with CalcAlpha).
- NegAlpha: Reverses the alpha value.
- MipMap: MipMaps are precalculated, smaller, filtered Textures for a certain size. A series of pictures is generated, each half the size of the former one. This optimizes the filtering process. When this option is OFF, you generally get a sharper image, but this can significantly increase calculation time if the filter dimension becomes large. Without MipMaps you may get varying pictures from slightly different camera angles, when the Textures become very small. This would be noticeable in an animation.
- Fields: Video frames consist of two different images (fields) that are merged by horizontal line. This option makes it possible to work with field images. It ensures that when Fields are rendered the correct field of the Image is used in the correct field of the rendering. MipMapping cannot be combined with Fields.
- Rot90: Rotates the Image 90 degrees counterclockwise when rendered.
- Movie: Movie files (AVIs supported by Blender, SGI-movies) and "anim5" files can also be used for an Image texture. In this case the subsequent Panel, Anim and Movie is populated by Buttons.
- Anti: Graphic images such as cartoons and pictures that consist of only a few colors with a large surface filling can be anti-aliased as a built in pre-process. This is not useful for Photos and similar pictures. Needs OSA.
- Normal Map: When the texture should be used as a "Normal Map" The drop-down menu to the right lets you change the space of the normal map (e.g. tangent to camera). See section Manual/Bump and Normal Maps
Scaling and Repeating
An Image texture is normally put on an object, so that the texture covers the whole object. With the NumButtons Min and Max you may set the offset and the size of the texture in relation to the object. Now you have to decide what to do with the pixels, that are not covered any longer.
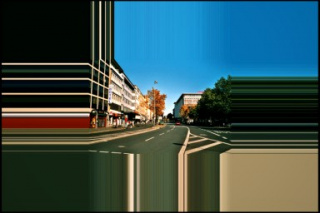
- Extend: Outside the Image the colour of the edge is extended (Extend). The Image was put in the center of the object with the shown settings.

- Clip: Outside the Image, an alpha value of 0.0 is returned. This allows you to 'paste' a small logo on a large object.
- ClipCube: The same as Clip, but now the 'Z' coordinate is calculated as well. Outside a cube-shaped area around the Image, an alpha value of 0.0 is returned.
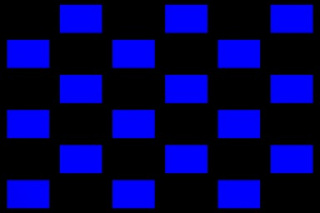
- Repeat: The Image is repeated horizontally and vertically as often as set in Xrepeat and Yrepeat. The mirror options for X and Y will mirror the image repeat in either the X or Y direction.
Mortar governs the distance between the fields in parts of the texturesize. (You can use the option size on the Map Input Panel as well to create the desired number of fields).
Animated Image Textures
Basically you may animate many different material attributes with IPO-Animations, e.g. the texture channels. Or you may animate the texture's offset (ofsX/Y/Z) in the Map Input Panel. You may as well use another object as source for the Input coordinates and animate this object.
But here we will talk only about animated textures itself, like videos and image sequences.
Videos as Textures
The simplest method to get an animated texture is to use a video file. The video needs the same - or an integral division - number of frames per second (FpS) as the animation, to run in the same speed.
You may use AVI Raw, AVI JPEG and Anim-Files (IFF Format). On Windows operating systems every AVI should work, as long as the appropiate codec is installed.
The number frs in the Anim and Movie Panel shows how many frames were recognised. You can copy this number to the field Frames with the arrowbutton. The number cur shows, which frame is shown in the Preview Panel.
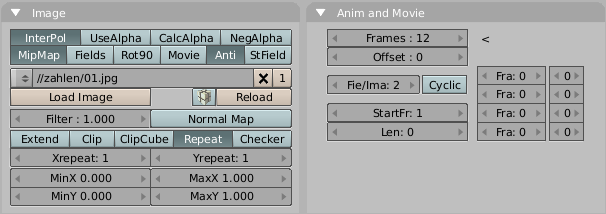
- Frames: The number of frames in the animation. The last frame will be used as static texture for the rest of the animation, if you don't turn on the option Cyclic.
- Offset: The number of the first picture of the animation. The endframe is calculated as Frames + Offset.
- Fie/Ima = "Fields per Image:" The number of fields per rendered frame. If no fields are rendered, even numbers must be entered here. (2 fields = 1 frame). This sets the speed of the animation. The correct settings depend on the framerate of the texturevideo, the framerate of the rendered animation, whether you render Fields (in the Render Panel of the Szene context) and whether the texturevideo uses "Fields" (Fields Button in the Image Panel of the Texture buttons). Some examples:
- The video has 24 FpS, the animation shall have 24 FpS. You are rendering without Fields. Set Fie/Ima to 2.
- The video has 12 FpS, the animation shall have 24 FpS. You are rendering without Fields. Set Fie/Ima to 4.
- The video has 16 Frames, the animation shall have 96 Frames. You are rendering without Fields. Set Fie/Ima to 6.
- The video has 24 FpS, the animation shall have 24 FpS. You are rendering with Fields and are using Fields in the Image Panel. Set Fie/Ima to 1.
- Cyclic: The animation Image is repeated cyclically.
- StartFr: The moment - in Blender frames - at which the animation Image must start. Until that moment the first Image of the video is used as texture.
- Len: This button determines the length of the animation. A Len of 0 means, that the length is equal to Frames. By assigning Len a higher value than Frames, you can create a still at the end of the animation when you use cyclic.
- Fra: The Fra buttons allow you to create a simple montage within an animation Image. The left button, Fra indicates the frame number, the right-hand button indicates how long the frame must be displayed (Stutter-Mode). An example follows. If you use Fra you have to set Frames and Len accordingly.
- Auto Refresh: Refreshes the image as frames change.
Numbered Image Sequence as Texture
Instead of a videofile you may use a numbered image sequence as well. The simplest procedure will be to save the images in a subdirectory to your blendfile and to load one of the images from this directory.
In this example I have used 12 Image files (01.jpg to 12.jpg). The entry in the field Frames activates the animation. Now Blender tries to find the next frames by changing a number in the filename. You may not use the option Movie also!
Numbers
You have to regard some things to keep Blender counting:
|
Everything else works accordingly to the videotextures. Here's an example of the Fra Option.
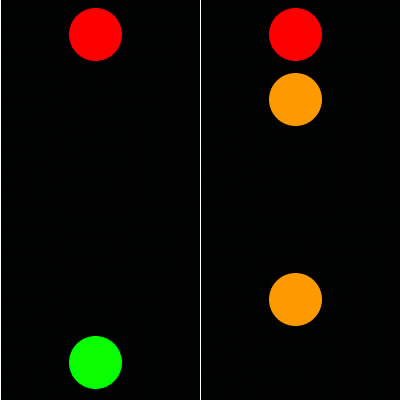
Lets assume, you would like to create an animated Traffic light. At first you create four different images: Red, Red/Yellow, Green, Yellow. These four images shall change continuously.
Please note that you need 100 Frames, though only four images are used. The result is not surprising (The Traffic light).
