利用者:Soylentgreen/Map To
The top rows of the Map To Panel shows the toggle buttons which determine which characteristic of the material will be affected by the texture. Some of these button are three state buttons, meaning that the texture can be applied as positive or negative. All of these buttons are independent.
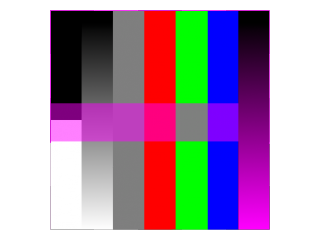
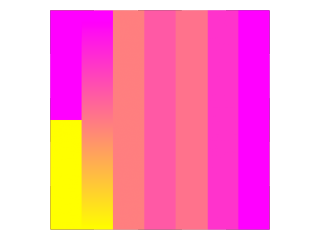
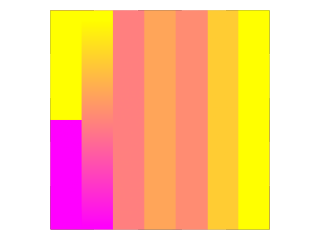
The result is also dependent from the type of input value. A texture may carry Grayscale Information (0-255), Transparency (0-255), RGB Color (3*0-255) or Normal Vectors (either Bump or real Normals, see Section Manual/Bump and Normal Maps/). Some of the variants are shown below. {{clr}
Map To Settings
- Col: (on/off) Uses the texture to alter the Material color.
- Nor: (off/positive/negative) Uses the texture to alter the direction of the local normal. This is used to fake surface imperfections or unevenness via bump mapping, or to create reliefs.
- Csp: (on/off) Uses the texture to alter the Specular color.
- Cmir: (on/off) Uses the texture to alter the Mirror color. Works only with Reflectionmaps.
- Ref: (on/off/neg) the value of the diffuse reflection.
- Spec: (on/off/neg) the value of the specular reflextion.
- Amb: (on/off/neg) the Ambient parameter.
- Hard: (on/off/neg) the Hardness parameter. A DVar of 1 is equivalent to a Hardness of 130, a DVar of 0.5 is equivalent to a Hardness of 65.
- RayMir: (on/off/neg) Ray-Mirror parameter (only for Raytracing).
- Alpha: (on/off/neg) the Transparency of the material.
- Emit: (on/off/neg) the Emit parameter.
- Translu: (on/off/neg) the Translucency parameter.
- Disp: (on/off/neg) to create displacement.
Common Settings
- Stencil: Usefull for semitransparent textures and "Dirt Maps". The texture is used as a mask for all following textures. See example below (Stencil). Black sets the pixel to "untexturable".
- Neg: The effect of the Texture is reversed. Normally white means on, black means off, Neg reverses that.
- No RGB: With this option, an RGB texture (affects color) is used as an Intensity texture (affects a value).
- DVar: Destination Value (not for RGB). The value with which the Intensity texture blends with the current value. Two examples: Emit is normally 0, if the DVar is also 0, no texture will have any effect. Set DVar to 1 to get maximal effect. The Alpha value ist normally 1, set DVar to 0 to get maximal effect.
- Mix: The texture Blending Mode. This works similar to the Layer Modes in Gimp or Photoshop.
- Col: The extent to which the texture affects colour.
- Nor: The extent to which the texture affects the normal. Affects Normal, Bump and Displacement Maps.
- Var: The extent to which the texture affects the other values.
- Disp: The extent an intensity texture changes the displacement. See section Displacement Maps.
- Warp and fac change following textures (Warp).
Input values and results
I've used The input file to demonstrate the impact of different input values. The material of the plane has ZTransp switched on, it's color is magenta (R=1,G=0,B=1). Map To Col, Map To color is yellow (R=1, G=1, B=0).
Normally the color of the texture is opaque. If you Use Alpha with the image texture the alpha information of the image is evaluated. This will not make the material transparent, only the texture! So these pixels show the underlying material color (Use Alpha).
No RGB shows the result of the respective setting. The RGB texture is used as an Intensity texture. White produces the "Map To" color.
Neg invertes the respective values.
Multiple Textures
Basically every texture is opaque to the textures above it. This is no problem, if one texture is for example mapped to color, the other mapped to alpha etc.
But how to confine a texture to a certain area, or create a smooth blending between textures?
If you want to give a Mesh multiple materials see instead Multiple Materials.
Stencil
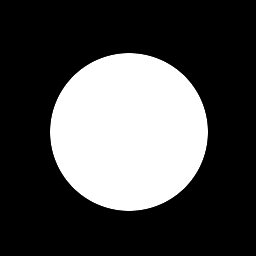
The Stencil mode works similar to a layer mask in a 2D program. The effect of a stencil texture can not be overridden, only extended. You need an intensity map as input.
Let's look at an example.
Where the mask is black the following textures have no effect. Stencil needs intensity as input, so you have to use No RGB if you would like to use either images without alpha or a texture with a colorband (e.g. Blend Textures with a colorband).
You can blend two textures if you use a blend texure as stencil map (Stencil map with a radial blend).
Warp
The option Warp allows textures to influence/distort the texture coordinates of a next texture channel. The slider fac defines the amount of the influence.
The distortion remains active over all subsequent channels, until a new Warp has been set. Setting the fac at zero cancels out the effect.
The first two images below show how a "Stucci" bumpmap can be used to warp a regular tiles image texture. The third image is a Normal Map which also slightly 'warps' the Tiles texture, for a fake 3d (or parallax) effect.
A more interesting example from the releasenotes of version 2.36 (Cornelius as a Warp Factor). The normal map of Cornelius (The same Texture for Normal and Warp mapping) was used as normal map as well as warp texture in channel 1. The checkerboard texture is used in channel 2.


