利用者:Rking/Doc:2.6/Manual/Animation/Editors/NLA
Non-Linear Action Editor
First, some terms:
- Channels are variables of an object (such as its X Location or its Material Color).
- Keyframes are a snapshot of these variables at a given moment of time.
- Actions are sets of keyframes for a window of time.
The Non-Linear Action (NLA) Editor can manipulate and repurpose these Actions without the tedium of keyframe handling. Its often used to make broad, significant changes to a scene's animation, with relative ease. It can also repurpose, and 'layer' actions, which make it easier to organize, and version-control your animation.
The NLA Editor interacts with the Graph Editor and the DopeSheet. So, in a way, you learn all three simultaneously.
Tracks
Tracks are the layering system of the NLA. At its most basic level, it can help organize strips. It layers motion much like how an image editor layers pixels---the bottom layer first, to the top, last. Sometimes the top information completely dominating, or sometimes with them blending in transparently.
Initial Setup
The first step in using the NLA is creating one or more Actions. By default, the Action Editor automatically stores the keyframes you create through the 3D View by storing them into an action based on the name as the object you are working on.
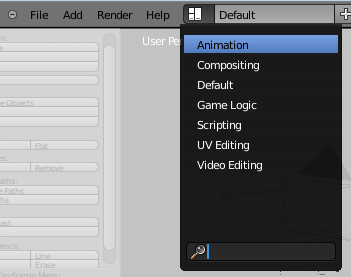
First, get your views set up so you can see what is going on. Load the Default Scene (CtrlN), and switch layouts either by hitting Ctrl←← or by clicking the dropdown:
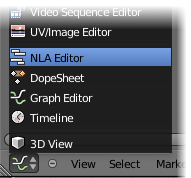
Now, since we are interested in the NLA Editor, load that instead of the Graph Editor:
You will probably want to do some re-sizing so you can see the NLA Editor better.
And now to use the tools you have open. Here are the steps to make a simple CubeAction:
- Load the Default Scene
- Select the Default Cube, and hit IL to keyframe its location. With this single pair of keystrokes what you actually did was:
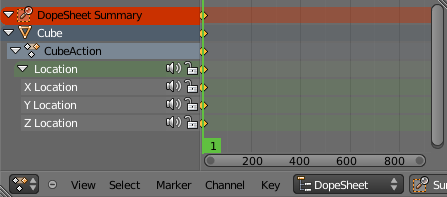
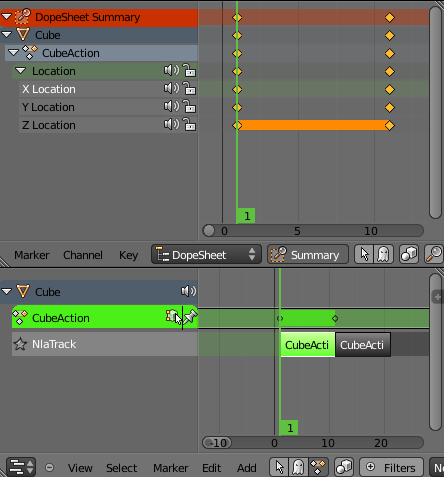
- Create the CubeAction and give it three channels: X, Y, and Z Location. You can see this if you look in the DopeSheet/Action Editor window (See first image, below).
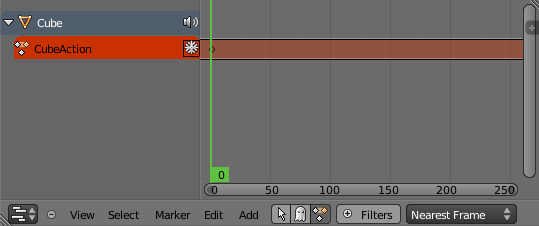
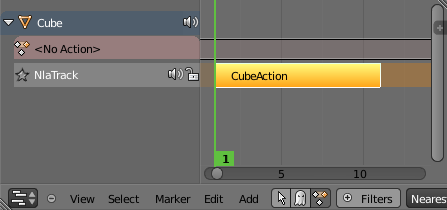
- Place that Action into the orange "DopeSheet Track" in the NLA Editor. (See second image, below.)
- Now, to complete the animation, go to Frame 11 by hitting ⇧ Shift↑
- In the 3D View hit G⇧ ShiftZ and scoot the default Cube to some random location.
- Hit IL to save the location channel data to a new set of keyframes. (Remember, "Go to the frame, make the change, insert the keyframe.")
- Test it out with AltA (Esc to stop).
The animation windows should now look something like this:
Creating Action Strips
Now that you have some Actions, there are two ways to create Action Strips.
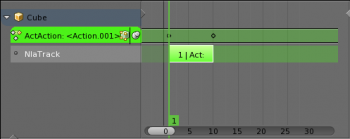
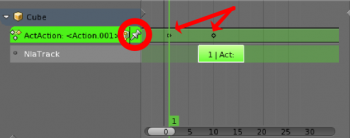
The first is by making an Action Strip out of the currently-loaded keyframes that are in the DopeSheet by clicking the unfreeze button (![]() ) next to the Track name in the NLA Editor. Once you do this, you might have to zoom in with your scroll wheel or with ↖ Home to see it better.
) next to the Track name in the NLA Editor. Once you do this, you might have to zoom in with your scroll wheel or with ↖ Home to see it better.
The second way to add Action Strips is by adding them manually with ⇧ ShiftA. Note that it must have a track to be created on, so you might have to first go to the Add menu and Add Track(s).
Once you have created it, you can perform some manipulations on it, such as G to move, S to scale, and by fiddling with the controls in the N Properties Panel, but more on that later.
Strip Types
There are three kinds of strips - Action, Transition, and Meta.
- An Action Strip is a container of keyframe data of an action (though they may be shortened, scaled, repeated, et cetera).
- Transitions perform calculations between Actions. They must be placed sandwiched between other strips.
- Meta groups strips together as a whole, so you can move them as one. If you find yourself moving a lot of strips together, it would help to organize them into Meta strips.
Editing Strips
The contents of Action strips can be edited, but you must be in 'Tweak Mode' to do so.
Hotkey: ⇆ Tab
Menu: View → Enter Tweak Mode
As soon as you hit ⇆ Tab on an Action, it throws that Action's keyframes into the DopeSheet for manipulation.
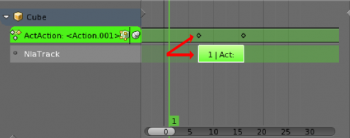
If you try moving the strip, while in edit mode, you'll notice that the keys will go along with it. On occasion, you'll prefer the keys to remain on their original frames, regardless of where the strip is. To do so, hit the 'unpin' icon, next to the strip.
When your finished editing the strip, simply exit Tweak mode with ⇆ Tab.
Re-Instancing Strips
The contents' of one Action strip can be instanced multiple times. To instance another strip, select a strip, and
Hotkey: ⇧ ShiftD
Menu: Edit→ Duplicate Strips
Now, when any strip is tweaked, the others will change too. If a strip other than the original is tweaked, the original will turn to red.
Track Controls
Several features are packed into a small space near the Track names.
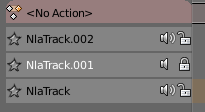
To the left of each track's name is the star icon. Clicking this is a "Solo Track" feature, causing only this track's effects to be visible when animating. This is very useful for debugging complex animations. As the name implies, you can only have one "Solo" track enabled at a time. Clicking the star (which is now orange) a second time returns to normal operation.
To the right of the track's name is the speaker icon, which is the opposite of the star---it "mutes" the track and keeps it from having an effect on the animation. You can click as many or as few of these as you like.
The lock prevents changes from being made to this layer. This is useful, for example, if you want to select several strips and move them---but you want to keep a few tracks excluded from the change.
Strip Properties
Strip properties can be made visible by:
Hotkey: N
Menu: View→ Properties
Note that, like most things in Blender, these values themselves can be keyframed and animated. This means you could have a repeating action whose rate slows down over time, for example.
Animation Data
The first box is the same as what you see in the Action Editor window. It allows you to choose, create, copy, and unlink actions based on the contents of the Orange track.
- Action Extrapolation - Action to take for gaps past the strip extents. Can be either
- Hold (Affects both sides of the strip)
- Hold Forward (Affects the region after the clip, only)
- Nothing (Neither).
- Action Blending - Affects the behavior when two tracks simultaneously have a curve affecting the same property. The default, Replace, causes the top strip to take precedence according to the parameters of the Blend In/Out (see next option, below). It can also be Multiply, Subtract, or Add.
Active Track
Here is one simple control which gives you the ability to rename tracks something other than NLATrack*.
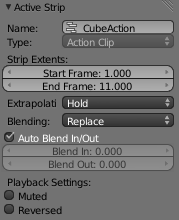
Active Strip
- Name - Rename a strip (defaults to being named the same as the Action it contains).
- Type - Will either say "Action Clip", "Transition", or "Meta", according to the three types of strips.
- Strip Extents - The boundaries of the strip itself. Note that this will stretch the duration of the Action, it will not cause greater or fewer keyframes from the Actions to play (see below for that option).
- Extrapolation - (See Action Extrapolation, above.)
- Blending - (See Action Blending, above.)
- Auto Blend In/Out -- Creates a ramp starting at the overlap of the strips. The first strip has full control, and it ramps linearly giving the second strip full control by the end of the overlapping time period.
- Blend In - Set the frame that represents when this strip will have full influence.
- Blend Out - Set the last frame of this strip's full influence.
- Muted - Mute a single strip (like muting the track, above). Causes the track outline to be dashed.
- Reversed - Cause this strip to be played completely backwards.
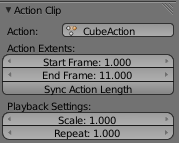
Action Clip
- Action - A reference to the Action contained within the strip. Can be changed to replace the current strip's value with another Action.
- Action Extents - How much of the Action to use.
- For instance, it is common to set the first and last keyframe of an Action to be the same keyframes. The problem with this is if you loop the animation, there is a slight hitch where the same keyframes are played twice. To fix this, simply bump the "End Frame" down by one.
- Note: If you select values that are above or below the actual keyframe count of the Action, then the F-Curve Extrapolation will be consulted. (Which can be changed in the Graph Editor, under Channel > Extrapolation Mode.
- Sync Action Lenth - Causes the "Start" and "End" Frames, above, to be reset to the first and last keyframed frames of the Action.
- Playback Settings
- Scale - Stretches strip, another way of increasing the Strip Extents: End Frame, above.
- Repeat - Also expands the strip, but by looping from the first keyframe and going forward.
Evaluation
- Animated Influence - Enabling alteration of the degree of influence this strip has as a keyframable value. If influence isn't animated, the strips will fade linearly, during the overlap.
- Animated Strip - Same as Animated Influence, but with Strip Time.
- Cyclic Strip Time - Cycle the animated time within the action start and end.
Modifiers
These interesting tools are described in their own section, below.
Strip Modifiers
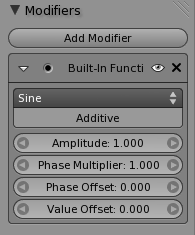
Like its close cousins in mesh and graph editing, Modifiers can stack different combinations of effects for strips. Obviously there will be more to come on this.
TODOs
- Strip Modifiers ^
- Integrate: http://aligorith.blogspot.com/2010/10/clarifying-animation-workflow-in.html

