テンプレート:Release Notes/2.40/Mesh/Editing
For more examples and thorough explanations of the new mesh editing features, see Edge and Face Tools in the User Manual.
Subdivide
The entire subdivide toolset has been recoded and improved for Blender 2.40. Mainly, Subdivide tools are now edge based, which allows for many improvements:
- Multicut options allow the user to subdivide the mesh several times at once
- Regular, smooth, fractal, knife, and loop subdivide have multicut options
For more information on the internals of the subdivide refactor, see
http://wiki.blender.org/bin/view.pl/Blenderdev/EdgeSubdivision
New Subdivide Options
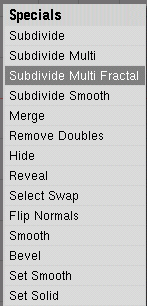
- When choosing Subdivide Multi or Subdivide Multi Fractal from the Specials Menu in Editmode (W), a number button dialog is shown which asks for the number of subdivisions to perform. This way, you can subdivide a mesh many times at once without the need to choose the Subdivide command repeatedly.
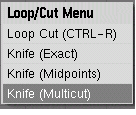
- The new Knife (Multicut) option in the Loop/Cut menu (K) allows you to cut a mesh several times at once, by identifying the number of times the cut will cross the same edge.
- If the Ctrl key is pressed when choosing the Subdivide command or confirming the number of cuts in a multicut, the new inner edges will be selected instead of the entire mesh.
- If the Beauty option is toggled in the Edit Buttons, selected faces are only subdivided along the longest 2 sides.
- If both the Beauty and Short options are toggled, selected faces are only subdivided along the shortest 2 sides.
Note: Using edge mode to select only the edges you wish to subdivide creates a more accurate subdivision than using the Beauty toggle.
Loopcut
While Loopcut is still accesable with CtrlR as usual, you can type in an arbitrary number of cuts using numeric entry during the loop selection. Several options are available while choosing the faceloop for or placement of the cut:
- Pressing P while positioning the loop cut will enter non-proportional mode, which keeps the shape of one end of the faceloop regardless of where the cut is positioned. Pressing F while in non-proportional mode flips which side of the faceloop is used to determine the shape of the cut.
- Pressing S while choosing the faceloop to cut toggles a smooth cut. After choosing the faceloop, a dialog prompts for the smoothness value before the position of the cut is chosen.
Edgeslide
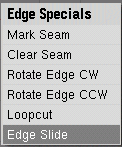
- A new tool, Edge Slide, has been added to the Edge Specials menu (CtrlE).
- This allows you to slide an edge along its two adjacent faces.
- The mouse moves the edge between either end of the faces in increments of 5%. Holding down ⇧ Shift will move the edge in 1% increments, and holding Ctrl will snap the edge to increments of 10%.
- Using the Wheel
 Mouse-Wheel or pressing ← or → arrow will change which of the perpendicular edges are used as the "rail" for edgeslide (the top or bottom of the faces the edge is being slid along).
Edgeloop delete
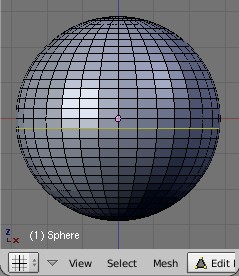
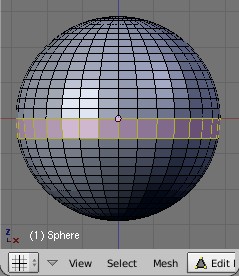
In the Delete menu (X), you can now delete an edgeloop if it is between two other edgeloops. This will create one facelooop where two previously existed. In the following images, you can see what happens when an edgeloop is deleted from a UV Sphere:
