テンプレート:Tutorials/A cartoonish spider
Modeling and rigging a cartoon looking spider!
Introduction
Blender's modeling tools are excellent for many tasks, especially for making organic forms. To make a funny, simple cartoon looking character with Blender is as simple as a walk in the park (well, once you know how, obviously). I'll try to prove that in this short tutorial.
So, first you'll need an idea. If you don't have a fresh idea, use an old one, it's probably already mature enough to be recycled with some fresh dimensions. Such was the case for me... Actually, you could even skip this part; with Blender you don't even need an idea. To play with the tools and their options is usually more than enough to start one!
My old spider illustration was a perfect starting point for a short and silly 3D movie, and to check out some new Blender tools in areas such as: lights, scenes, painting, materials, rigs, particles, shape keys, NLA, nodes, video composing, sound, codecs, etc... So I needed a good looking model, but one that is also simple enough to achieve decent/short rendering times. You know, short rendering times = longer movie in a shorter time.
There are many good modeling tutorials around, including ones in BlenderArt volumes, so check them out. Most of the modeling tools are already mature, so they haven't changed much. Here I'll show you my key stages of the modeling and rigging process:
Body
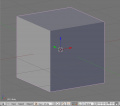
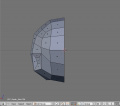
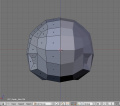
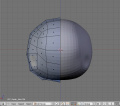
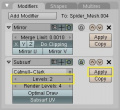
It's good to start your model in the center of the 3D space, especially if you'll use Mirror Modifiers, Armatures, etc. So first hit ⇧ ShiftC to move the 3D cursor to the center, and 1 NumPad for the Front view (so that the "X" axis goes from left to right). Add a cube (Object mode: Space Add > Mesh > Cube) and add a Subsurf Modifier to it (F9 for the Editing buttons, then Space Add Modifier > Subsurf), set the Level to 2 and hit the Apply button (image 1.h) (or AltC in object mode) in the Modifiers panel. Tweak the vertices to get a shape like this.
The basic modeling tools are: Grab & move G, Scale S and Rotate R. You can select joined mesh pieces with L in Edit Mode (modeling is done in this mode most of the time). Once selected, you can separate them again with P. To make a face (also known as a polygon) select edges or vertices and press F. With AltS you can move faces along their normals.
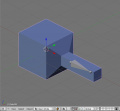
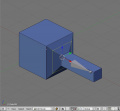
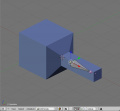
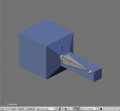
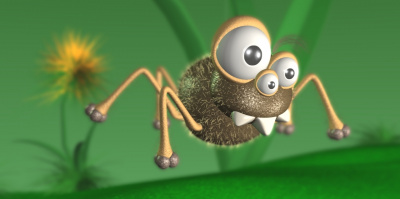
Select three faces (image 1.c) and extrude them inward with E to make a place for the upper legs 'connections' with the body (image 1.d). You can delete one side of the body mesh and add a Mirror Modifier, so you'll need to tweak only one half of the body since it's usually good to build things symmetrically at first. OK, this is the spider's body shape. Easy, huh!? We'll add hair or fur later...
Head
Check the sketch to see how big the head must be to fit the style of the illustration. You can be flexible here, making it bigger or smaller. Sometimes you get better results when you don't follow the sketch exactly. There are many ways to build the head for a body. I used the topology of the body as the starting point for the head. So, I duplicated body faces (4x3) in Edit Mode with ⇧ ShiftD. These 12 new faces are still part of the body mesh, so I separated them using P.
You can make the head in the same way as the body above... from a cube. But by duplicating part of the already existing body mesh you get precise alignment of vertices which are useful for quicker assembly of body parts (less tweaking, faster result!). So, after a few extrusions E and some tweaking of some vertices, I came up with this:
Legs
Again, with the same principle as a head, I selected one (which was enough for this part) face where the middle leg "joint" will be located and duplicated it with ⇧ ShiftD and separated it with P. After a few extrusions E and vertex tweaks, I came up with this:
At the tip of the leg I added four spheres (see footnote 1) and joined all leg meshes together with CtrlJ. I could also pose the leg into a different rest position, but for a later stage it's important that the knees are at least a bit bent for the proper Armature IK calculations needed later. Finally I duplicated the remaining five legs in the planned positions (again, with ⇧ ShiftD).
Eyes & Teeth
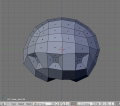
The spider's teeth are super simple... well like the rest, huh!? OK, I admit, I went about this the same way one more time! ⇧ ShiftD, P, E, tweaking... But this time I added an extra Loop Cut with K (image 4c.) to make the topology of the spider's teeth more fascinating!
- TIP: In Blender, X is an extremely important HotKey, which is usually used to delete ugly & awkward looking artwork! :) Interesting how efficient Blender is with a few HotKeys, huh!?
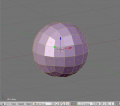
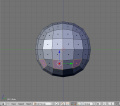
I could make the eyes even simpler, but there's a little trick for an eye's 'iris lens'. Namely, you get better light reflections if you make the lens more spherical or convex. Here's how I made it: Add a sphere using Space, then Add > Mesh > UVsphere (with 8 Segments and 8 Rings). Select the top 16 faces (2 rings) and separate them with P. Make the lens more convex using the Move G, and Scale S tools.
The eyelid is made with an additional UV-Sphere (12 Segments and 8 Rings), rotated 90 degrees relative to the eyeball. Then scale, delete one segment row and extrude an Edge Loop toward the center of the eyelid (images 5 b-c.) For the opening/closing of the eyelid I used ShapeKeys, but I won't go into ShapeKey details at this time. You can check the related (2.46 updated!) file for details.
- TIP: Use Median Point and 3D Cursor pivots with the Snap tools ⇧ ShiftS for the center positioning of an eyelid axis. Face Loops and Edge Loops can be selected with ⇧ ShiftAltRMB
 and CtrlAltRMB
  . Sneaky tools!
Hair, fur and other horrendous growings!
The spider model at this stage is basically done. The rest are colors and of course horrendous hair! That's quite easy again. Colors were tweaked in the Shading Menu F5 and the Particle Emitters used duplicated parts of the already made spider meshes.
Originally was this spider made with an old particle hair system, so I needed to tweak it for the new fancy hair system compatibility. Scroll down for both available files!
Rig, oil & sweat!
The next phase toward animation was rigging. This armature contains basic (version 1 - see footnote 2) use of IK constraints, but for an animation I didn't need a more complex rig.
TIP: If you want to avoid some unpredictable Armature behavior, start to build the rig in the center ⇧ ShiftC!
So, I added the first bone at the center (Object mode: Space, then Add > Armature). I usually name this first bone Root_'something', in this case Root_Spider.
Afterward, I duplicated this bone in Edit Mode, extruded E the tips of the bones two times and positioned them again with Snapping tools ⇧ ShiftS.
- TIP: If you want to save time in naming bones, name only 'important' bones (Root_*, Handle_*, Tag_*) and leave Blender to name the rest of the bones automagically! Only take care to add *.R or *.L on the end of certain bone names (for example: Handle_Leg_01.L). Blender will recognize this as a bone chain on the Left side. This is also useful for Mirror Bone editing!
Here is an example of setting a leg bone in the exact position, which is very hard to achieve by hand, especially when working with organic forms and exotic angles:
- 8a.) Add Bone
- 8b.) Set pivot to Median Point; Select Edges; ⇧ ShiftS, then choose Cursor -> Selection
- 8c.) Select Tip of the Bone in Edit Mode
- 8d.) ⇧ ShiftS, then choose Selection -> Cursor
OK, back to the spider's rig. After I extruded and positioned all needed bones for a leg, I started with an IK chain logic setup.
- TIP: You can switch between Pose and Edit Modes with ⇆ Tab, and Pose and Object Modes with Ctrl⇆ Tab. Don't forget to disable Envelopes in the Armature Modifier if you're using Vertex Groups!
Bones with IK constraint solvers are yellow colored. Every spider's leg has one IK solver (set to ChainLen:2) which I added in a Pose Mode (image 9b.). After I duplicated the left/right side legs ⇧ ShiftD, I then added a bone for the head and one bone for a mouth/jaw. There is also an optional handle for moving all legs simultaneously!
- FINAL MASTER TIP: One animation per day keeps Kaito away!
Download .blend
- Version for Blender 2.46 and newer.
- Version for Blender 2.45 and older.
|

|
- 1. Adding the spheres this way isn't optimal if you're building the model for a game. There must not be hidden faces in that case! This model was planned for an animation, so these 'dense' spheres can be used as particle emitters if needed.
- 2. The Armature system in Blender was build in stages. Version 1 can do FK, IK and some other basic constraints. Version 2 can do more advanced things (check Mancandy's rig made by Bassam Kurdali as an example). Version 3 is the latest and greatest Armature system used for characters in the Blender Institute's Open Movie 2! http://www.bigbuckbunny.org

