利用者:Antoniov/Grease Pencil as Object
目次
Grease Pencil as Object
Introduction
Grease pencil becomes a new Blender object
This document describe the proposal to change current grease pencil module. This design has been done with the support of artists Daniel M. Lara and Matias Mendiola that help me to design, test and improve all the process with their knowledge and experience. Thanks both!
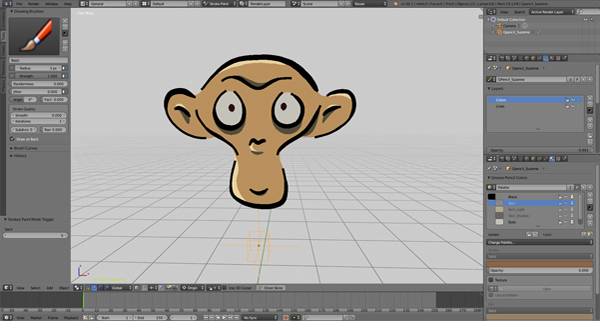
Grease pencil has grown from a simple annotation tool to a powerful drawing tool that deserve become a new object in Blender. The new object, will inherit and improve all the new features for 2D animation of the actual Grease Pencil tool but maintaining the ability to be use as annotation tool.
As new object, now it will be possible to copy, link or append this object in the scene, improving workflow. Linking a GP object to the scene will link the corresponding GP datablock and palette.
The new object can share the same GP datablock with other GP objects, it will be possible to create arrays of duplicated characters (as an army) sharing the same datablock and the internal geometry cache, speeding the drawing process and allowing bigger and complex scenes.
Roadmap for Gpencil features
This document is a roadmap of the ideas we will try to implement in Blender 2.8x. Maybe all of them will not be available in 2.80 version, but it will be implemented in future versions.
1st Stage - Required for production
- Merge GPencil color palette system with Blender color palettes 🗸
- Convert GPencil into a Blender object 🗸
- GPencil modes: object, editing, paint and sculpt 🗸
- Scale strokes thickness with zoom 🗸
2nd Stage - really good to have
- Improve onion skin 🗸
- Better line styles and fills (Geometry Shaders) 🗸
- Integrate GPencil with Render layers 🗸
- Modifiers (Noise, Build, etc.) 🗸
3rd Stage - Xmas time :)
- Multiple editing 🗸
- Fill Strokes tool 🗸
- Select GP object selecting strokes in viewport
- Strokes and fill affected by lights 🗸
- DOF, Blur effects 🗸
- Integration with Eevee 🗸
- Integration with compositor 🗸
- Integration with Cycles 🗸
- Convert Drawing Brushes to Blender Brushes 🗸
- ...and lots of tiny things/tools/improvements
Overal goals
- Tight to a “Just draw it” concept.
- Artist friendly for traditional 2D animation.
- Artist friendly for 2D rigged character animation.
- Easy to use on a 3D space.
- Well integrated with other Blender 3D objects.
- Well integrated in Compositing and Render process.
- For 2D editors (Nodes, Image, VSE, etc.) limited support as annotations only.
GPencil Object
The new Object will be used only for 3D view, including new functionalities. For 2D modes (VSE, IMage Editor, Node Editor, etc) the current grease pencil code will be used and renamed as Annotations.
It’s important to notice that annotations will be a subset of functionalities and will not support all options supported by 3D view.
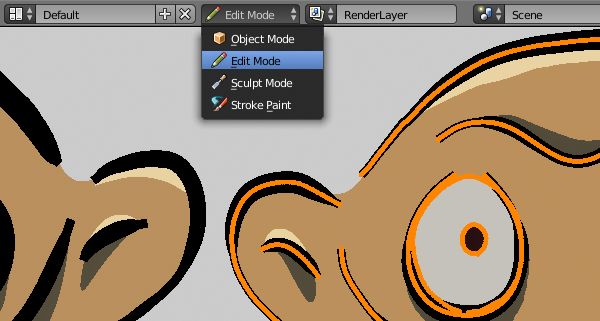
GPencil Modes
In order to get a standard way of using grease pencil object, a new set of modes must be put in place.
Each of these modes will cover a separate function like paint, edit or sculpt. Using different modes allow to define different keymaps too and get a more specific workflow for each task.
It's important to design a fast way to switch between modes in order to keep an agile workflow. The proposed keymap for each mode could be redefined with new workspaces. The Tab and Ctrl+Tab will work similar to other Blender areas to switch between modes.
Object mode
- As any other object in Blender, GPencil could be selected or transformed in the 3D viewport.
Stroke Paint mode
- This will be the only mode that allow draw strokes over a GPencil object
- Shortcut: D or D+LMB
- This mode will not need the previous concept of continuous drawing or to keep pressed the D key, only press mouse and draw in a more natural way of drawing.
- Separate each mode allows, for example, define the size of the drawing brush using F key (as usual in Blender). This was impossible before because the keymap was already defined and it was not available.
Edit mode
- Only one GP object can be edited at the same time. The edit mode will be similar to the current edit strokes mode. Some analysis to allow multi-frame editing is in progress.
- Shortcut: TAB
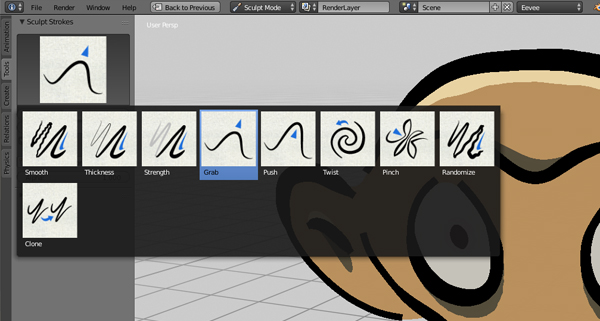
Sculpt mode
- Only one GP object can be edited at the same time.
- Shortcut: E (now need press E + Left Mouse )
- New sculpt brush selection interface.
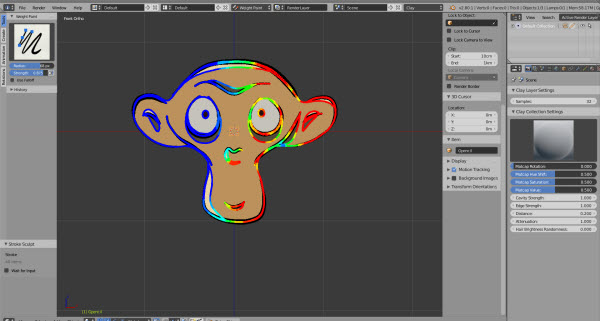
Weight paint mode
- Allows to define vertex groups and the weights by point.
User interface
In order to follow the UI guidelines and behaviour of other object in Blender, the tools and panels of the GPencil will be moved and rearranged on Outliner, Properties editor, tool shelf, etc.
Layers
The current grease pencil layers will be equal to current use. From artist point of view is better to keep an internal layer system inside each GPencil object. Use different objects to manage different drawing layers is not practical.
As GP is now an object, it can be arrange using new collections also, so we can arrange the objects in the scene, and for each object arrange the layer order, visibility, etc. and the stroke order. In this way, we keep a full control of strokes in a mixed 2D and 3D environment.
Animation
Dopesheet editor
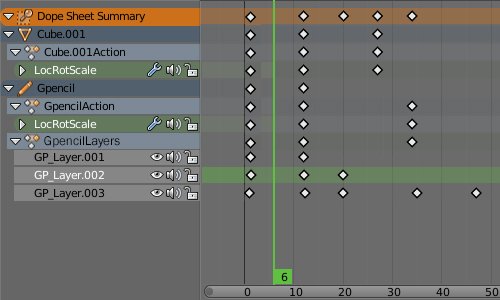
In order to get object data and layers data, a new group called “Layers” can be added as new group. Only keyframes if stroke present.
Mockup of the proposed design.
Curve editor
For GP objects, only location/rotation/scale will be available from here. The GP layers and stroke cannot be changed here.
Example of palette color in curve editor
Render
Now the render of GP is not intuitive. if we want to mix with 3D render or make any compositing the process to export to EXR is very complex. How we get a grease pencil render as fast as opengl render but keeping the opengl render functionalities for other artist tasks is something that need further analysis.
It’s important to include in the design how the grease pencil render is integrated with the sequencer. The current design creates a lot of problems.
Modifiers
Here we can define a set of modifiers to GP object. Due the nature of the strokes that can change in each frame, it’s impossible to define information by stroke or point as weight painting, so all modifiers must be assigned by layer and/or color/index. A new field for pass index will be added for each palette color, and it would be used in modifiers to apply to different colors at the same time instead to use layer selection.
According to this, we could assign the modifier at following levels:
- Full object 🗸
- Layer 🗸
- Pass index (defined at color level) 🗸
The implementation will use the current structure for modifiers, but as the modifiers are base on DerivedMesh, the GP modifiers will be only a placeholder than will be processed in drawing time using the internal flags to determine if must be recalculated or not. With this approach we can keep the same UI and internal structure but using strokes instead of meshes.
Planned modifiers:
- Array 🗸
- Build 🗸
- Simplify 🗸
- Subdivide 🗸
- Hook 🗸
- Lattice 🗸
- Noise 🗸
- Offset 🗸
- Smooth 🗸
- Thickness 🗸
- Hue/Saturation 🗸
- Opacity 🗸
- Tint (color change) 🗸
- VFX Flip 🗸
- VFX Blur 🗸
- VFX Pixelate 🗸
- VFX Swirl 🗸
- VFX Wave 🗸
- VFX Light 🗸
Shaders
A new group of shaders has been defined for strokes and fill.
For strokes, now the line is not drawn using opengl primitive line, but using a new geometry shader that triangulate the line and generate a geometry to draw the line.
Initially, two types of strokes are available:
- Solid: The stroke is drawn with a line.
- Dot: The stroke is drawn with dots or circles.
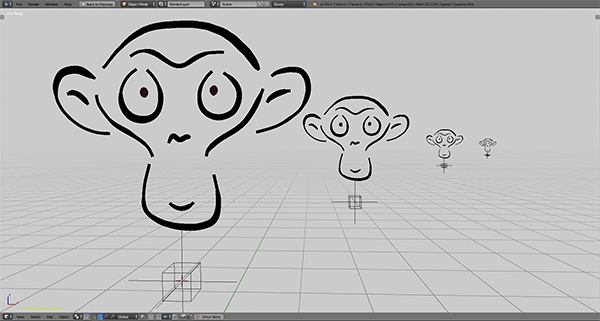
This new stroke implementation allows the use of thicker lines and to be affected by viewport zoom factor. This new shader allows apply textures and patterns.
Example of same character at different zoom factors.
Note: An option to disable affected by zoom is available because in some artist pieces this can be useful.
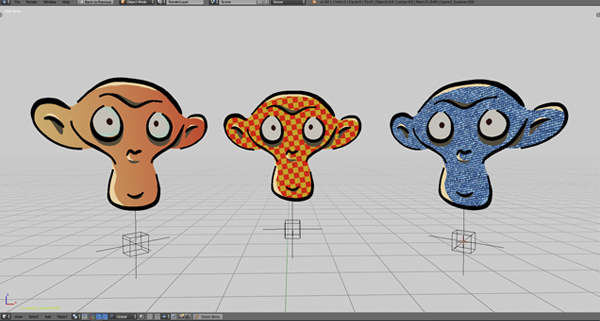
For dot, the old volumetric method was not valid and a complete new system has been developed in order to allow points bigger than 10 pixels and affected by zoom factor. This new shader allows apply textures and patterns too.
Example using gradients and textures
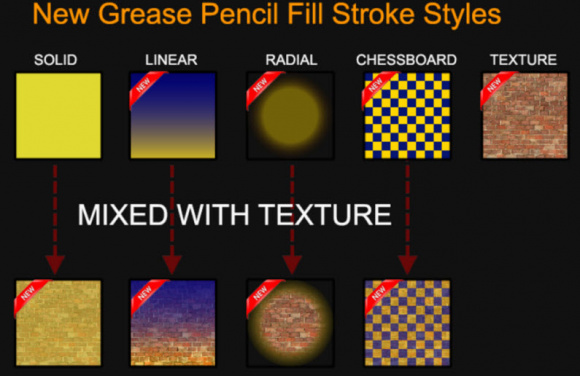
For fill, a new shader with a lot of options has been implemented.
The list of options can be changed during development adding new options.
Multiview
To have stereo multiview render would be a very good addition to GP. @dfelinto can help us to decide the next steps to do.
Technical details
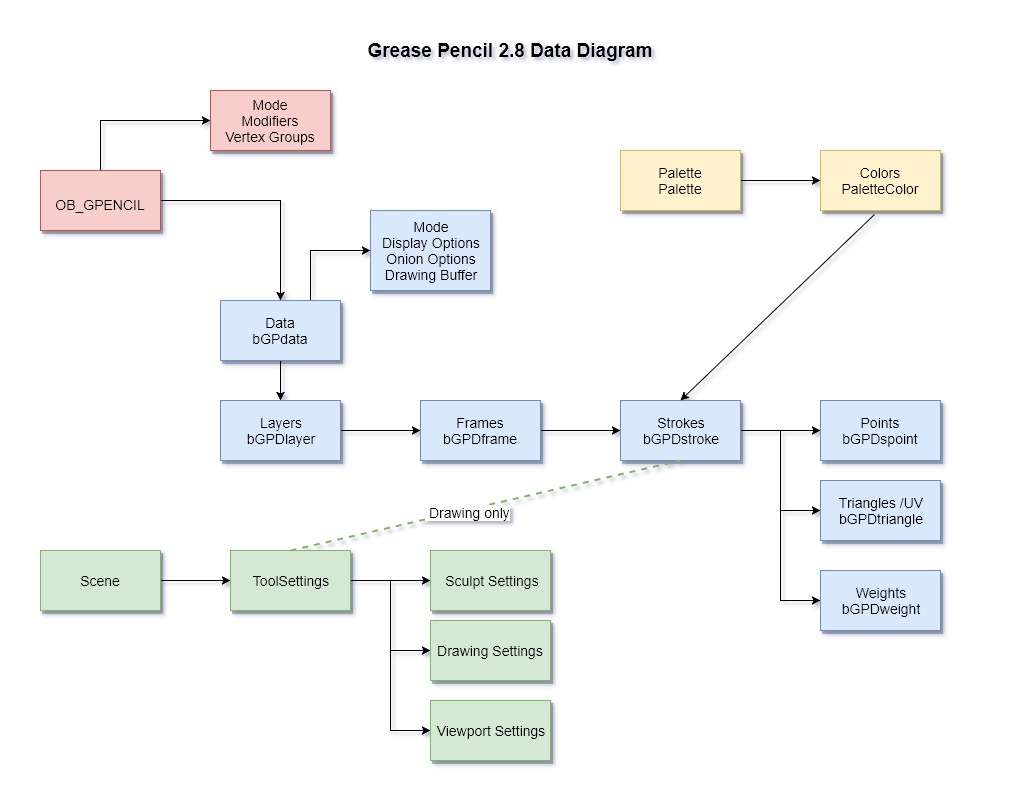
This section include details about the internal design and information related to the task to recode the grease pencil functionality.
General Implementation
In order to create a new object type, we will use the same basic behaviour that EMPTY object, but using a different object type.
To identify the new grease pencil object, a new viewport icon is displayed using a combination of empty axis and box. This makes the identification easier. Aditionally, a support for bounding box display will be added.
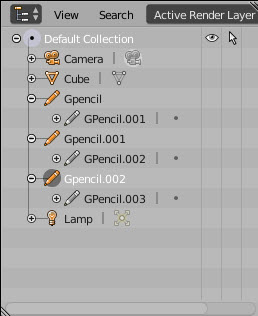
The new object will appear in Outliner in a similar way other objects use.
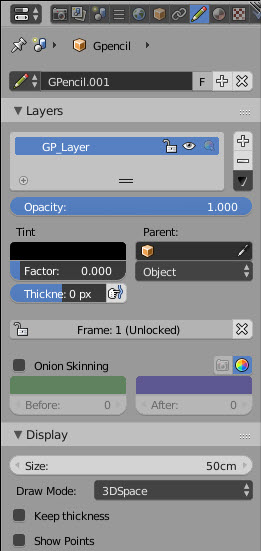
The size of the object can be changed as empty objects using the size panel. The layers has been moved to object data panel in order to make more consistent the UI.
This object will have grease pencil data instead of mesh data, and when the user press TAB to enter in Edit mode, the stroke edit mode will be enabled.
Internally, the grease pencil layers, frames and strokes will work as today grease pencil object mode, but there will be a difference: The strokes will follow the object transformation (location/rotation/scale). If the layer is parented to new object, then this layer will follow the transformation of the parent object and not the default parent object.
Note: The current scene level will be removed because it breaks the new workflow.
The object type is defined in DNA_object_types.h with a value of 26:
OB_GPENCIL = 26,
The new object type will be OB_GPENCIL.
Draw multiple object on viewport/render.
One of the main points of the new object is to be able to have several GP objects on screen at the same time. The visibility of this objects will be handle by the current outliner options (Hide render flag).
Layer information
As the layers will be part of the object, it would be logic to move this information to the object data area.
Palette colors
Currently, the palettes are linked to the GP datablock, but if we have several datablock at the same time on screen, it’s not logic to have one palette for each of them.
In order to share the palette across several object, this information must be moved to Blender Palettes. To keep consistency of the UI, the palettes will be moved to Material panel and not to properties panel as today.
To get more info about Palettes, please review this page: https://wiki.blender.org/index.php/User:Antoniov/Convert_bGPDpalettes_to_BlenderPalettes
Drawing viewport details
The drawing engine of grease pencil has been rewritten in order to use the new draw manager, implementing all the drawing in a drawing engine called gpencil_engine.c. The drawing process uses several cache systems in order to reduce the drawing time and avoid duplicate geometry calculation.
After some discussions we have decided to keep as drawing engine only and not a full render engine, because grease pencil is used alone or on top of other render modes, so it is not logic to separate in a render engine. This approach allows to use grease pencil over Cycles or Eevee.
There are several levels of sorting the viewport that are required by 2D animation and that complement the usual 3D space.
- Level 1: Stroke order
- The order of the strokes is the default drawing order, where the last to draw is on top. This order can be modified with arrange operator.
- Level 2: GP Layers
- For each GP object, the strokes are sorted by the position of the layers as worked in previous Blender versions.
- This layers allows the artist to sort the strokes very fast and mimic a common 2D drawing software where layers define the order.
- Level 3: Object z-depth
- The third order is defined by the position in the 3D space. If the drawing mode is set to 3D Space, the strokes will be on back or front depending of the position in 3D space.
The internal technique used is render the strokes in a temporary framebuffer without z-depth test and with z-write enabled. After that, a fullscreen quad render with z-depth test using the previous color and z-depth textures. This step is necessary because if we enable the z-depth test in the render, the z-fighting will destroy the drawing.
Note: There is a limitation in current Draw manager and the technique used for z-depth.
We need use OIT (Order Independent Transparency) which is still an open issue in the realtime field (and also for Eevee).
The best OIT method is somewhat complex and not very precise (still not 1:1 with the ordered version). It involves more framebuffers and performance cost. This feature need to be implemented in the draw manager in the future so that all engines can use it.
For now, we calculate the distance to POV and make an inverse sort to draw the objects. This solution is not perfect but can minimize the problem while new draw manager function will be in place.
In order to minimize this problem while new functions will be available, try to make your drawing setting the position of the GP object in a way that z-depth keep consistent when the camera moves. Usually, this can be gotten aligning the pivot points on the same visual z-depth line.
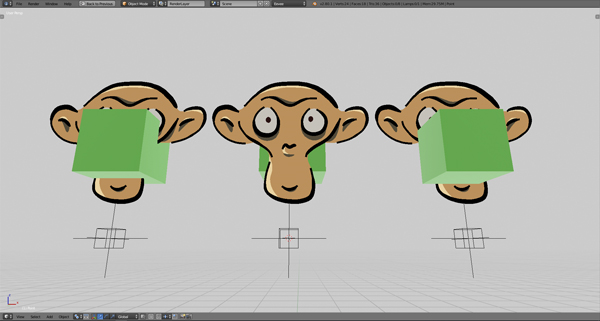
New X-Ray modes (Draw mode)
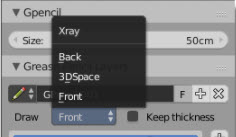
A new option has been implemented in order to define how the strokes are affected by other objects in 3D space. The new option allows define several values: Back, 3D Space and Front.
- Back: Draws all strokes behind all objects.
- 3D Space: Strokes are hidden by 3D objects when occlude view.
- Front: Strokes are drawn on front of all 3D objects.
Example of different drawing modes (3D space, Front, Back).
