利用者:Broken/Techniques
NOTE: This is a temporary page that I'm using to dump these 'techniques' into. They don't belong amongst the reference manual, but are very useful, and it would be great to see more tips and tricks like this. Perhaps a good idea would be to add a 'techniques' page to each chapter, full of these sorts of things. I'll worry about that when I come to a high-level restructure of the manual.
--14:15, 12 July 2006 (CEST)
目次
Techniques
Incidence Angle dependent Textures
I will mention the limitation of this technique right away: this will be no real Fresnel effect, because it is dependent on the camera angle - not really the incidence angle. But it works similar to Fresnel, when the camera is not too close to the surface or the face is relatively small compared to the camera. It works well with spheres but not so well with large planes.
As an example we will fake Fresnel Alpha. Of course you can do better with the corresponding slider, but with this technique we can change every Map To channel - not just Alpha. Therefore we use Alpha just for comparison reasons here.
Create a new material and set the Alpha Value in the Material Panel to 0.04. Turn on ZTranps in the MirrorTransp Panel (Material settings for incidence dependent Alpha).
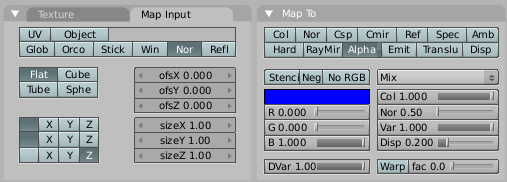
Now add a new texture and set Map Input to Nor. Select -/-/Z coordinates. Under Map To, select Alpha only (Texture settings for incidence dependent Alpha).
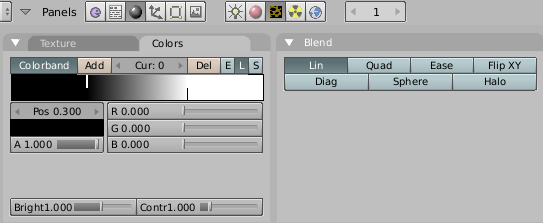
Under the Texture Buttons (F6) choose the Blend Texture Type. Then in the Blend buttons choose the Sphere type. We could discuss the Blend effect in detail by using the Colorband, but this example shows only the principle.
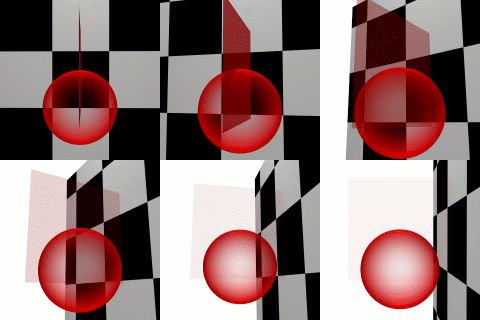
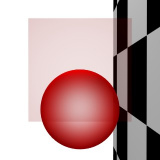
You clearly can see how the plane becomes (96%) transparent if you view it directly perpendicular (Faked Fresnel Effect). For comparison "real" Fresnel (Real Fresnel Effect).
Instant Professionalism
We will get a nice effect if we change this technique a bit. Under Map To select Ref and/or some Emit. Set the texture blending mode to Add. Since you get instant super light crispyness on your object (and it's very easy to achieve) it jestingly was called "Instant Professionalism".
Slope Dependent Textures
A very similar technique can be used to create textures that are dependent on the slope of the terrain. Use a linear Blend texture with a colorband (Texture settings for slope dependent textures))
Use this blend texture as a Stencil map which will keep the "Steep" Texture (Material settings for slope dependent textures). With the shown settings the terrain rises in Z-Direction.
Height Dependent Textures
You may also create textures that are dependent on the vertex position in respect to a certain axis (height dependent). Simply set Map Input to Glob, the input coordinates to Z/Z/Z. Now you can use a stencil texture to part a position "below" from a position "above". Colorbands allow you to adjust the softness of the transition. You could use a similar technique to create some color variations directly with a texture. Even contour lines would be possible - either with a custom colorband or with a partially transparent image texture with vertical lines.
Single sided faces (Backface Culling)
In Blender we don't really have single sided faces. But we can make them transparent from one side. Using Map Input type Nor will help us.
At first we will set No V. normal flip in the Mesh Panel of the Editing buttons (F9). Because Blender normally renders double-sided, the direction of the normal (towards the front or the back) is automatically corrected during rendering. This option turns this automatic correction off. Be sure the face normals are set consistently in the same direction (CtrlN in EditMode).
Now (again), set Map Input to Nor and change the mapping to Z/-/- (Texture settings for Backface Cullling). We will use a linear Blend texture, mapped to Alpha. Also, set DVar to 0 (totally transparent). Since we use a colorband with the Blend texture, we have to set No RGB.
And now for the last step - the custom blend (you could use an image texture as well of course). The left half (0 - 0.500) is white, the right half (0.501 - 1.000) is black.
Now the rendered faces are transparent from one side. As always with transparent materials you have to turn ZTransp or Ray Transp on, to see things behind your object instead of only the world background.


