利用者:Greylica/Doc:2.6/Manual/Vitals/Quick render
Quick Rendering
What is rendering ?
Rendering is the process of creating a 2D image. Blender creates this image by taking into account your model and all of your materials, textures, lighting and compositing. There are two main types of rendering systems built inside Blender, Full render, and OpenGL render. This page shows you basic knowledge about rendering Images.
Rendering an image using Full Render
To start a Full render you can do any of the following options:
- Press F12
- Go to Properties Window » Render context » Render panel and press the Image button or
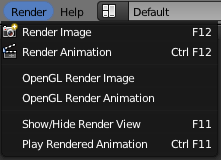
- Go to Render » Render Image from the header of the Info Window (See: Header of the Info Window)
To abort or quit the render, press Esc.
OpenGL rendering an image
To start a OpenGL render you can do any of the following options:
- Click on OpenGL Render Active Viewport, in the header of the 3D Window, using the small button showing a Camera (together with a small image showing a slate) in the header of the 3D View
- Go to Render » OpenGL Render Image from the header of the Info Window (See: Header of the Info Window Image)
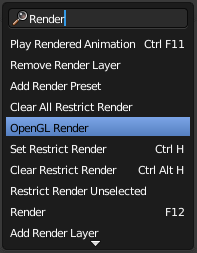
- Using the Search functionality of Blender, pressing Space, typing Render and clicking on OpenGL Render.
To abort or quit the render, press Esc.
Adjusting the resolution
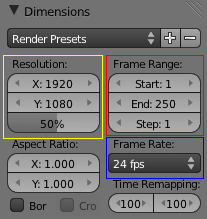
The Dimensions panel of the Render context allows you to change the resolution. The default instalation of Blender, is set initially to 50% of 1920 x 1080, resulting in an 960 x 540 Image. (Highlighted in Yellow, in Dimensions Panel Image). Higher resolutions and high percentage scales will show more detail, but will also take longer to render.
Output format and output file
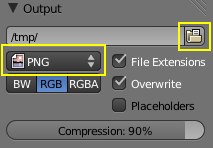
You can also choose an output format and the output location for your rendered image or animation. By default those are saved in a temporary folder (/tmp), using an absolute path. You can setup your file paths using instructions present in the File setup chapter, however you can change this to a different folder by clicking the folder icon in the Output panel. You can also choose the type of image or movie format for your work from the Menu Button
Saving your image
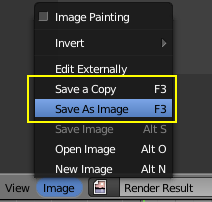
Blender does not save your image automatically. To save your image, you can either press F3 or click 'Save as' from the Image menu of the UV/Image editor window's header. This action will open the Blender Internal File Browser, and then you can search for folders to place your Render.
Rendering an animation using Full Render
Rendering an animaton is simple, the Frame Range (Highlighted in Red, in Dimensions Panel Image) in the Output Panel is used to define the amount of frames your animation will render. The time is defined by the Frames Per Second, defined in the Frame Rate (Highlighted in Blue, in Dimensions Panel Image) drop-down list. The standard is set to 24 FPS and 250 frames.
A quick example to understand those numbers:
- The Panel shows that the animation will start at frame 1 and ends at frame 250, and the FPS setting is set to 24, so, the standard Blender instalation will give you aproximately 10 (ten) seconds of animation.
To render an animation using Full Render, you can do any of the following options:
- Press CtrlF12
- Go to Properties Window » Render context » Render panel and press the Animation button or
- Go to Render » Render animation from the header of the Info Window (See: Header of the Info Window Image)
Rendering an animation using OpenGL Render
To Render an animation using OpenGL Render, you can do any of the following options:
- Click on the small button showing a slate (together with a small image showing a camera) in the header of the 3D View
- Go to Render » OpenGL Render animation from the header of the Info Window (See: Header of the Info Window Image)
To abort or quit rendering the animation, press Esc.
The purposes of OpenGL Rendering
OpenGL rendering allows an animator to quickly inspect his animatic (for things like object movements, alternate angles, etc.), by giving him a draft quality rendering of the current viewport.
Because it is only rendered using OpenGL, it is much faster to generate, even if it only looks as good as what you see on the 3D viewport.
This allows the animator to preview his animation with fluid playback, when he would otherwise not be able to do so in realtime due to scene complexity (ie: Pressing AltA results in too low of a Frames Per Second to get a good feel for the animation).
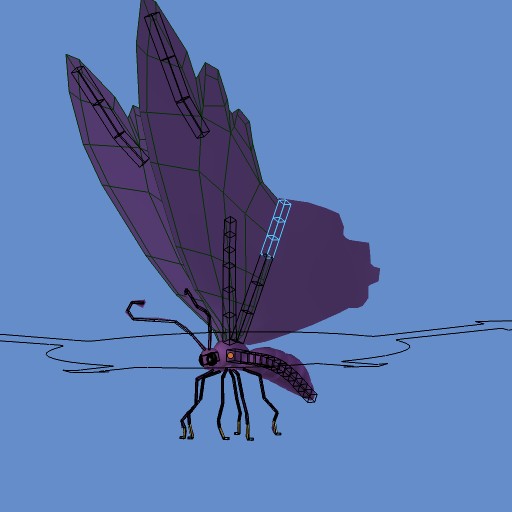
This is an example of an OpenGL rendered image:
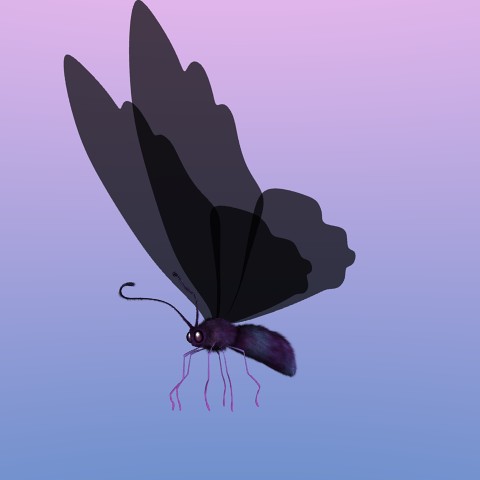
And then here is the Full Render using Blender Internal render engine:
You can use OpenGL to render both images and animations, and change dimensions using the same instructions explained above. As with a normal render, you can abort it with Esc.
目次
- 1 Quick Rendering
- 1.1 What is rendering ?
- 1.2 Rendering an image using Full Render
- 1.3 OpenGL rendering an image
- 1.4 Adjusting the resolution
- 1.5 Output format and output file
- 1.6 Saving your image
- 1.7 Rendering an animation using Full Render
- 1.8 Rendering an animation using OpenGL Render
- 1.9 The purposes of OpenGL Rendering
