利用者:Koilz/wiki - doc kia - Keyframes
- The Introduction and F-Curve Interpolation part of this page was originally written by Jaredr122 2011.
- Then modified by a set of users.
目次
Animation Tools: Channels
I am a bit lost how to write this.
Funny Actions
- bpy.data.actions['CubeAction'].groups['Location'].channels[0].keyframe_points[2].interpolation='LINEAR'
- Action
- An action holds a set of animation data for an object.
- Group
- A group of channels, example, location, rotation.
- Channel
- A property of an object that can be animated. These are what have FCurves. They are like Drivers.
- Keyframe
- An FCurve control point.
- Channels
>>> bpy.data.objects['Cube'].animation_data.drivers[0]
bpy.data.objects['Cube']...FCurve
>>> bpy.data.actions['CubeAction'].groups['Location'].channels[0]
bpy.data.actions['CubeAction']...FCurve
Channels
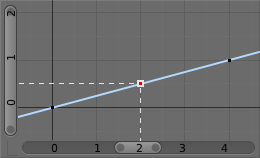
Channels have an F-Curve which is used to animate objects.
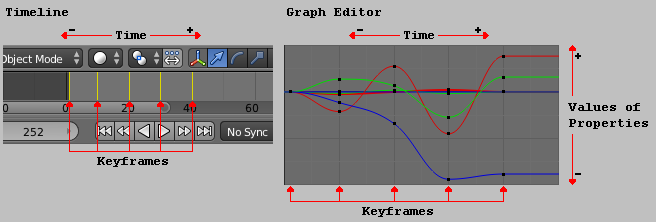
Channels use time to control the values of properties.
Using a F-Curve, the channel reads the time frame and sets the value of the property.
So from this example, if the time frame is 2.0 the property will be 0.5.
.
Introduction
- Keyframes are one of the main objects used for animation. Keyframes define a value of data at a specified frame.
- Quite obviously, something is "animated" when it changes over time. In Blender, animating an object means changing its properties over time, such as its X location, or the Red channel value of its material diffuse color, and so on.
Blender's fundamental unit of time is the "frame", which usually lasts just a fraction of a second, depending on the frame rate of the scene.
F-Curve Interpolation
As animations are composed of incremental changes spanning multiple frames, usually these properties ARE NOT manually modified frame by frame, because:
- it would take ages!
- it would be very difficult to get a smooth variation of the property.
This is why nearly all direct animation is done using interpolation.
The idea is simple: you define a few “control points”, called "keyframes", which are multiple frames apart.
- Between these keyframes, the properties values are interpolated, allowing for a smooth transition between keyframes. Thus, the animators' workload is significantly reduced.
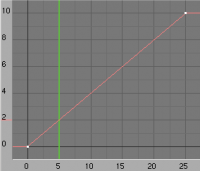
For example, if you have:
- a control point of value 0 at frame 0,
- another one of value 10 at frame 25,
- linear interpolation,
then, at frame 5 we get a value of 2.
The same goes for all intermediate frames: with just two points, you get a smooth growth from 0 to 10 along the 25 frames. Obviously, if you’d like the frame 15 to have a value of 9, you’d have to add another control point (or keyframe)…
These F-Curves can be edited in the Graph Editor.
Adding Keyframes
- Here are some common ways to animate objects by adding keyframes.
- These methods can be used on different objects, like armature bones in pose mode.
Insert Keyframe
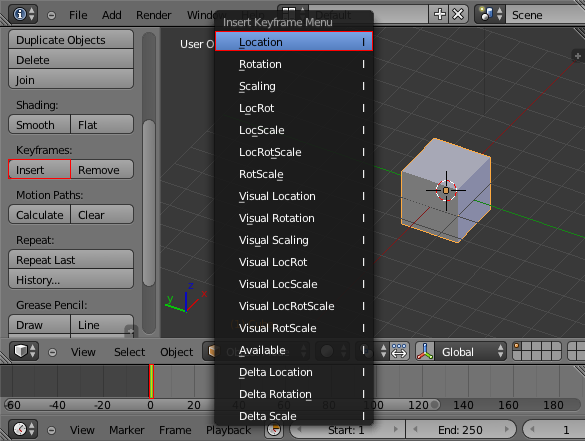
- With a Mesh Object selected in Object Mode, and the frame set in the Timeline. In the 3D View Tools press the 'Insert Keyframe' button, or press I in the 3D View to bring up the 'Insert Keyframe Menu'.
- Select 'Location', this will record the location of the Mesh Object on the frame the Timeline cursor is set.
- Set the Timeline cursor to a different frame, move the Mesh Object, then insert another keyframe.
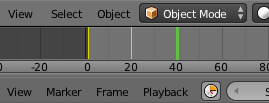
- The keyframes are displayed in yellow on the Timeline. Move the Timeline cursor to test the animation.
Keying Sets
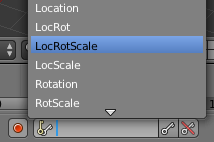
- Keying Sets are a set of keyframes in one. They are made to record multiple properties at the same time. There are some built in keying sets, and also custom keying sets.
- Use the keying set menu in the Timeline editor, to select a keying set. Now when you insert a keyframe, blender will add keyframes for the selected keying set.
- See Timeline for more info.
- See Keying Sets for more info.
Auto Keyframe
- Auto Keyframe is the red record button.
- Auto Keyframe adds keyframes automatically to the set frame after setting the location, rotation, scale, etcetra, of the selected object in the 3D View.
- See Timeline for more info.
Properties
- Keyframes can be used to animate lots of properties in blender.
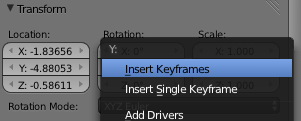
- To add keyframes to a property on the UI, RMB
 the property, then select Insert Single Keyframe, or Insert Keyframes.
 - Insert Keyframes will add a keyframes to the set of properties.
Keyboard
- The keyboard can also be used to add keyframes.
- I: Insert keyframe to the set frame.
- Alt+i: Remove keyframe from the set frame.
- Alt+shift+i: Remove all keyframes from the UI property.
Animation Editors
- Most of the low level settings for the keyframes are found in the Graph Editor.
- You can add keyframes to channels that have existing keyframes in several animation editors, which are described in other pages
Ex Links
- Motion Paths - M
- Graph Editor - M
- Graph Editor - M - User Doc 2.5
- Timeline - M
