利用者:Marenzelleria/Clothes and some color
Still working on this section.
目次
What you'll make in this section of the tutorial
Adding a skin material
Materials and textures make an object more interesting. For details, see Manual/PartIII/Materials_in_practice. Or, you can learn by doing: Let's add a skin material and some materials for the eyes.
To add a material to an object
- Make sure the object is selected
- Get to the Material buttons: In the buttons window, click on the gray sphere in the header (or use the shortcut F5). These are the Shader buttons.
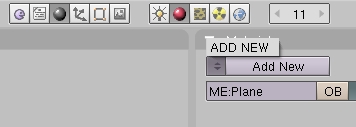
- To get to the Material buttons, click on the red sphere, as shown in Adding a material. You may notice that there are other buttons next to the red sphere - these are for lights, textures, radiosity, and settings for the "world". More on these later.
- In the Materials buttons, click the Add new button (Adding a material). Alternatively, click the arrows next to the text box that says Add New and select (you guessed it) Add New.
You probably noticed two things happened:
- The object (in this case, the character) got a little darker. This is because the default new material is a dark gray, as opposed to the light gray color of an object with an unassigned texture.
- A whole lotta stuff just popped up in the materials window. These are the material controls, which you'll tweak to get just the right look.
- Name the material by clicking in the text box. Default is "Material"; I called this one "Body".
- Now we can start changing material settings.
Skin material color
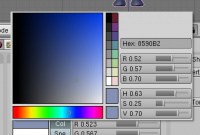
- Choose a color by clicking the (by default, white) box next to the Col button in the Material tab.
- A color chooser will appear. Once you have selected your color, move the mouse away from the chooser, and the chooser will close automatically. You can use the hex code to pick a color, too - the color I used was 8590B2.
Skin material shaders
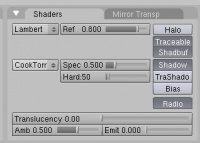
Shaders determine how the material will react to light. You can adjust the shaders so you get a bright, shiny material or a dull one.
- Go to the Shaders tab.
- Feel free to play with the different Diffuse and Specular shaders.
- In this case, I made the following choices to make a sort of skin texture.
- Diffuse Shader: Oren-Nayer
- Ref = 0.8 (Reflection)
- Rough = 0 (Roughness)
- Specular Shader: WardIso
- Spec = 0.1 (Intensity of specular)
- rms = 0.255 (how focused the specular is)
- Diffuse Shader: Oren-Nayer
For more on materials, check out this excellent shader discussion.
Multiple materials on a single object
Now, let's add some materials to the eyes. To do this, we're going to create two new materials, and apply both of them to different parts of the same object: an eyeball material, and a pupil material.
Note
These steps are summarized below in a summary table.
|
Create an eyeball material
- Select one of the eyes
- Add a new material, as described above
- Name this one "Eye"
- Make the color white
- Make it a little more shiny, say by increasing the Specularity in the Shaders tab.
Creating a second material on the same object
Here comes the tricky part:
- Make sure you still have the eye selected
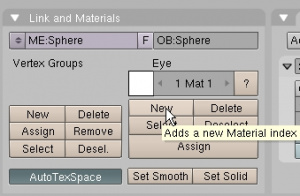
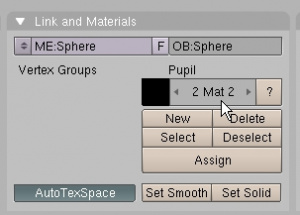
- Under the Edit buttons (F9), look for the Link and Materials buttons (Link and materials tab in Edit buttons, default settings).
- Click the New button under material. This adds a new material index to the object, in this case, the eye.
- There will be a "2 Mat 2" in the box. This means "There are 2 material indices, and index #2 is selected" (Link and materials tab in Edit buttons, after adding a new material index)
- By clicking the arrows to the left and right of the material slots, you can select which material index is selected, by watching the second number. Before going to the next step, verify that material index #2 is selected.
- Go back to the Material buttons (F5).
- Add a new material.
- Make it black.
- Name it something like "Pupil".
- Go back to the Edit buttions (F9).
- In the 3D Window, enter the object's Edit Mode (⇆ Tab)
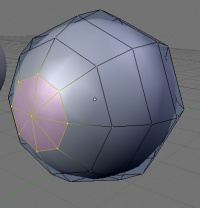
- Select the faces that you'd like to apply the pupil texture to. Select the front vertex, and the first ring of vertices (Selecting the vertices to apply the pupil material to).
- Click the Assign to assign the material in this material slot to the selected vertices.
Now we'll do the same thing for the other eye. Since the Eye and Pupil materials are already created, just do these steps:
- Select the other eye.
- Assign the Eye material to it by selecting it in the Material dropdown box.
- Go to Edit buttons (F9), and make a New material index for this material.
- With the new (second) slot selected, go back to Material buttons (F5)
- Select the Pupil material from the dropdown box to assign this material to the second material slot.
- Go back to the Edit buttons.
- With the vertices selected, hit Assign.
Summary of adding multiple materials to one object
| Action | Location | Shortcut to buttons | |
|---|---|---|---|
| 1. | Select object | 3D Window | (none) |
| 2. | Assign first material | Materials buttons | F5 |
| 3. | Create new material index | Edit butons | F9 |
| 4. | Select material to apply (or create a new one and select it) | Materials buttons | F5 |
| 5. | Select faces to apply material to | 3D Window | (none) |
| 6. | Assign faces to the material index | Edit buttons | F9 |
Rotate the eyes outward
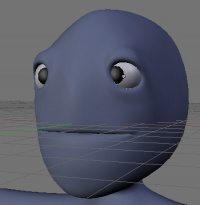
You've got eyes! In this case, however, the eyes look sort of cross-eyed. We'll have to rotate the eyes outward to make them look better, but we'll do this precisely by typing in numbers.
- In top view, select the CHARACTER'S left eye (the one on the right side of the screen in Top View)
- R to Rotate . . .
- But instead of moving the mouse to rotate, type the numbers -15, then Enter. This will rotate the left eye 15 degrees outward.
- Select the other eye, and rotate in top view 15 degrees.
Adding skin textures
Textures overview
A texture is simply an image that is associated with a material. A texture can affect different parts of a material - like specularity (how shiny it is), color, reflectance, or even how bumpy the surface is (a "bump map").
Textures are incredibly powerful. With a grayscale texture, lighter shades affect the material more, and darker shades affect the material less. Thus, the texture image affects the material in different place, depending on where the image is light and where it's dark. |
We'll add two textures to the skin: the first will be a simple noise texture, and the second will be a spherical blend texture trick to give the skin a sort of glow when lit from behind.
Add a texture
- Go to the texture buttons (F6).
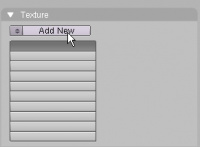
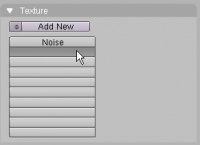
- Click on Add New (Adding a new texture).
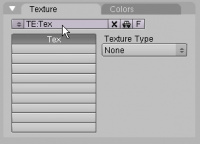
- Note how there are 10 boxes total. This means that you can have up to 10 textures on any single material. Each one of those textures can be a different type, and can affect a different part of the material.
- Next, choose a type of texture. By default, the type is "None". Pretty boring.
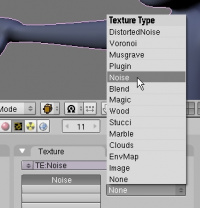
- Choose Noise (Choosing a Noise texture).
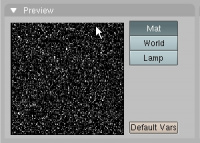
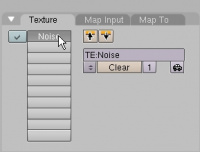
- The new Noise texture is shown in the panel on the left side of the window (The Noise texture).
- Now go back to the Material buttons (F5).
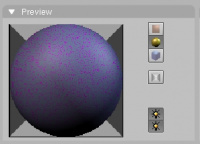
- Notice that the Material preview looks speckled (New textures affect color by default). That's because by default, a new texture affects the color of a material. Also by default, the color that is affected happens to be a really ugly magenta. We're going to change all this.
- Look for the Texture tab in the Materials buttons (Texture tab in the Materials buttons).
- Make sure there's a check in the box next to the texture name. That means the texture will be applied to the material (you can uncheck a box to disable the texture in the material)
- If you need to delete a texture from a material, you can hit the Clear button.
- There's nothing we need to change in this tab.
Map Input
- Now click on the Map Input tab, also in the Material buttons (The Map Input tab)
- These are settings that determine the relative size and direction of the texture on the material -- and therefore the object. For the Noise texture, just leave them at their default settings. Easy enough! (We'll change a couple of these settings for the next texture we add).
- See Manual/PartIV/Map_Input for more details on the Map Input tab.
Map To
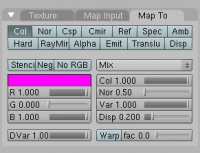
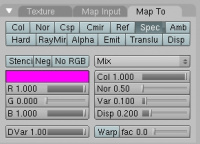
- Click on the Map To tab. The Map To tab shows the default settings.
- See Manual/PartIV/Map_To for more details on the Map To tab.
- I made the following changes from defaults:
- Turned off Col (to remove that magenta color)
- Turned on Spec (to make the noise texture affect the specularity of the skin)
- Changed the Var slider to 0.1 (to reduce the effect of the noise and make it more subtle)
Add a second skin texture
The second texture will give a glow to the edges of the character. I found the details on this on the Elysiun (now blenderartists) forum: ["Glowing edge" texture]
- With the body still selected, add a second texture:
- With the body still selected, add a second texture:
- Go back to the Texture buttons (F6)
- Click an empty box (Selecting an empty Texture slot).
- Click Add New
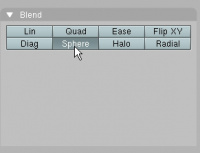
- This time, choose Blend as the Texture Type.
- Rename the new texture to "Blend".
- Note that some extra setting popped up -- we didn't get any extra settings when we added the Noise texture. Different texture types give you different options. For the Blend texture type, we can choose which type of blend we want.
- Choose Sphere as the blend type Choose sphere as the blend type
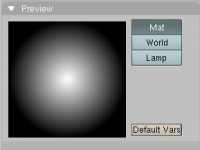
- Your texture should look something like The spherical blend texture.
- Go back to the Material buttons (F5).
- In the Textures tab, make sure the Blend texture you just made is selected (the gray button is pressed) and that there's a check next to it.
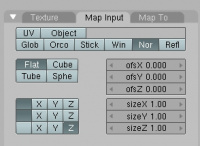
- Go to the Map Input tab, and make the following changes to the defaults:
- Nor instead of Orco
- Set the coordinates to use (those X Y Z buttons) as - - Z. We are essentially switching off the X and Y coordinates of the texture, and only using Z.
- The Map Input tab should look like The new Map Input tab settings for the Blend texture.
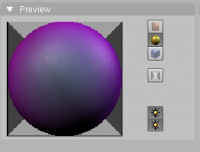
- The material preview should look something like Results of the Map Input settings
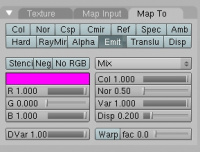
- Now go to the Map To tab, and make the following changes to the defaults:
- Turn off Col (removes the magenta color)
- Turn on Emit (emit creates a glowing effect)
- The tab should look something like The new Map To tab settings for the Blend texture.
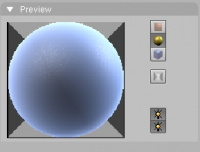
- The material preview should look something like Material preview with both textures.
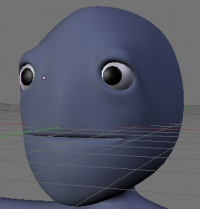
Here's a quick render of the character so far:

