利用者:Mariand/Doc:2.6/Manual/Data System/The Outliner
Outliner window
Description
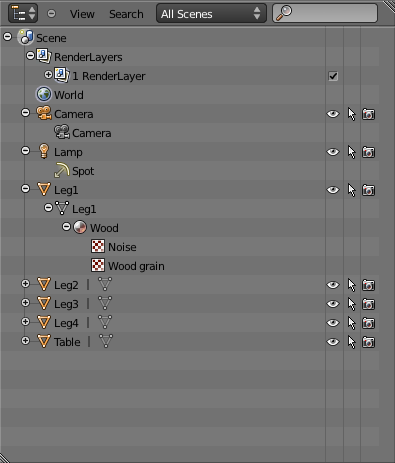
The Outliner window is used for easily navigating a complex scene. The Outliner gives you a 2D representation of your complicated 3D world. Use it to find things in your scene.
For example, suppose you sneeze while moving an object; your mouse flies off your desk (gesundheit!) and the object is hurled somewhere off screen into space. Simply use the outliner to find it; select it, and move back to your 3D window to snap it back to your cursor (⇧ ShiftS › Selection › Cursor).
Another more practical example is to evaluate the impact of a change on related datablocks. Suppose you are looking at your TableTop object, and it doesn’t look right, the Wood material doesn’t look right; you want it to look more like mahogany. Since the same material can be used by many meshes, you’re not sure how many things will change color when you change the material. Using the Outliner, you could find that material and trace the links that it has to every mesh in your scene.
Outliner view
The Outliner is a kind of list that organizes things related to each other. In the outliner, you can:
- View the data in the scene.
- Select and deselect objects in the scene.
- Hide or show an object in the scene.
- Enable or disable selection (to make an object “unselectable” in the 3D Views).
- Enable or disable the rendering of an object.
- Delete objects from the scene.
- Unlink data (equivalent to pressing the X button next to the name of a datablock).
- Easily select which render layer to render.
- Easily select which render pass to render (for example, you can choose to render just the Specular pass).
Selecting the outliner window type
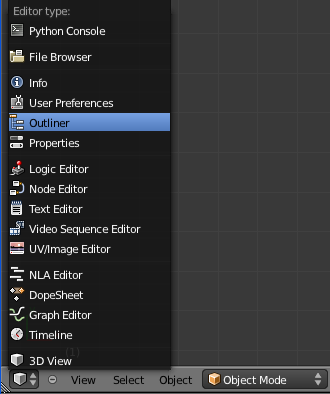
Choose a window and LMB ![]() on its current Window type button (left-most icon in its header), and LMB
on its current Window type button (left-most icon in its header), and LMB ![]() on Outliner.
on Outliner.
Using the Outliner
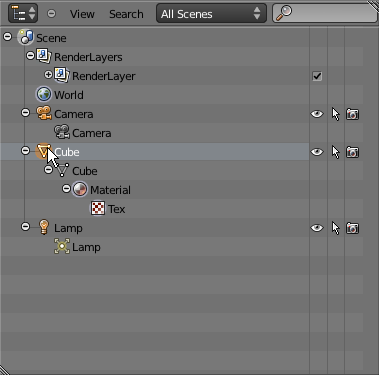
Each row in the Outliner shows a datablock. You can click the plus-sign to the left of a name to expand the current datablock and see what other datablocks it contains. If the row is already expanded, the icon to the left will be a minus-sign. Clicking the minus-sign will collapse subordinate objects beneath the row.
You can select datablocks in the Outliner, but this won’t necessarily select the datablock in the scene. To select the datablock in the scene, you have to activate it.
Selecting and activating
Single selection doesn’t require any pre-selection: just work directly with LMB ![]() (and/or RMB
(and/or RMB ![]() - contextual menu, see below) inside the name/icon area.
- contextual menu, see below) inside the name/icon area.
When you select an object in the list this way, it is selected and becomes the active object in all other 3D Views. Use this feature to find objects in your 3D View, select them in the Outliner, then zoom to them with . NumPad or if you don't have a numpad, snap and center your cursor on them via ⇧ ShiftS › Cursor › Selection, and then ⇧ ShiftC.
- Activating a datablock
- Activate the datablock with LMB
 on the icon of the datablock. Activating the datablock will automatically switch to the relevant mode. For example, activating the mesh data of the cube will select the cube and enter Edit mode while activating the object data of the cube will select the cube and enter Object mode (see right).
- Toggle pre-selection of a group of datablocks
- Useful when you want to select/deselect a whole bunch of datablocks. For this you must prepare the selection using LMB
 outside the name/icon area. Those pre-selected have their line in a lighter color.
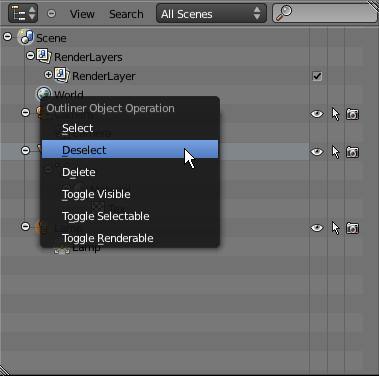
 - You then can (de)select them with a RMB
 on the name/icon area, which brings on a context menu (see bellow).
- Context menu
- Show the context menu for a datablock with RMB
 on the icon or name. Depending on the type of the pre-selected datablock(s), you will have all or part of the following options:
- Select.
- Deselect.
- Delete.
- Unlink – To unlink a datablock from its “owner” (e.g., a material from its mesh).
- Make Local – To create a “local” duplicate of this datablock.
- Note: some datablock types will not have a context menu at all!
- Deleting a datablock
- Use X to delete the selected datablock(s).
- Expanding one level
- Use + NumPad to expand one level down in the tree-list.
- Collapsing one level
- Use - NumPad to collapse one level up in the tree-list.
- Expanding/collapsing everything
- Use A to expand/collapse all levels of the tree-list.
Toggling object-level restrictions
The three following options, in the right side of the Outliner window, are only available for objects:
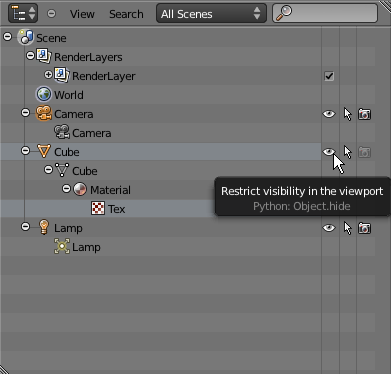
- Visibility
- Toggle visibility by clicking the “eye” icon for the object on the right-hand side of the Outliner. Useful for complex scenes when you don’t want to assign the object to another layer. This will only work on visible layers - an object on an invisible layer will still be invisible regardless of what the Outliner says. V will toggle this property for any objects that are pre-selected in the Outliner.
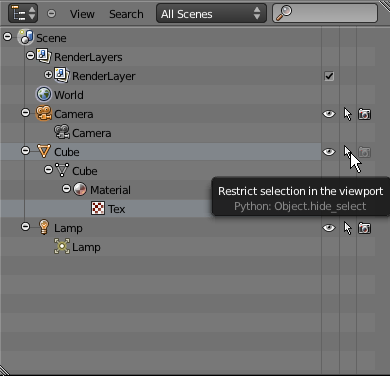
- Selectability
- Toggle selectability by clicking the “arrow” icon. This is useful for if you have placed something in the scene and don’t want to accidentally select it when working on something else. S will toggle this property for any objects that are pre-selected in the Outliner.
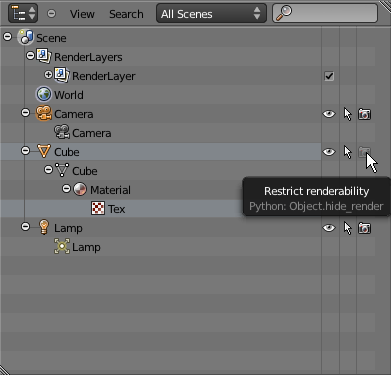
- Rendering
- Toggle rendering by clicking the “camera” icon. This will still keep the object visible in the scene, but it will be ignored by the renderer. R will toggle this property for any objects that are pre-selected in the Outliner.
Searching
You can search the file for datablocks by (optionally) changing the parameters of the searching in the Search menu in the header of the Outliner window and then typing in the search input box in the rightmost position of this header:
The matching datablocks will be highlighted with the green background and nothing else except them and their parent hierarchy will be displayed.
Filtering the display
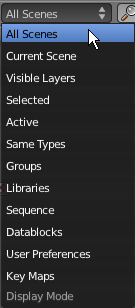
The window header has a field to let you select what the outliner should show in the outline. By default, the outliner shows All Scenes. You can select to show only the current scene, datablocks that have been selected, objects that are on currently selected layers, etc. These selects are to help you narrow the list of objects so that you can find things quickly and easily.
- All Scenes - Shows everything the outliner can display (in all scenes, all layers, etc.)
- Current Scene - Shows everything in the current scene.
- Visible Layers - Shows everything on the visible (currently selected) layers in the current scene. Use the layers buttons to make objects on a layer visible in the 3D window.
- Selected - Lists only the object(s) currently selected in the 3D window. You can select multiple objects by ⇧ ShiftRMB
 -clicking.
 - Active - Lists only the active (often last selected) object.
- Same Types - Lists only those objects in the current scene that are of the same types as those selected in the 3d window.
- Groups - Lists only Groups and their members.
- Libraries - TODO
- Sequence - TODO
- Data Blocks - TODO
- User Preferences - TODO
- Key Maps - TODO
Example
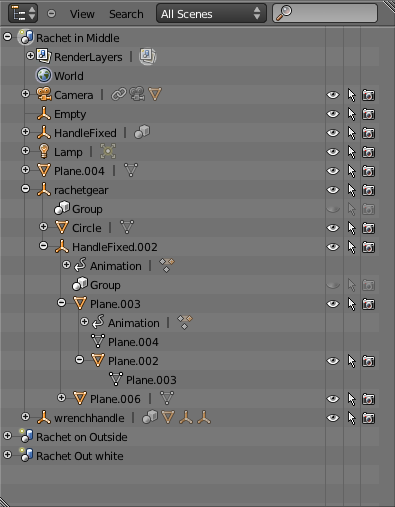
The outline example shows that the .blend file has three scenes: “Ratchet in Middle”, “Ratchet on Outside”, and “Ratchet Out White”. By clicking on the little plus-sign to the left of the name, the outline is expanded one level. This was done for the “Ratchet in Middle” scene. As you can see, this scene has some “World” material settings, a “Camera”, an “Empty”, a “HandleFixed” object… All objects that were added to the scene.
By clicking the plus-sign next to “ratchetgear, we can see that it has some motion described by the “Animation” entry; that it was based on a “Circle” mesh, and that it is the parent of “HandleFixed.002”, which is in turn the parent of “Plane.003”, and so on.
The neat thing is: if you select any of these datablocks here, they will be selected in the 3D window as well, as far as this is possible. Pressing . NumPad with your mouse cursor in any 3D Window will center and align the view to that object. Very handy. Also, pressing X will delete it, as well as all the other hotkeys that operate on the currently selected object.
