利用者:Nicholasbishop/Using sculptmode
目次
Overview
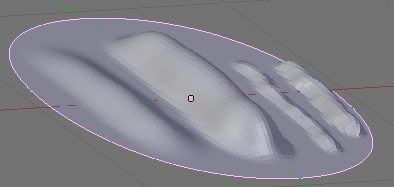
Sculpt Mode is similar to Edit Mode in that it is used to alter the shape of a model, but Sculpt Mode uses a very different workflow: instead of dealing with individual elements (vertices, edges, and faces), an area of the model is altered using a brush. In other words, instead of selecting a group of vertices, Sculpt Mode automatically selects vertices based on where the brush is, and modifies them accordingly.
Sculpt Mode
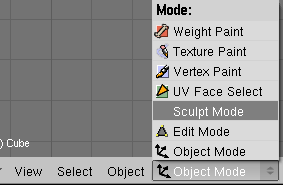
Sculpt mode is selected from the mode menu.
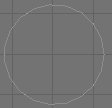
Once sculpt mode is activated a sculpt menu will appear in th 3d view header, and a tabs for sculpt and brush will appear in the multires panel. Also the cursor will change to a circle with a cross hair in the center.
Hiding and Revealing Mesh
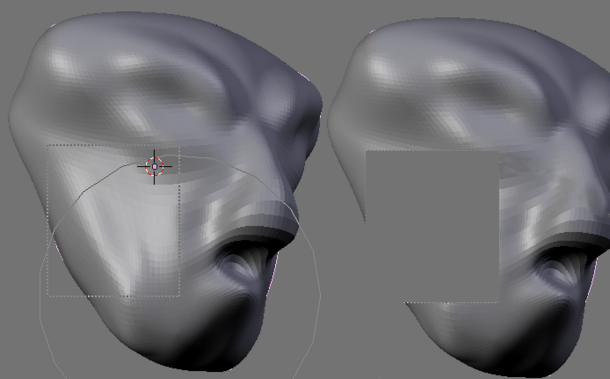
To hide mesh ⇧ ShiftCtrlLMB ![]() drag will hide all but the selected rectangle. Or To ⇧ ShiftCtrlRMB
drag will hide all but the selected rectangle. Or To ⇧ ShiftCtrlRMB ![]() drag will hide only the selected rectangle. To reveal mesh AltH or ⇧ ShiftCtrlLMB
drag will hide only the selected rectangle. To reveal mesh AltH or ⇧ ShiftCtrlLMB ![]() click and release will reveal all of the mesh.
click and release will reveal all of the mesh.
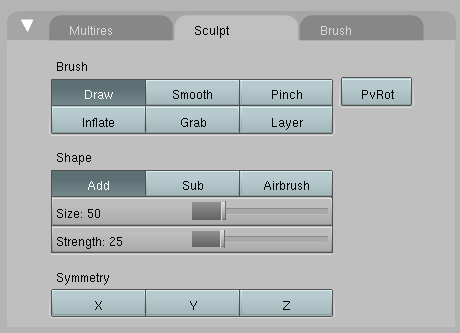
Sculpt Panel
Brushes
Sculpt Mode has six brushes that each operate on the model in a unique way:
- Draw
- Draws a smooth curve on the model following the brush; vertices are displaced in the direction of the average normal of the vertices contained within the brush. D
- Smooth
- As the name suggests, eliminates irregularities in the area of the mesh within the brush's influence. S
- Pinch
- Pinch pulls vertices towards the center of the brush. If Sub is active instead of Add, vertices are pushed away from the center of the brush. P
- Inflate
- Similar to Draw, except that vertices in Inflate mode are displaced in the direction of their own normals. I
- Grab
- Grab is used to drag a group of points around. Unlike the other brushes, Grab does not modify different points as the brush is dragged across the model. Instead, Grab selects a group of vertices on mousedown, and pulls them to follow the mouse. The effect is similar to moving a group of vertices in editmode with proportional-editing enabled, except that Grab can make use of other Sculpt Mode options (like textures and symmetry.) G
- Layer
- This brush is similar to Draw, except that the height of the displacement layer is capped. This creates the appearance of a solid layer being drawn. This brush does not draw on top of itself; brush stroke intersects itself. Releasing the mouse button and starting a new stroke will reset the depth and paint on top of the previous stroke. L
Modifiers
Brush Shape
- Add and Sub
- Add causes the brush to pull an area of the model in the positive direction, Sub in the negative direction. (With the Pinch brush, Add pulls vertices inward and Sub pushes vertices outward.) Interactive toggling of brush direction is with holding down ⇧ Shift. Or V can be used to toggle it until it is toggled again.
- Airbrush
- When enabled, this option causes the brush to continue modifying the model after mouse down without moving the mouse. If disabled, the brush only modifies the model when the brush changes its location. A
- Size
- This option controls the radius of the brush, measured in pixels. F in the 3D view allows you to change the brush size interactively by dragging the mouse and then left clicking (The texture of the brush should be visible inside the circle). Typing a number then enter while in F sizing allows you to enter the size numerically.
- Strength
- Strength controls how much each application of the brush affects the model. For example, higher values cause the Draw brush to add depth the the model more quickly, and cause the Smooth brush to smooth the model more quickly. If the range of strengths doesn't seem to fit the model (for example, if even the lowest strength setting still makes too large of a change on the model) then you can scale the model (in Edit Mode, not Object Mode.) Larger sizes will make the brush's effect smaller, and vice versa. You can change the brush strength interactively by pressing ⇧ ShiftF in the 3D view and then moving the brush and then left clicking. You can enter the size numerically also while in ⇧ ShiftF sizing.
- Symmetry
- Mirror the brush across the selected axes. Note that if you want to alter the directions the axes point in, you must rotate the model in Edit Mode, not Object Mode. Can be toggled via X, Y, and, Z respectively.
Brush Panel
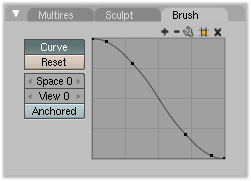
Sculpt Mode can take full advantage of the range of options offered by Blender's texture system. Brush textures are accessed using a similar interface to that used by the Material buttons or the World buttons: there are nine texture slots in the Sculpt Mode Brush Panel, plus a Default slot that acts simply as a flat texture.
Any texture type can be loaded into one of the Sculpt Mode texture slots. Once a texture is associated with a slot, additional options will appear that affect how the texture controls the brush.
- Drag, Tile and 3D
- These three options control how the texture is mapped onto the brush. If Drag is enabled, the texture follows the mouse, so it appears that the texture is being dragged across the model. The Tile option tiles the texture across the screen, so moving the brush appears to move seperately from the texture. The Tile option is most useful with tilable images, rather than procedural textures. Lastly, the 3D allows the brush to take full advantage of procedural textures. This mode uses vertex coordinates rather than the brush location to determine what area of the texture to use.
- Fade
- When Fade is enabled, this option smooths the edges of the brush texture, so that the brush will smoothly fade into the model at the edge of the brush's influence.
- Space
- Setting this to a non-zero value adds extra space between each application of the brush. The value is measured in pixels; setting Space to 100 will require the mouse to move 100 pixels between each 'dot' applied to the mesh. Note that this is the total distance the brush has traveled, not the current linear distance from the last time the brush was applied.
- View
- WRITEME
- Angle
- This is the rotation angle of the texture brush. It can be changed interactively via CtrlF in the 3D view. While in the interactive rotation you can enter a value numerically as well.
Sculpt Menu
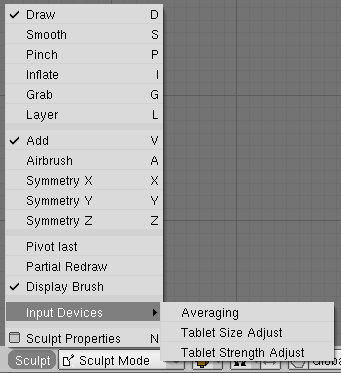
The Sculpt menu offers several new controls in addition to the tools already discussed.
- Pivot last
- Sets the rotation center for rotating the scene to the last location the brush was used.
- Partial Redraw
- This uses a special graphics optimization that only redraws where the mouse has been - it can speed up drawing on some graphics cards but slow it down on others. Primarily is only useful needed for dense mesh (greater than 100,000 polys).
- Display Brush
- Controls whether the brush circle is drawn.
- Input Devices
- Here you can select the behaviour of the used input devices.
- Averaging - This option uses an average direction of movement for the number of pixels specificed and then interpolates the stroke along a linear path of that number of pixels. This can be useful for dense meshes but the speed hit can be such that it may be faster to leave it at 1 (the default).
- Tablet Size Adjust - Sets to what extent tablet pressure affects brush size.
- Tablet Strength Adjust - Sets to what extent tablet pressure affects brush strength.
