Attic talk:Old/Manual/PartIX/The Armature Object2
Adding an Armature
Mode: Object Mode / Edit Mode (Armature)
Hotkey: ⇧ ShiftA
Menu: Add → Armature
Description
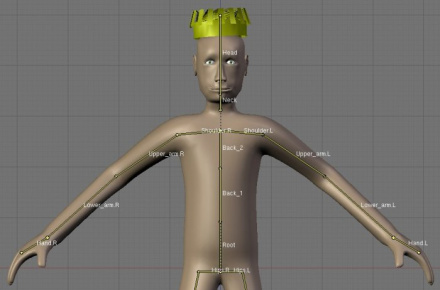
Armatures are like articulated skeletons, that allow you to pose and deform the geometry that surrounds it. An armature is made of a series of bones connected to each other via parenting or constraints. Armatures are most often used in character animation, as a manipulatable skeleton to pose a character, but they can also be useful in other situations too.
An armature is like any other object type:
- It has a center, a position, a rotation and a scale factor.
- It has ObData that can be edited
- It can be linked to other scene, and the same armature data can be reused on multiple objects.
- All animation you do in object mode is only working on the object, not the armature's contents like bones.
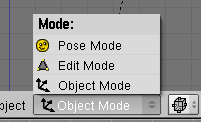
An armature has 3 modes. You can switch using the dropdown menu in the header of the 3Dview or use ⇆ Tab to switch between Armature Edit Mode and Object Mode. When in ObjectMode, you can switch the Pose Mode on and off with Ctrl⇆ Tab. Rather than being an explicit mode that excludes all others, Pose Mode is a state of the armature you can switch on or off. So when in PoseMode, you are still in ObjectMode (you can select another object, contrary to the EditMode).
Options
- Object Mode
- Your armature is like any other Object, you can move it around the scene, scale it, rotate it and edit options in the Object button window (F7).
- Edit Mode
- Your armature is in what we call rest position, you can move, add and delete the bones it contains.
- Pose Mode
- Your armature is ready to be animated, each bone can be moved, scaled or rotated relative to the rest position defined in Edit Mode. Constraints can be applied, you can pose your character, add keys and animate the bone's behavior over time.
Armature Datablock
Mode: Object Mode / Edit Mode (Armature)
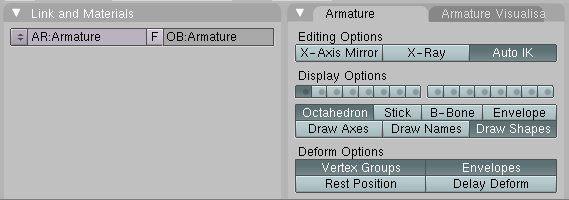
Panel: Editing Context → Link and Materials
Description
Armatures consist of an Object and an Armature data block. These can be manipulated in the same way as other objects
Options
- AR
- Rename the armature Datablock. The dropdown is a quick way to select which Armature datablock you want to connect to this armature object. You can keep more than one version for the same character. Useful when you have a special move to achieve in a shot, you can turn on an armature for special purposes.
- F
- Assign a fake user to the Armature. Again, if you have more than one armature for you character, it's a good idea to turn the Fake on, as if your armature datablock is not used (linked) it's not going to be saved in your
.blendfiles. You can always do batch fake-assignement of armatures by opening the Datablock browser (⇧ ShiftF4), go back one level (..) to see the root of your project, then go in Armature datablock, select all the armatures you want to keep and press the F. - OB
- Rename your armature object to something more cool and useful than
Armature,Armature.001, etc...
Armature Display Options
Mode: Object Mode / Edit Mode (Armature)
Panel: Editing Context → Armature
Description
Various methods to control how Armatures are displayed in the 3D View are available. Also note there are some specific options and features that relate to the display mode you're in.
Options
- X-Ray
- The same as in the Object Context, this lets you see the armature through anything in the scene, solid or not. It's useful to see where your bones are in your character so you can select them.
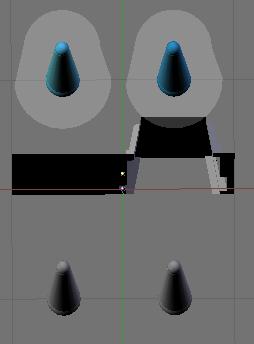
- Octahedron
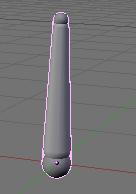
- This is the default view. Nothing exciting except you have a good idea of the rolling of the bones.
- Stick
- This diplay mode is really useful when you have a lot of bones in your view. It lets you "unclutter" the screen a bit. It draws the bones as tiny sticks.
- B-Bones
- It's more a feature than a display mode. This is useful to visualise the effect you get when you activate the B-bones (Bezier-Bones). Each join between 2 bones acts like a curve handle and lets you get extremely curvy poses. This is explained further in the Posing Armatures section.
- Envelope
- Again it's more a feature than a display mode, using envelopes lets you deform all vertices within a bone's proximity, rather than having to explicitly define and weight paint vertex groups. In this case the visualisation will be useful to tweak your rig, showing you which part of the mesh that a bone will move. It's possible interactively change the zone of influence in this display mode. The zone is only visible in EditMode or PoseMode though.
- Draw Axes
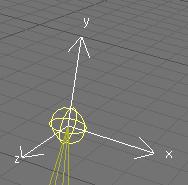
- To draw the axes on each bone of the armature when you are in Editmode of PoseMode. Handy when you want to know where you are, and which axis to use in a constraint for example. Mental note: Y is up, Z is depth and X is side, contrary to object for which Z is up, Y is depth and X is side. (Draw Axes)
- Draw names
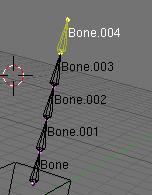
- This lets you see names of bones whatever the mode you are in. It's useful again to edit your armature, create parent dependencies or add constraints. (Draw names)
- Ghost
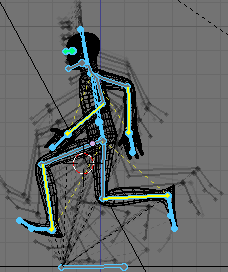
- Shows a transparent 'ghost' of the armature N frames behind and over the current time. This only works when you have an action linked to the armature, as we will see in the Posing Armatures section.(Ghost)
- Step
- The frame interval between ghost instances.
Armature Deformation
Mode: Object Mode / Edit Mode (Armature)
Panel: Editing Context → Armature
Description
Armatures can deform meshes either through a parent relationship or through modifiers. There are various options to control this.
Options
- Vertex Groups & Envelopes
- Those two toggles let you choose if you want the armature to deform your character using the Vertex Groups and/or the Envelopes. These are used when the Armature is deforming via a parent relationship. If you are using an Armature modifier, these controls are available per modifier in the modifiers panel.
- Rest position
- This will show the character as factory default (as defined in EditMode), no actions will be applied to the armature so you can easily edit it in the middle of an animation.
- Delay Deform
- This was useful before when the old system was very slow. What it does is when you do a manipulation to the rig, it waits until you finish to update the view.
Editing Armatures
Mode: Edit Mode (Armature)
Panel: Editing Context → Armature
Description
Armatures are comprised of Bones. Editing an Armature in Edit Mode allows you to manipulate the bones in their default rest position.
Options
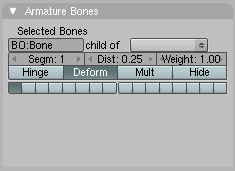
- BO
- Rename your bone.
- Child of
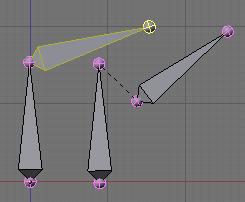
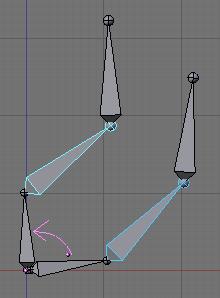
- Dropdown: lets you choose which bone will be the parent of this bone. If so there will be a small button "con" meanning connected. This will just set the relationship between your bones. If you just parent it to another bone, it will do everything the parent does, rotate, move and scale. A dotted line between the parent and child will appear. If you select Connected, the Root of the Children will go stick to the tip of the parent, giving you a chain of bones like the 2 bones in your arm. (Child of)
- Segm
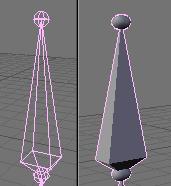
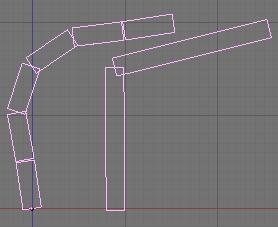
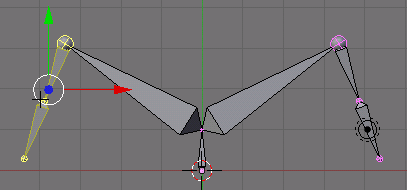
- This is the option to use B-Bones. Set to something > 1, it will cut your bone in many little segments and will deform them on a bezier curve. It really show off in a chain of bones though. See the example bettween 1 segment (right) and 3 segment each (left). (I returned in Object mode to see the effect). (Segmented Bone)
- Dist
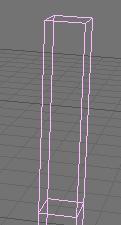
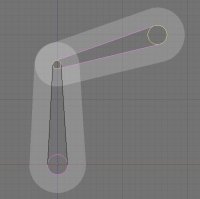
- This is the area of influence of the bone. it can be visualised using the Envelope display mode. We generally don't touch this field as there is a more easy and fast way to change this option. Turn Envelope drawmode on and select a bone. Then using AltS, you can scale the zone of influence. Better: you can do it on multiple bones and you can do it in EditMode and PoseMode. (Envelope)
- Weight
- This gives you the liberty to tell if this bone will work more or less on the geometry. For example if you have 2 bones working with envelope and crossing each other, you can tell one of them to get more power by lowering the weight of the bone you don't want to use much. If both bones have the same weight (like 1:1) they will influence the geometry equally. But if you set one to 0.5. The other one at 1 will influence more. For example in this image, 2 bones using envelope influence try to move the same geometry. The 2 on the left have the same weight, you can see the geometry didn't move. On the right one of the bones has 0.5 so the bone with 1 of weight is winning the pulling contest!. (Weight)
- Hinge
- This tells the bone to remain motionless in a chain. It doesn't copy the rotation and scale of the parent. Useful for mechanical rig I would say, as you can animate the rotation of the hinge bone without having to correct it because the parent rotated. (Hinge)
- Deform
- This lets you tell if you want the bone to deform at all. It's like setting weight to 0, except it's faster this way. Useful when using a bone as a target or a controller, i.e. a bone you just want to use to work on other bones.
- Mult
- To deform geometry you can use vertex group and/or Envelope. The fact that you can mix both ways gets interesting when you can use one to better tweak the other one. Like using envelope everywhere but tweaking a difficult place manually with vertex group. It's gonna be shown more in details in the Skinning section.
- Hide
- This option lets you hide the bone. You can use it to hide useless bones when you try to see what you're doing or just to get a functional rig for an animator when everything is done, kind of "hiding the useless". For example, when you animate you don't need the entire chain of the leg, just the controllers. This option is valid for both EditMode and PoseMode. It's possible to directly Hide bones in the 3Dview by selecting the bones to hide and do H. You can turn all bone visible with AltH too.
Selecting Bones
Description
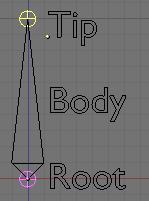
Bones in Edit mode consist of the tip (the end pointing to) and the root (the end pointing from), and these can be moved independently. RMB ![]() clicking on the tip or the root selects either, or clicking on the bone's body selects the entire bone. Selecting both the tip and root selects the entire bone implicitly.
clicking on the tip or the root selects either, or clicking on the bone's body selects the entire bone. Selecting both the tip and root selects the entire bone implicitly.
L selects a chain of connected bones under the mouse pointer
Adding and Deleting Bones
Mode: Edit Mode (Armature)
Hotkey: ⇧ ShiftA, E, ⇧ ShiftD
Menu: Armature → Extrude, Armature → Duplicate
Description
In Edit mode, you can add a new bone at the cursor location via the Add menu (⇧ ShiftA).
E extrudes a new bone from a selected root or tip. This will create a bone connected to the original one, meaning the Root of the new bone will follow the Tip of the original one. You can also CtrlLMB ![]() to extrude a new bone. It will extrude to where you clicked.
to extrude a new bone. It will extrude to where you clicked.
⇧ ShiftD duplicates selected bones. An entire bone must be selected, not just the root or tip.
X deletes selected bones
Subdivide
Mode: Edit Mode (Armature)
Hotkey: W
Menu: Armature → Subdivide
Description
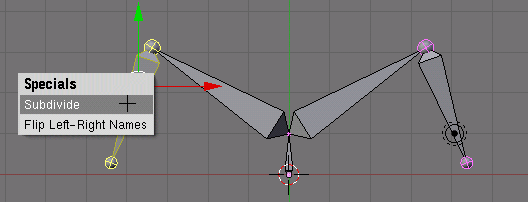
You can subdivide a bone (Before/After subdivision) with the W menu.
X-Axis Mirror Edit
Mode: Edit Mode (Armature)
Panel: Editing Context → Armature
Description
X-axis mirroring replicates edits to one side of an Armature, mirrored on the other side. This works many of Blender's armature editing tools, including manipulations such as move, rotate, scale, for extrude and subdivide. It's a clean way to just do half the job.
The axis of mirroring is X so left<-->right in frontview (1 NumPad) and the center is the center of the armature object.
Flipping Left and Right Bone Names
Mode: Edit Mode (Armature)
Hotkey: W
Menu: Armature → Flip Left & Right Names
Description
Blender can flip left or right markers in bone names. This can be useful if you've constructed half of a symmetrical rig (marked for a left or right side) and duplicated and mirrored it, and want to update the names for the new side. Blender will swap text in bone names according to the following naming conventions.
Naming conventions
Naming conventions in Blender are not only useful for you to find the right bone, but also to tell Blender when any two of them are counterparts.
In case your rig can be mirrored in half (i.e. it's bilaterally symmetrical), it's worthwile to stick to a left-right naming convention. This will enable you to use some tools that will probably save you time and effort.
- First you should give your bones meaningful base-names. Like
leg,arm,finger,back,foot, etc... - If you have a bone that has a copy on the other side (a pair), like an arm, give them one of the following seperators...
- Left/right seperators can be either the 2nd position (
L_calfbone) or last-but-one (calfbone.R) - If there is an lower or upper case
L,R,leftorrightblender handles the counter part correctly. For a list of seperators see below. Pick one and stick to it as close as possible when rigging, it will pay off. For example:
- Left/right seperators can be either the 2nd position (
Lefthand -> Righthand L Hand.005 -> R Hand hand.r -> hand.l Foot-l -> Foot-r pelvis LEFT -> pelvis RIGHT
- Before Blender handles an armature for mirroring or flipping it first removes the number extension, if it's there (like
.001) - You can copy a bone named
bla.Land flip it over using W >> flip name. Blender will name the copybla.L.001and flipping the name will give youbla.R. Extensions such as.001are also preserved.
Possible seperators for Left-Right extensions:
- space " "
- dot "
." - minus "
-" - underscore "
_" - If no 'switch' done yet, it tries if a name starts or ends with
leftorright, case insensitive. It replaces this, disregarding separator.
